SOLIDWORKS – Creating Internal Volume – Combine (Subtract)
Previously there have been a few CATI blogs written regarding the process of finding the internal volume of a part. Such methods include the commonly known Intersect command to achieve this task as well as the Delete Face command. This blog will touch on one more approach to that end goal which might prove useful to your circumstance.
An alternative approach to identifying the internal volume of a part in SOLIDWORKS is by use of the Combine feature, specifically Combine Subtract. By this method, we can easily encompass the intended part with an arbitrarily sized and non-merged part to produce a remaining part that solely makes up the cavity of the original part. All walls are excluded from the Mass Property value and can be updated to reflect a desired specification.
The first step in the process is to Isolate the part if it is within an Assembly or Multibody Part environment. For simplicity, let’s take a look at a previously shelled part on its own.
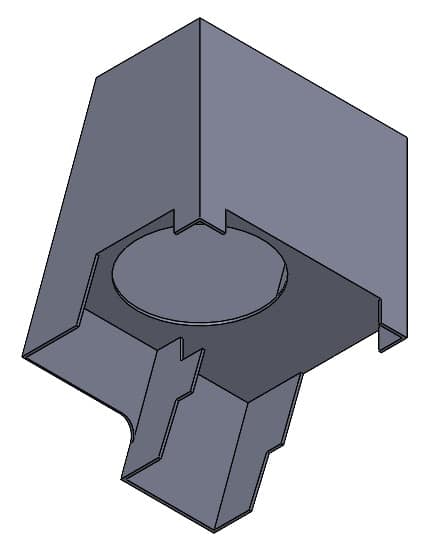
The idea in using the Combine Feature is to eliminate the original part while solely maintaining the internal space that is to represent air or liquid. This remaining representation results in a physical model that can be measured for Volume using Mass Properties. While air is a measurable Material, it is not an important factor in this instance.
While there is an opening to the shelled part, we will need to cap off the opening to fully secure the enclosure. This will allow for complete separation between the internal cavity being measured and the additional component we will later use to achieve the result.
Once we have a sealed model, we will then create our ‘Volume Tool’ which is a new Boss Extrusion that fully encompasses the original part. Since exact measurements are not necessary, we can leave this new extrusion Under Defined as it will be mostly removed with the Combine Subtraction Feature.
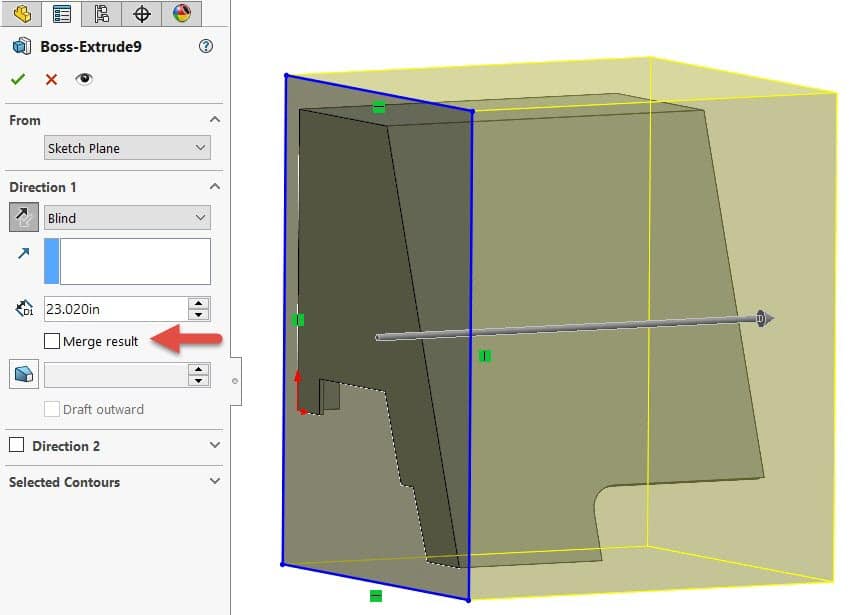
Create a sketch for the new extrusion. While the extrusion should fully engulf the original part, it is perfectly fine to either use the same Plane in which the original part was created or one of its exterior surfaces. Ensure the ‘Merge Result’ option is NOT selected here as we need two Solid Bodies.
Next, we can find the Combine Feature in ‘Insert>Features>Combine’ and we can select the Subtract option. The Main Body will actually be the ‘Volume Tool’ as I have renamed in the image below. The ‘Enclosure,’ or original part, will be selected for the Bodies to Combine portion.
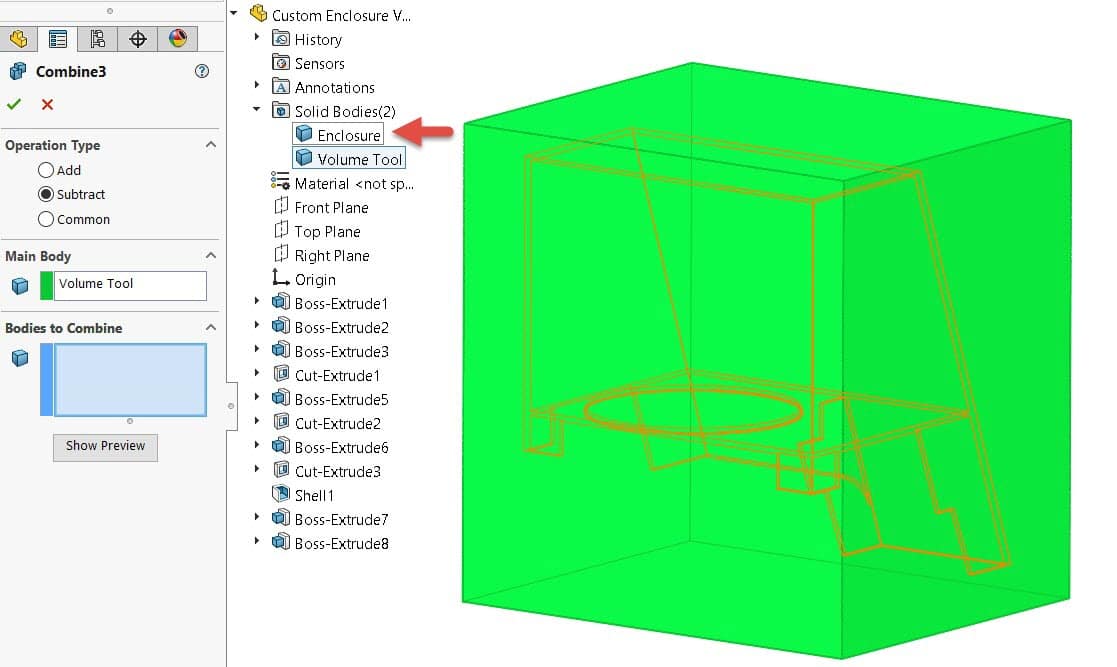
The reason the new extrusion or ‘Volume Tool’ is selected for the Main Body as opposed to the original part is because we are removing the original part and keeping what remains from the new extrusion.
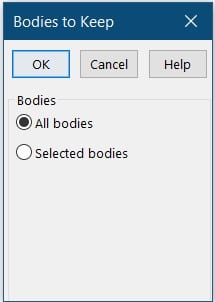
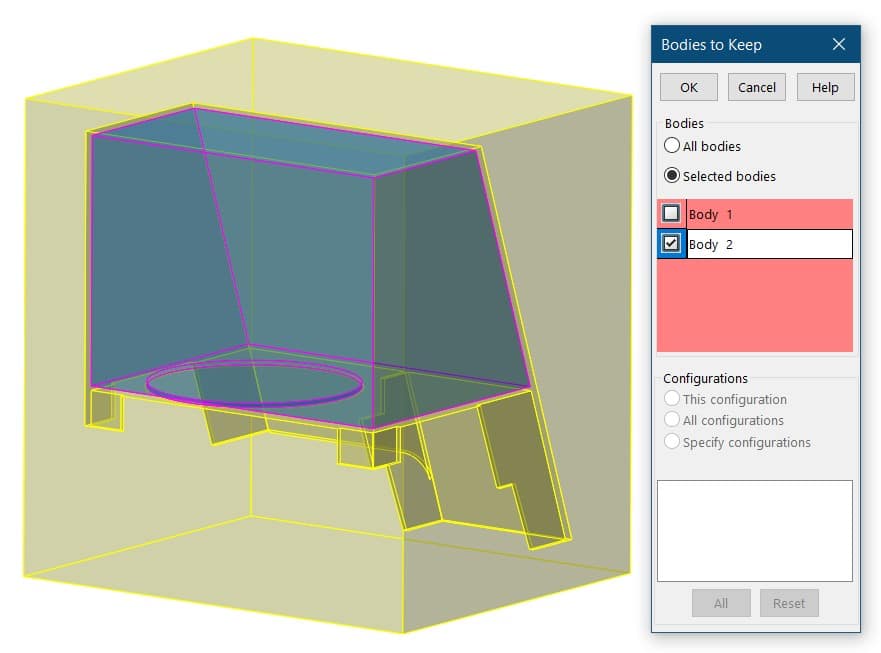
Upon accepting the Combine, we are immediately prompted to select which resulting body we want to keep. Click the option for ‘Selected bodies’ to then choose the body that makes up the internal space from the original part. This is previewed in blue in the image below. Click ‘OK.’
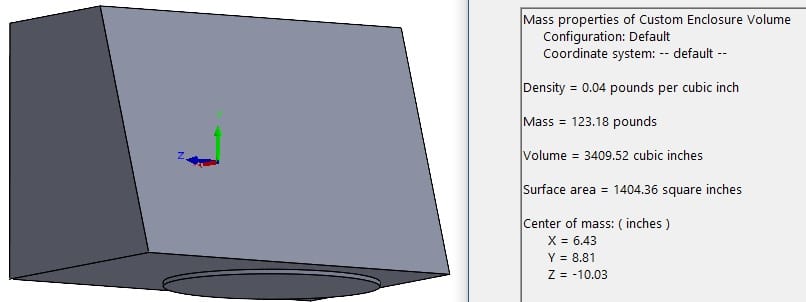
The remaining Solid Body can then be used for the Mass Properties calculations where we can see the exact volume of the internal cavity for our part. Units of Measure can be changed within Mass Properties by clicking the ‘Options’ button at the top of the dialogue window and selecting ‘Use custom settings’ in the resulting window.
Should you need to make changes to the part that results in a different internal volume later, you can use the two Boss Extrusions and the Combine in a separate Configuration to reference later.
Undoubtedly, this is a handy tool and nice addition to the ways in which we can find Internal Volume for our SOLIDWORKS models. Please see the provided links below to reference the blogs of the previously mentioned methods.
https://www.cati.com/blog/2018/03/solidworks-creating-internal-volume-intersect/
https://www.cati.com/blog/2018/06/solidworks-creating-internal-volume-delete-face/
Gabriel Rodriguez
Application Engineer
Computer Aided Technology, Inc.