Split and Combine Magic in SOLIDWORKS
Below is an example of a design that took ‘a lot’ of work to get these ridge features. There are nine features that go into making the ridges just the way I want.
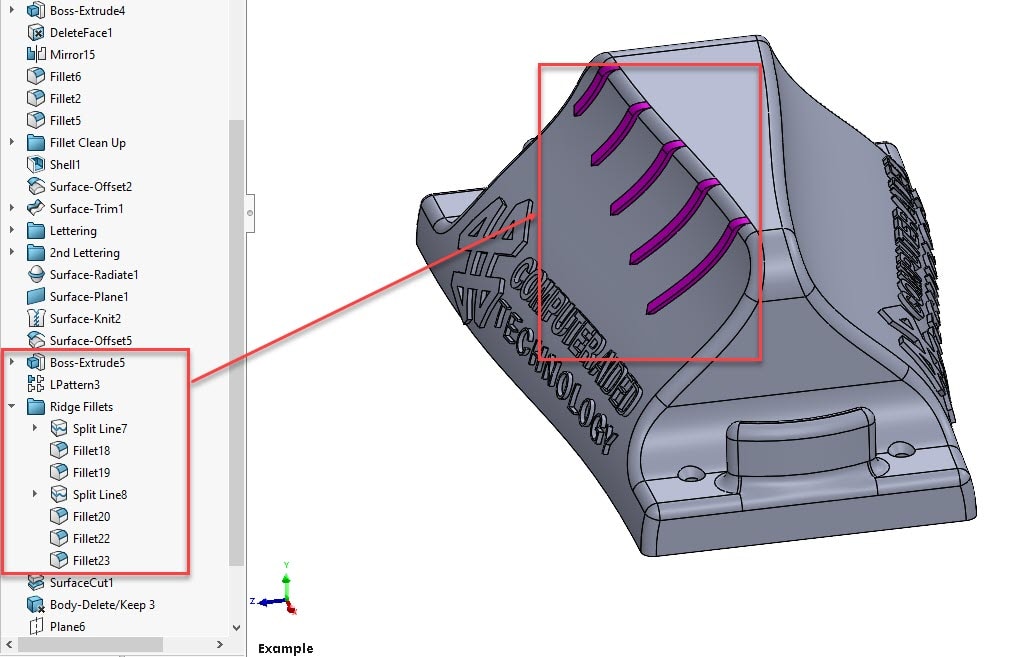
And now I’m at a point in the design where I want to replicate those ridges on the other side of the part, but quite frankly I don’t want to mirror all those features and/or faces. In fact, I CAN’T mirror all those features! No matter what I try I cannot get the geometry over on the other side of the part!

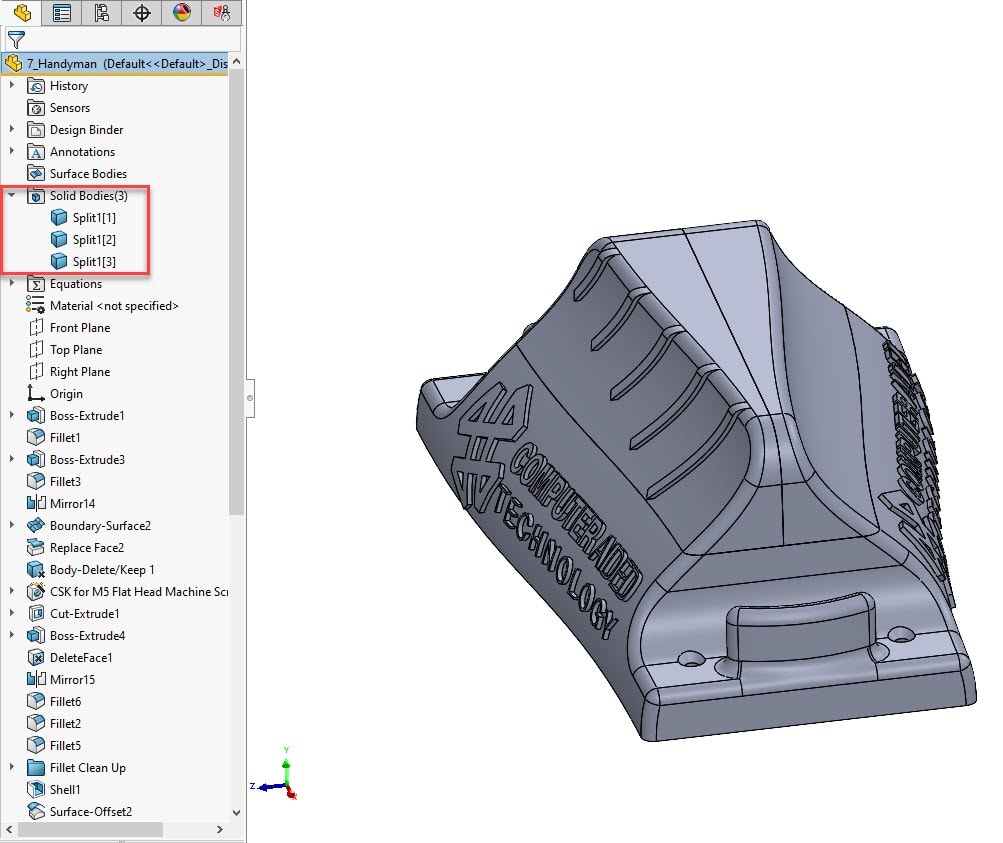
Well, that’s where the handy Split/Combine technique really helps get us out of a jam. Simply put, I’m going to divide the part into sections for local operations. By selecting a couple of reference planes and or surface bodies, I can slice my part into sections from Insert > Features > Split. Here I select the trim tools (planes or surface bodies) and then select ‘Cut Part’.

From here I can select the sections I want to cut apart as their own bodies for local operations. In this case I select the half that I want to mirror and the other half that I want to remove. And I can choose them from the Graphics Window or use the checkbox from the PropertyManager.

I now have three unique solid bodies for my local operations.
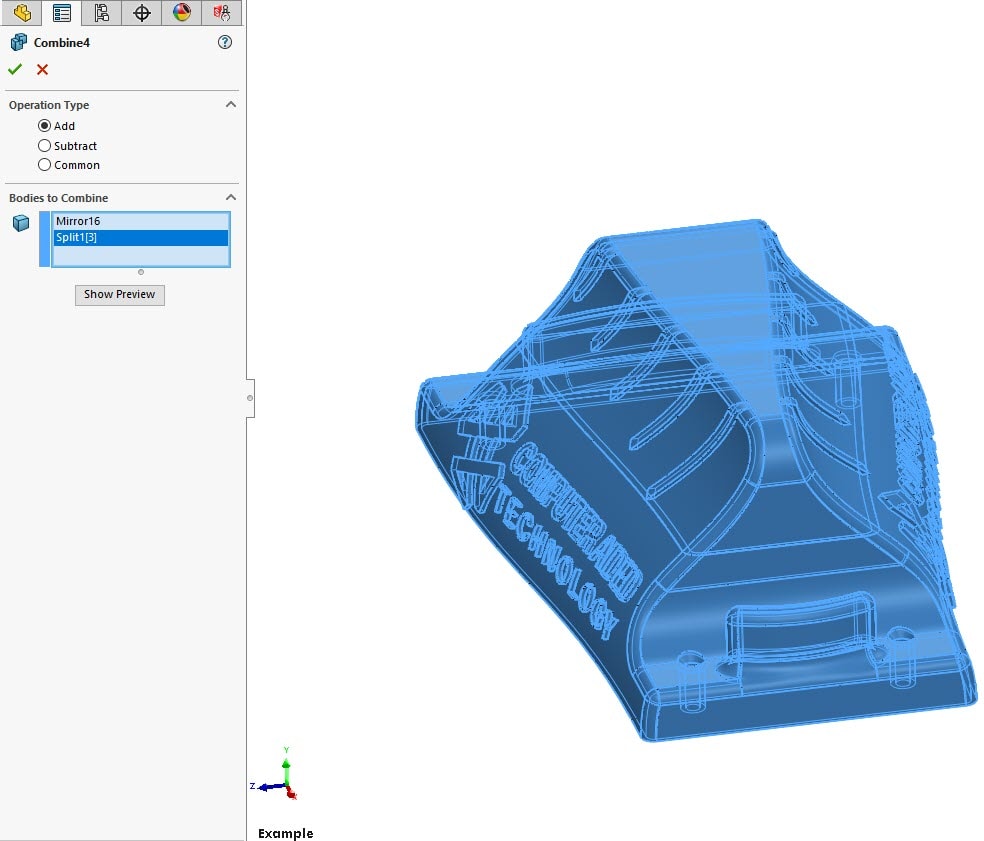
Once I’ve used Delete/Keep Bodies to remove the unwanted body (RMB on the ‘Solid Bodies’ folder > Delete/Keep Bodies) and successfully mirrored the body on the half I’m replicating, I’m ready to join the two bodies back together.

Now for the magic, because if I’ve learned anything from TV, and I like to think I have, it’s that if you can’t put everything back together it’s a pretty bad magic trick or it’s a great start to a family sitcom mishap with dad’s favorite pocket watch. And since I’m pretty sure you didn’t come here for sitcoms…..ABRA-COMBINE…or just Combine. Just use Insert > Features > Combine and choose the bodies you want to add together.
Now it’s all back together like normal.
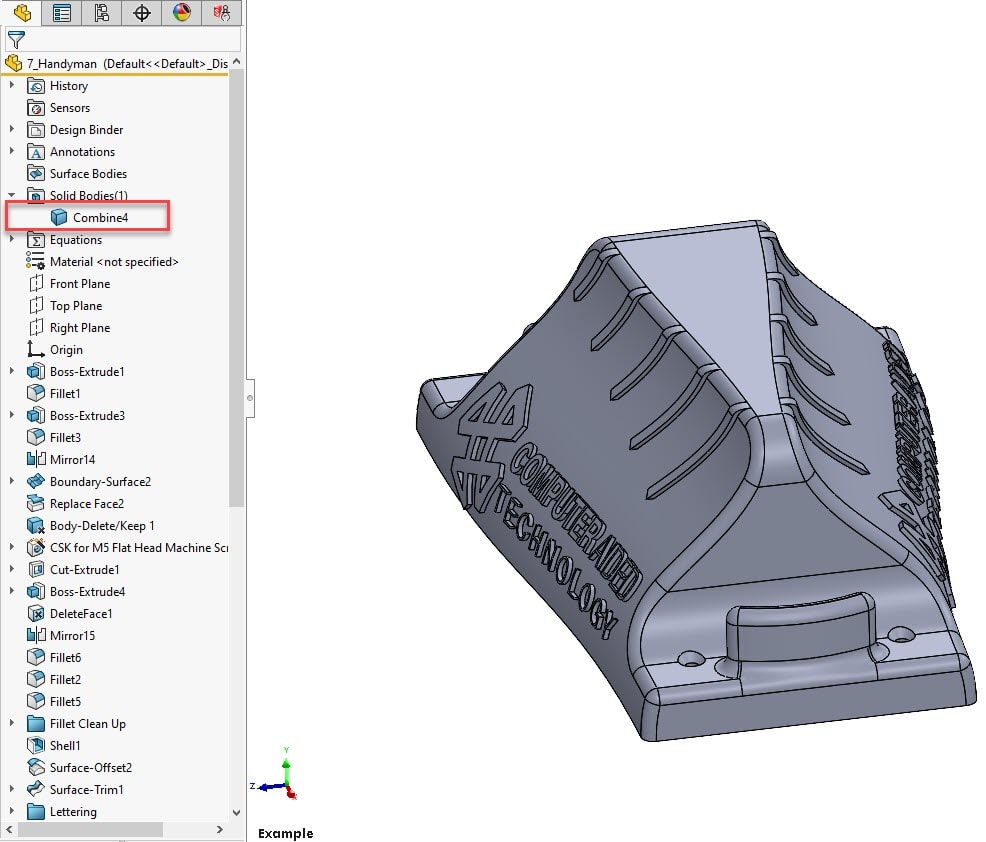
It’s like magic. Only slightly less interesting. But if you run into a problem where local operations are needed, use the Split/Combine technique to get yourself out of the jam!
Brandon Nelms
Application Engineer Manager
Computer Aided Technology, Inc.