3D Scanning: Airfoil Inspection

The current process for inspecting complex airfoil designs are too slow for full-rate production and ongoing design changes. Turbine engines have hundreds of airfoils, consisting of complex arrays and are inspected at an average of one airfoil an hour using a conventional Coordinate Measuring Machine (CMM).
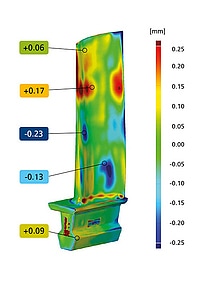
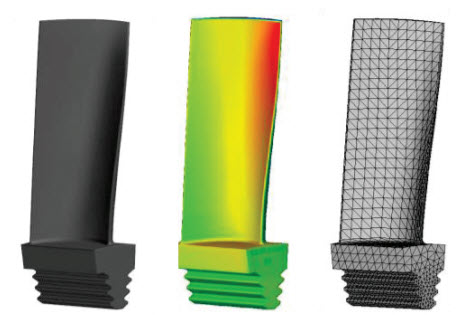
Utilizing a Handheld 3D scanner from CREAFORM expedites the inspection process by creating an associated mesh that can be compared to nominal CAD for critical feature deviation and reported on an AS9102 within minutes. Utilizing Polyworks software, a custom report template can be created to provide an automated reporting workflow. Additionally, more in-depth information can be extrapolated from a 3D scan for reporting than otherwise possible using traditional methods.
For example; a simple surface deviation color map can indicate quick imperfections from the trailing edge of an airfoil. Which can be reported for a quick Go/No Go.

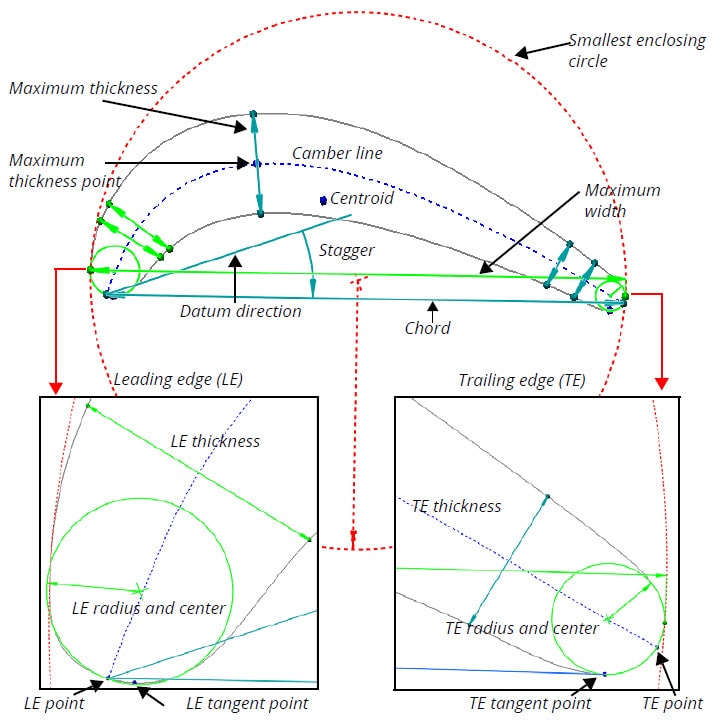
Or for more advanced critical feature reporting Polyworks offers an airfoil gauge. With this simple tool in Polyworks, the standard characteristics of an airfoil profile can be extracted from a 3D scan. Such as; the leading edge, trailing edge, camber line, chord length, stagger and much more. Each feature can then be compared to CAD for the deviation and then reported in an AS9102.

For more information on 3D scanning visit our 3D scanning blog section at CATI.com.
The engineer’s first problem in any design situation is to discover what the problem really is.
Bob Renella
Product Manager
Computer Aided Technology, LLC

 Blog
Blog