Chamfering Surfaces in SOLIDWORKS
If you do a lot of surface modeling in SOLIDWORKS, you may have gone bonkers looking for the chamfer command. Don’t worry, a conniving coworker did not modify your toolbar layout. Unfortunately, this is a limitation of the software. You cannot use the chamfer feature on surface bodies. The chamfer command is not even visible if your part consists of only surface bodies.
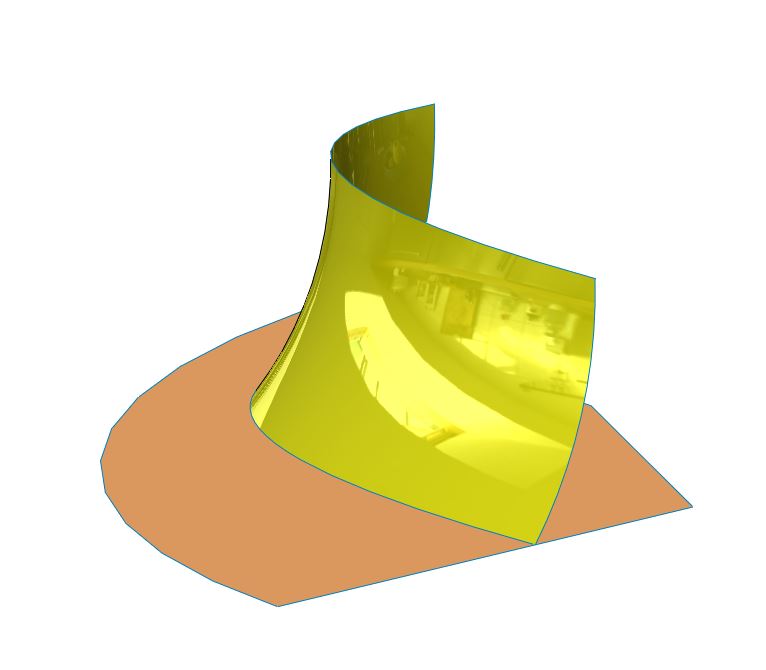
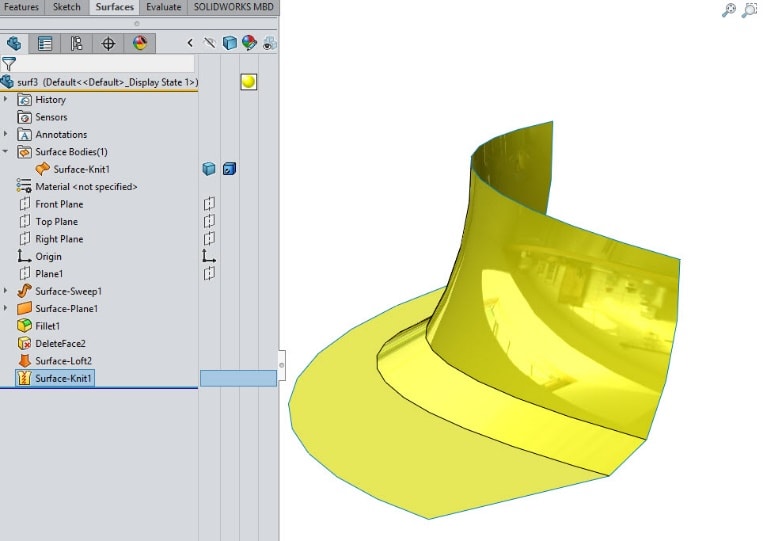
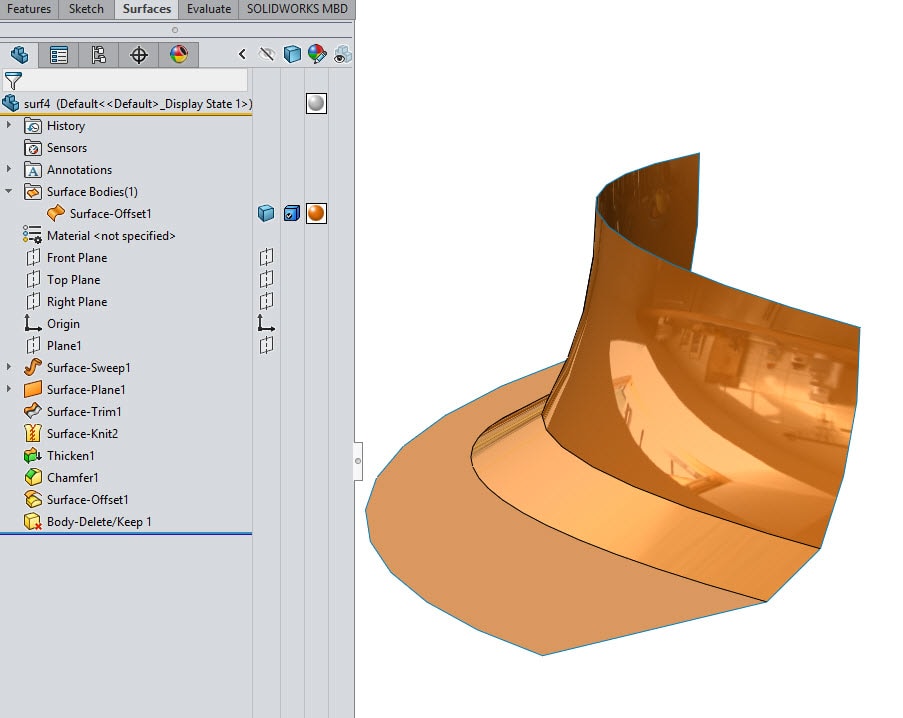
Let’s explore two different methods of working around this limitation. These methods do require a few additional features. Despite the extra steps, the result is a robust model. In our example below, we have a part file that contains two intersecting surface bodies. We would like to chamfer the edge where they intersect.
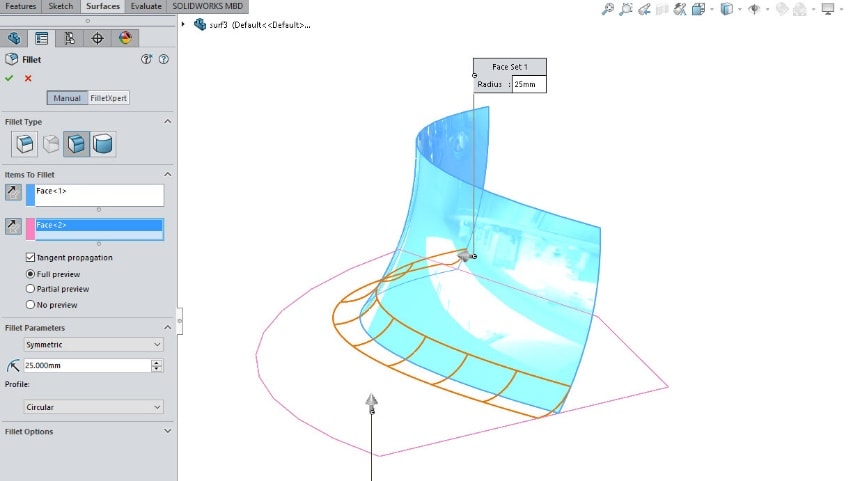
Fillet Method
In this approach, you select the desired geometry to be chamfered and apply a face fillet instead. The face fillet in SOLIDWORKS is a powerful feature when being applied to surface bodies. If your selected faces are not part of the same surface body, this fillet command will actually trim, knit, and fillet in a single step. If your surface bodies extend past their intersection, you will need to make sure this “trim” functionality is keeping the desired faces. In the property manager, beside the selected faces, you have the direction options. You will need to make sure these point in the correct direction to create the filleted face.
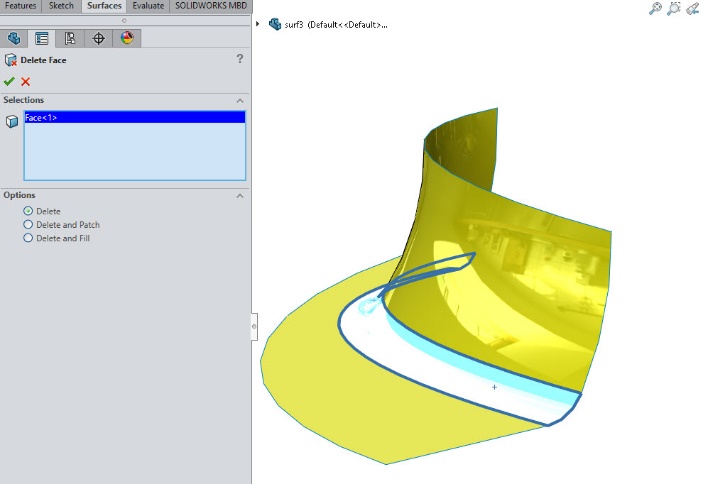
The next step is to use a delete face command on this newly created fillet.
To close this gap, you can use a lofted surface command by selecting the open edges as the loft profiles.
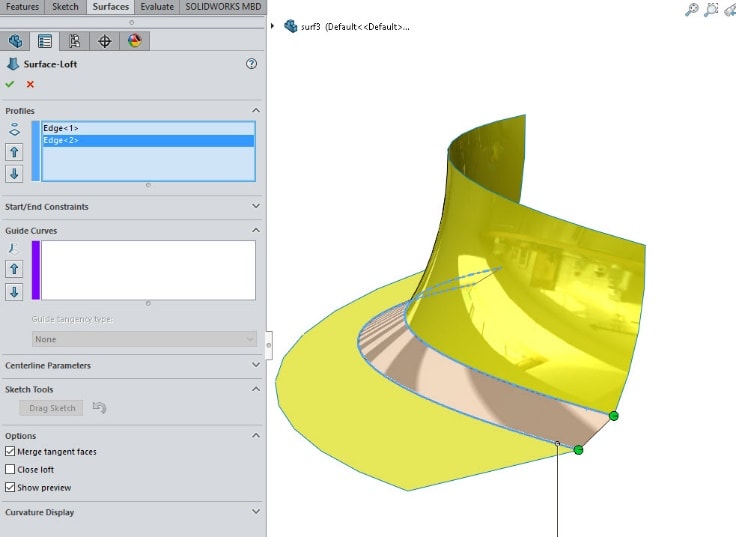
For more advanced geometry, this loft feature may require guide curves. If you would like more information on lofts with guide curves, please see our other blog articles on this topic: https://www.cati.com/blog/2015/02/how-does-guide-curve-influence-work-in-a-solidworks-loft-feature/
The final step of this approach is to knit these surfaces together to create a single surface body.
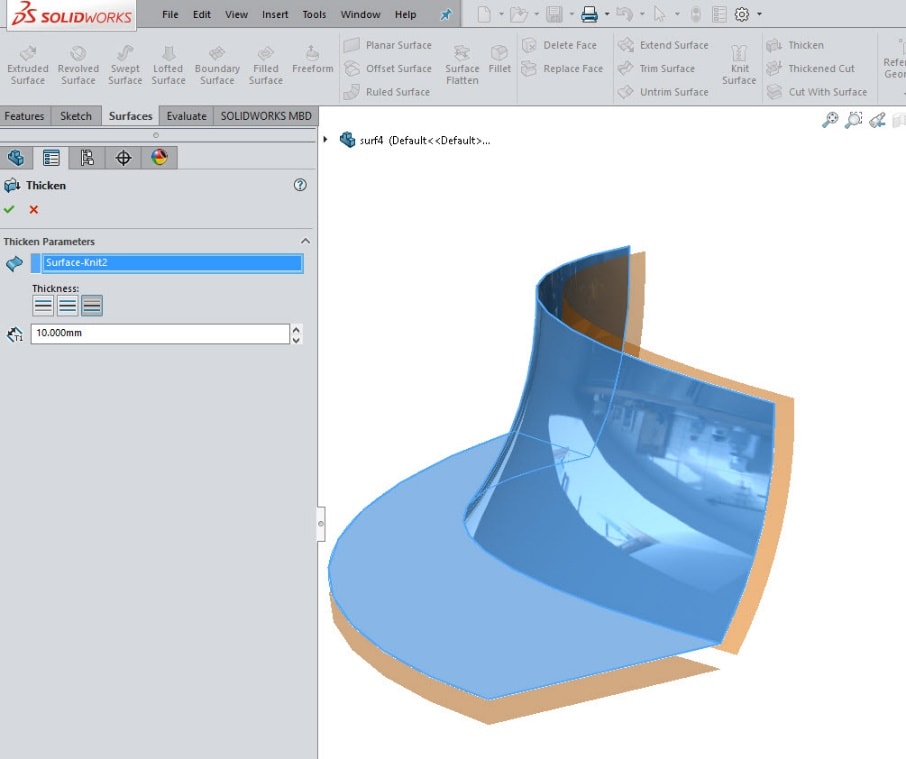
Thicken Method
The other method for working around the surface chamfer limitation is to make the part a solid. The thicken feature can only be applied to a single surface body. You may need to trim and knit the surfaces to meet this requirement. Using the thicken command will turn the geometry into a solid body by giving the surface a user defined thickness.
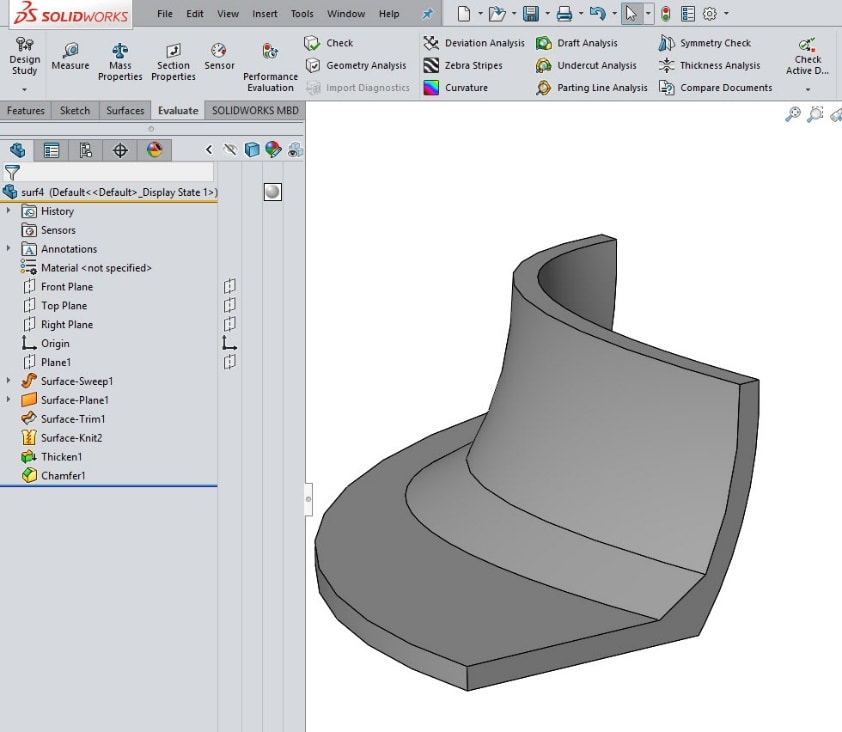
Now that the part is solid geometry, the chamfer feature can be applied to the edge.
To reach our goal of a chamfered surface, we need to copy the face and turn it into a surface. You can use the offset surface command, with an offset distance at zero, to accomplish this.
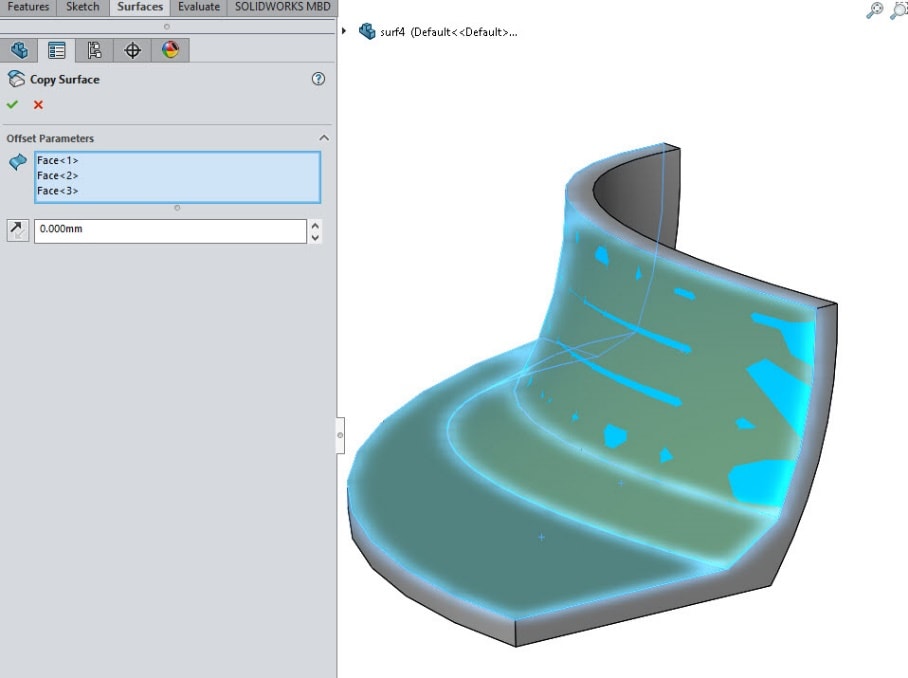
The final step, of this approach, is to use a delete body command. This will remove the solid body, leaving only the chamfered surface geometry behind.
If you run into software limitations, such as this surface chamfer, please submit enhancement requests. The SOLIDWORKS development team takes these customer requests into consideration as they add new functionality to the software in each major release.
For additional information on submitting SOLIDWORKS enhancement requests, please visit:
https://www.cati.com/blog/2011/03/how-to-submit-a-solidworks-enhancement-request/