It's Race Month, so....Drive...in the Xpress Lane....with DriveWorks Xpress
Man that was a stretch for a title to tie into the Indy 500, but come on it’s the best I got! Trust me it doesn’t get much better from here!
Last month I did a 10-4 Tech Talk on Hidden Gems in SOLIDWORKS, one of which was DriveWorks Xpress. Wouldn’t you know it right after a few people called me, for the purposes of this blog I’m writing, wanting to know more about how DriveWorks Xpress worked. So in an effort to help these fictitious good hearted souls, I thought I would walk through some of the basics to setting up your own DriveWorks Xpress model.
I think it’s an unwritten rule of salesmanship that sales people can sell all kinds of products that are “pretty much” what you already designed. It’s JUST like our Model 123 only the customer wants it to bend the reality of space time, so I took their check because that’s no problem right? Absolutely, should be no work for me to break the laws of physics. And while DriveWorks Xpress won’t break the laws of physics, you can make yourself much faster at handling those pesky, it’s JUST like Model 123 scenarios.
DriveWorks Xpress will allow you to set up a master model, define what aspects of your design you want to be able to change and from a simple form you can then create JUST like designs to your hearts content.
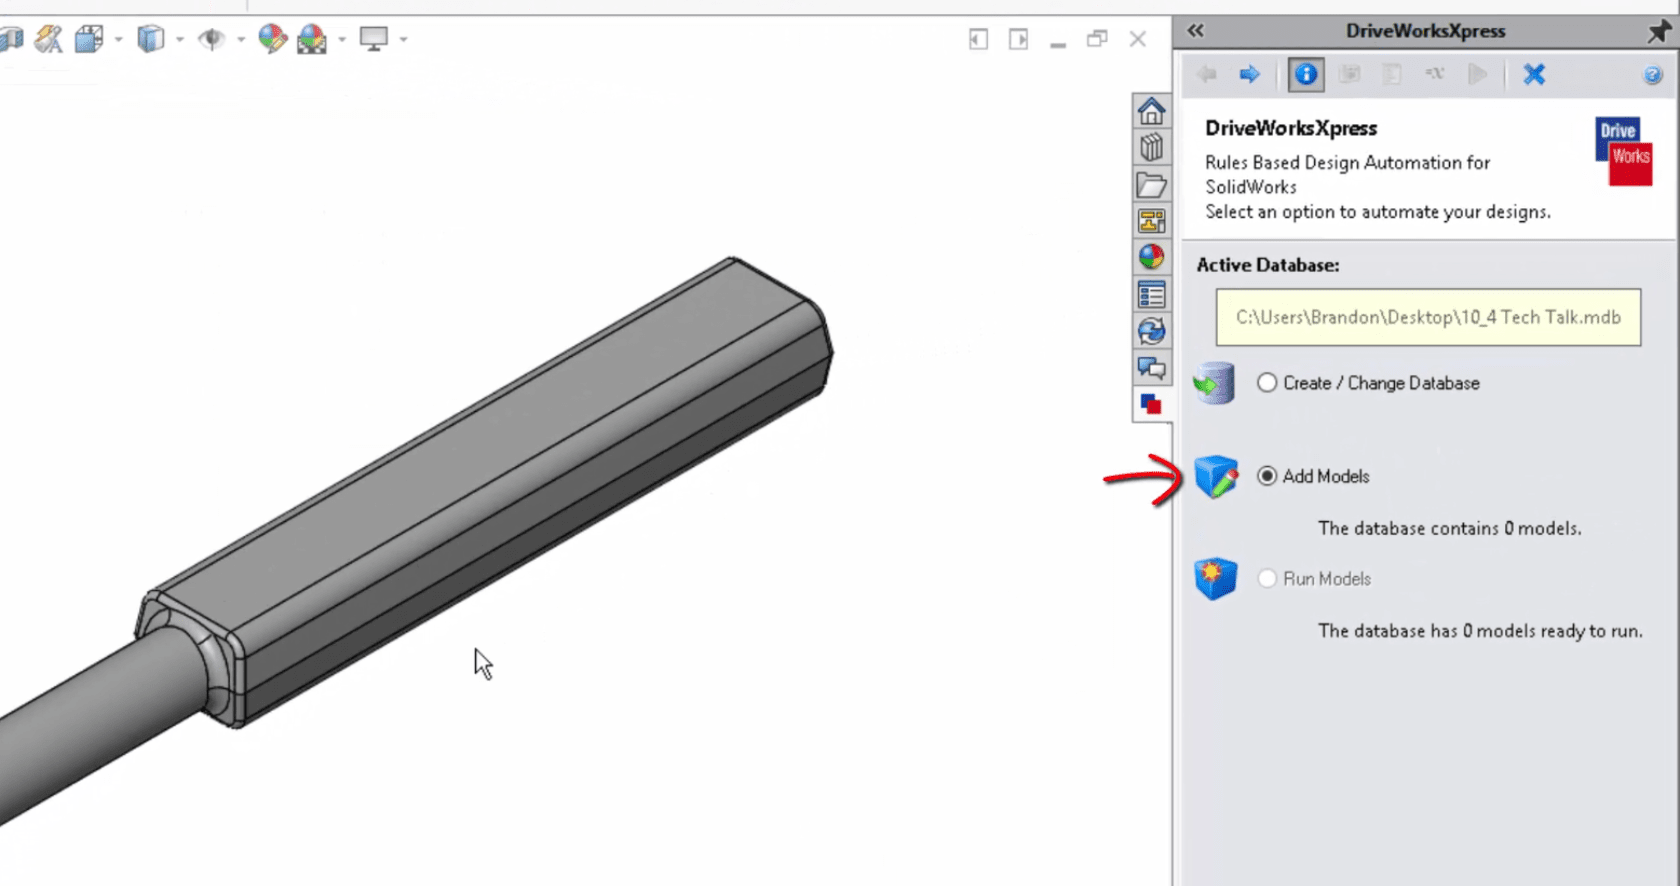
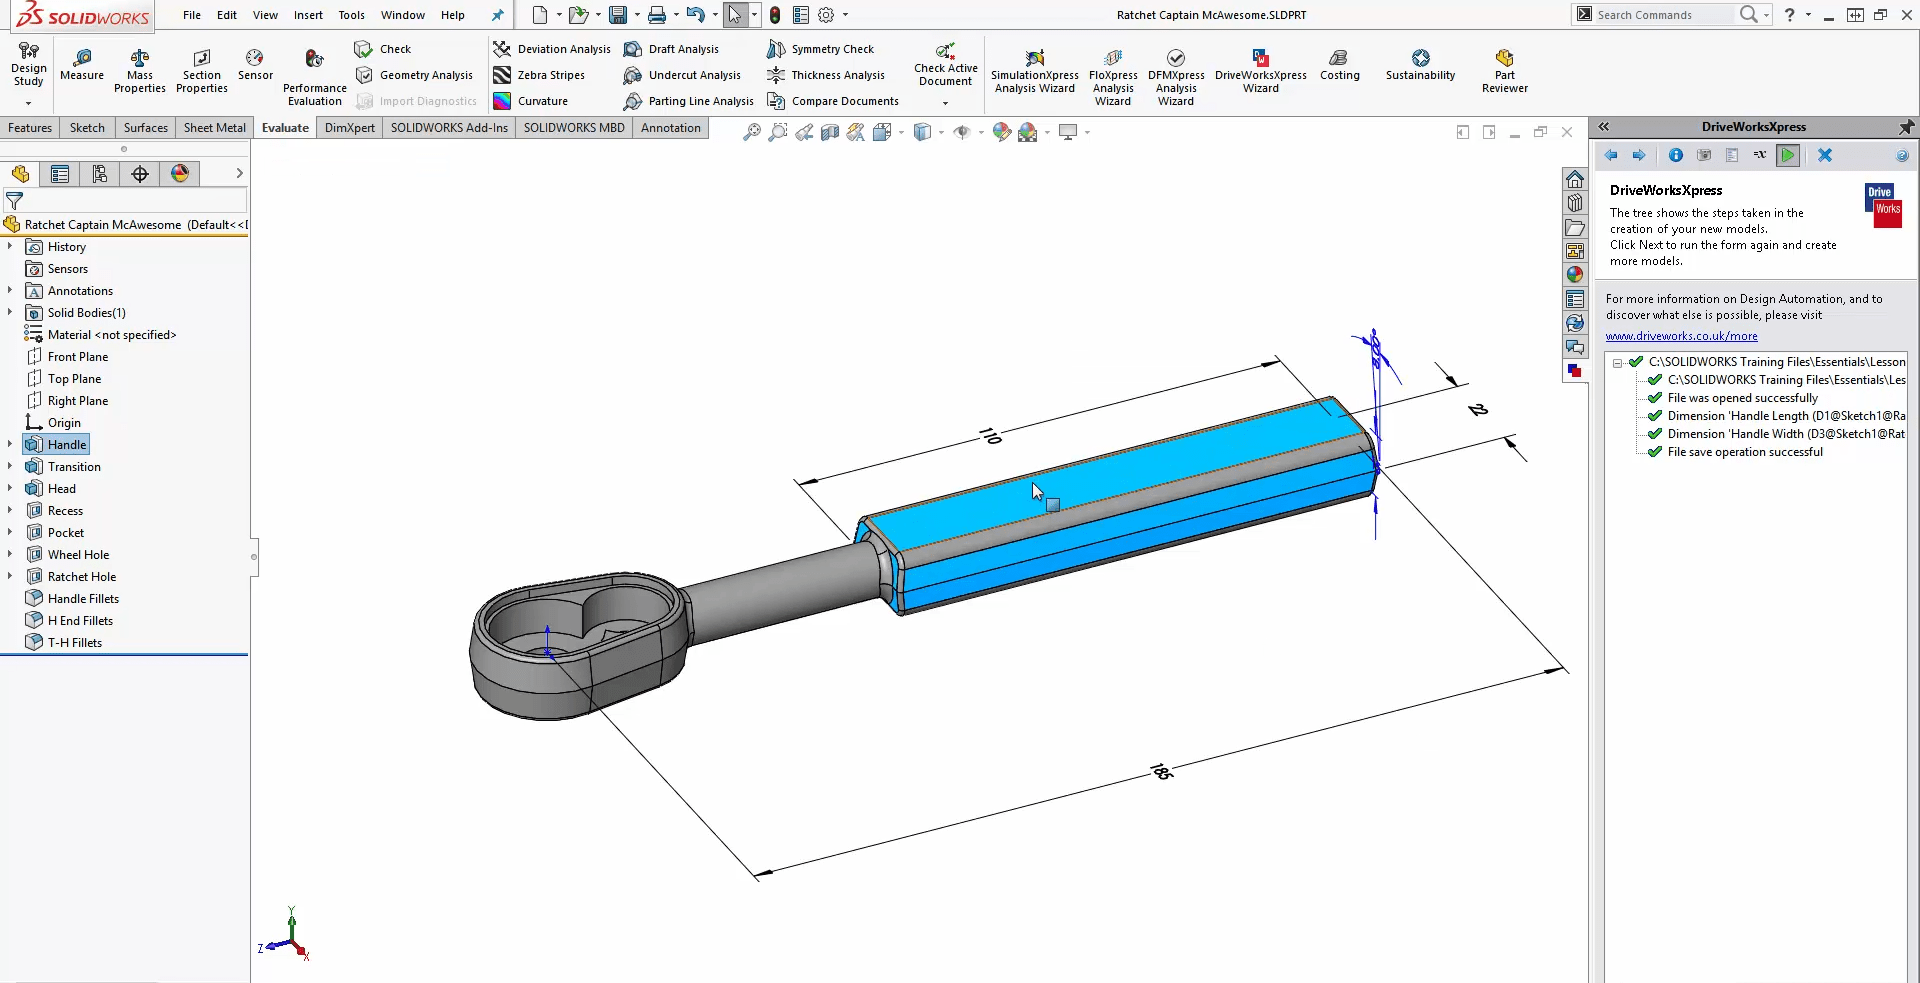
The first step is to Add a Model to your database.
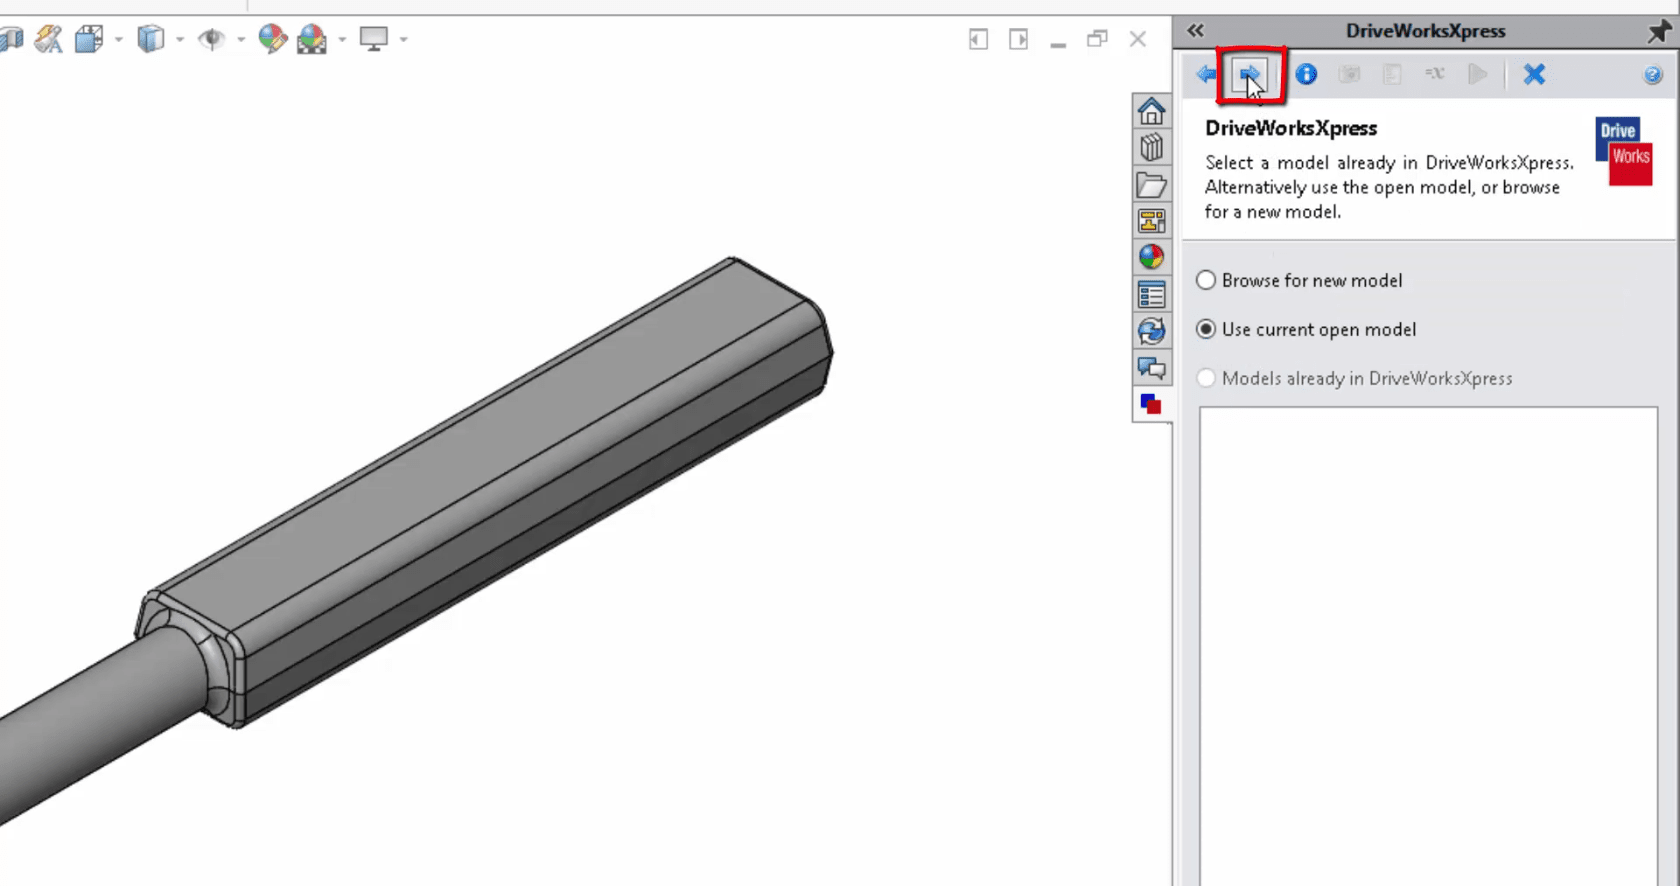
Then Choose the Model you want to use.
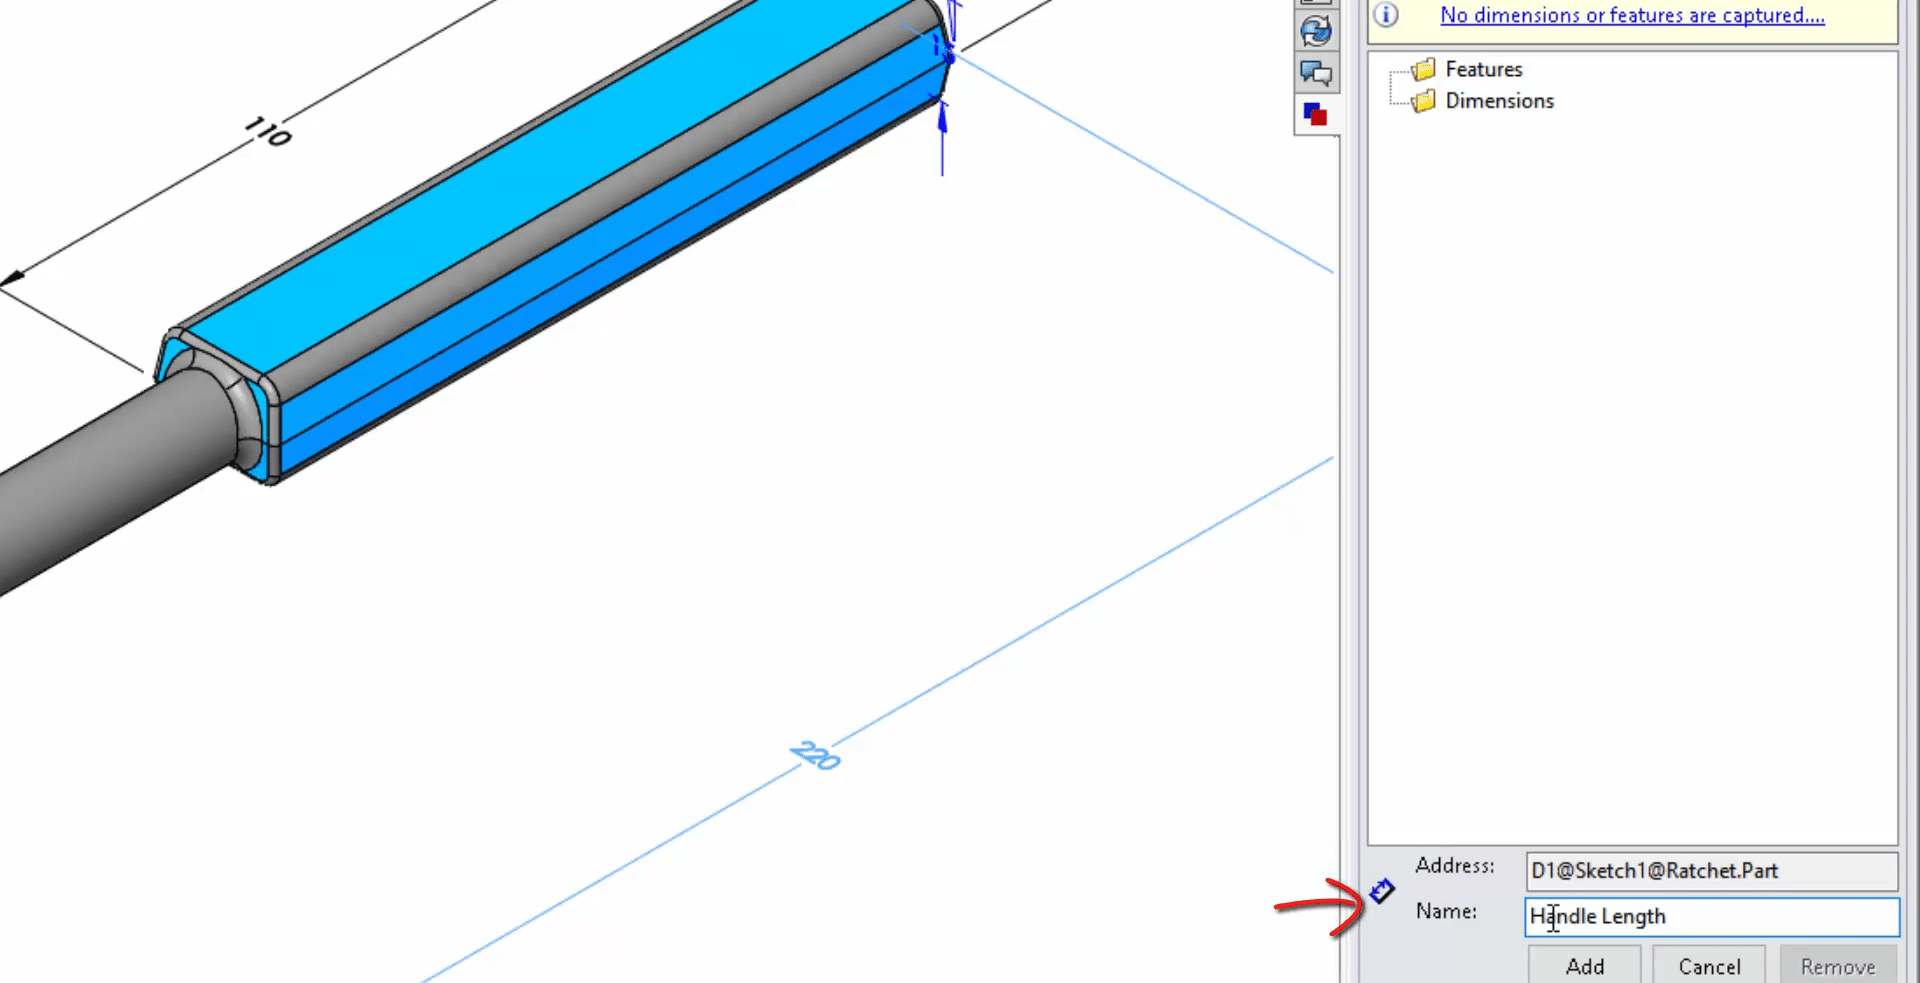
Then select the Dimensions and Features tab so you can choose what you want to have on your form.
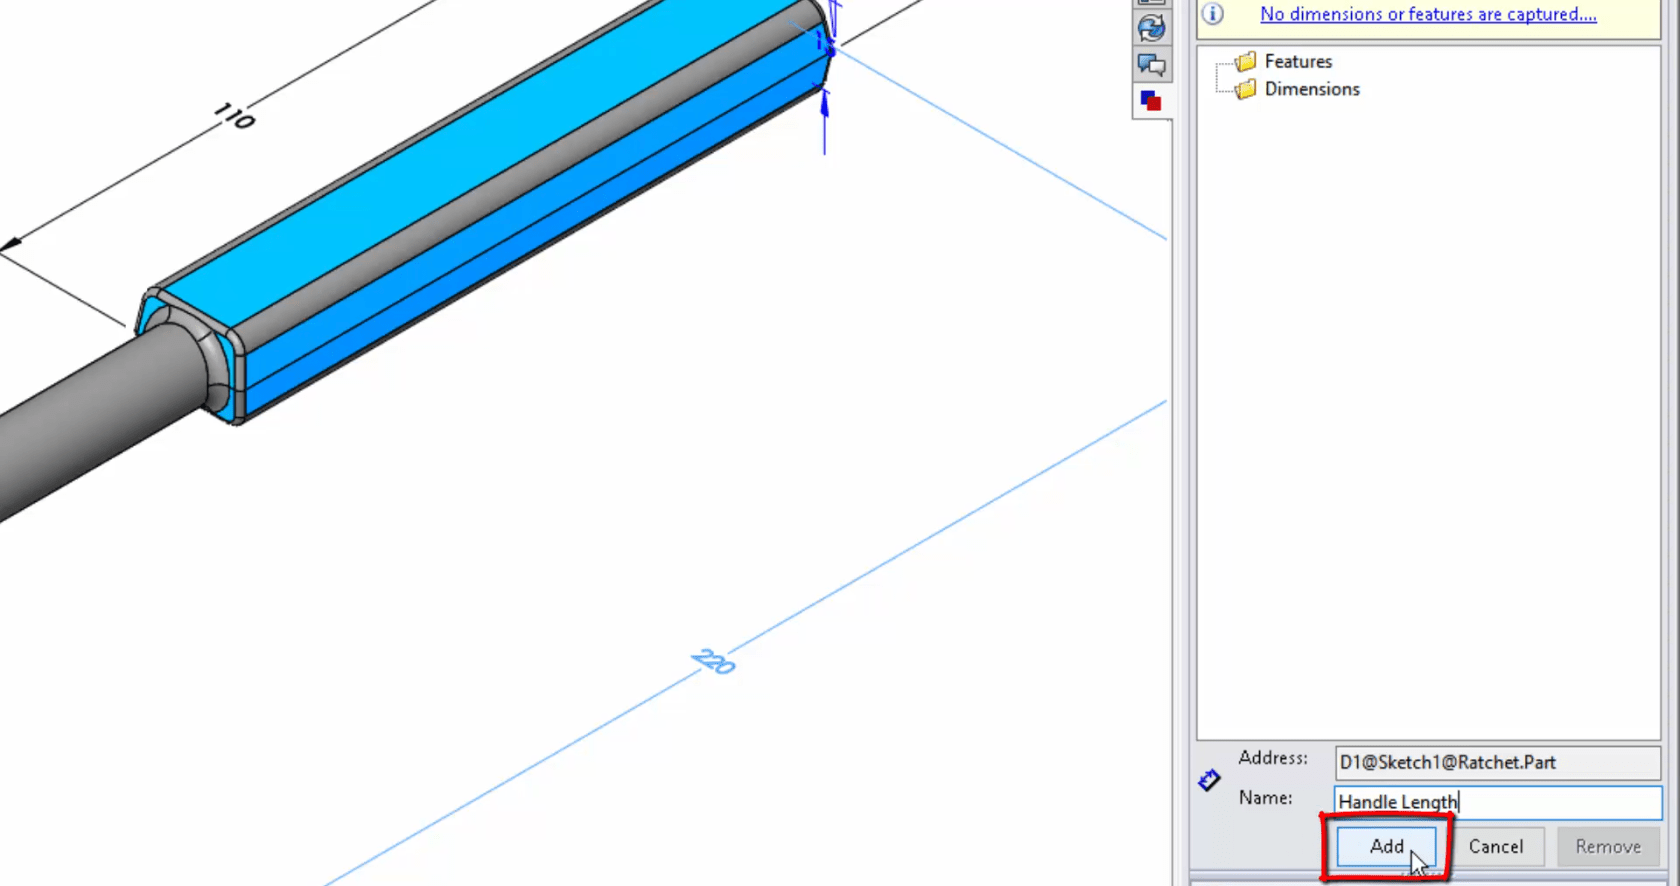
Select the Dimensions and features you want to be able to modify. The name here is a variable that will be driven from an equation.
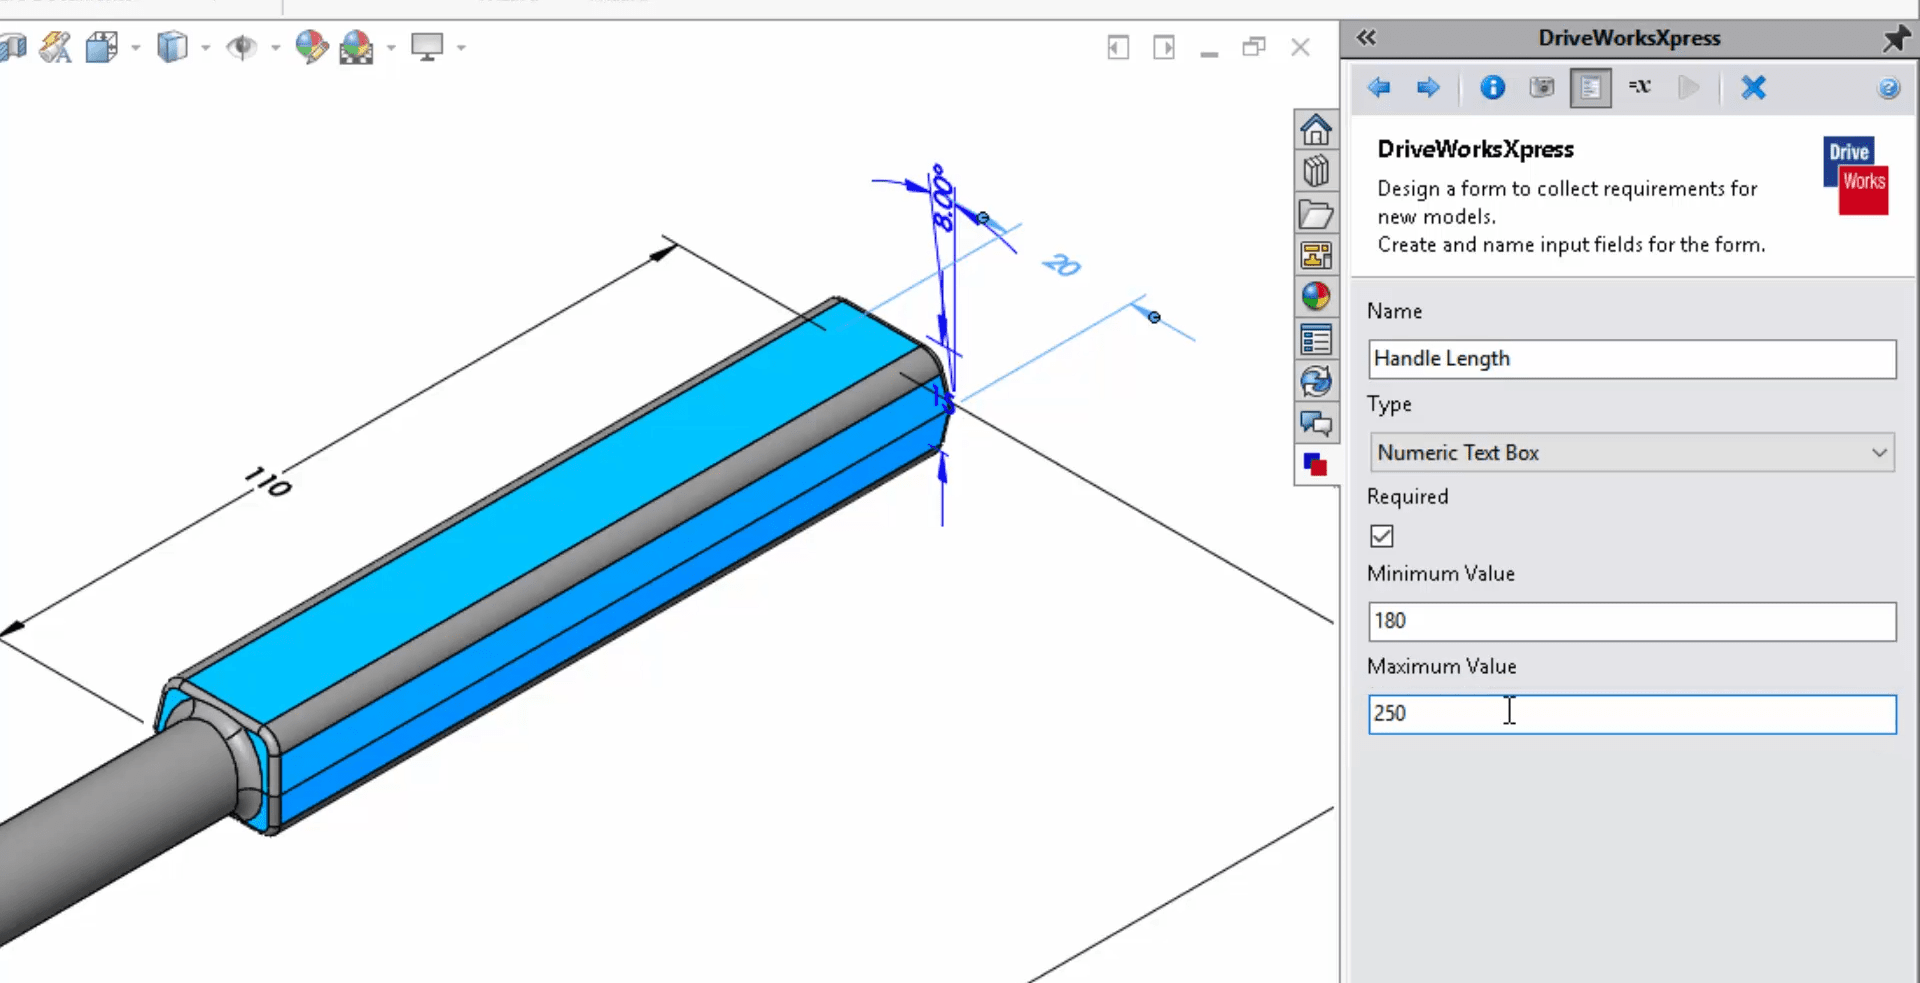
Next add inputs for your form. The Names used here are what you will see requested on the form, so make the name something that makes it easy to identify. You can also set these input forms to be numberical and give them a range of possible inputs.
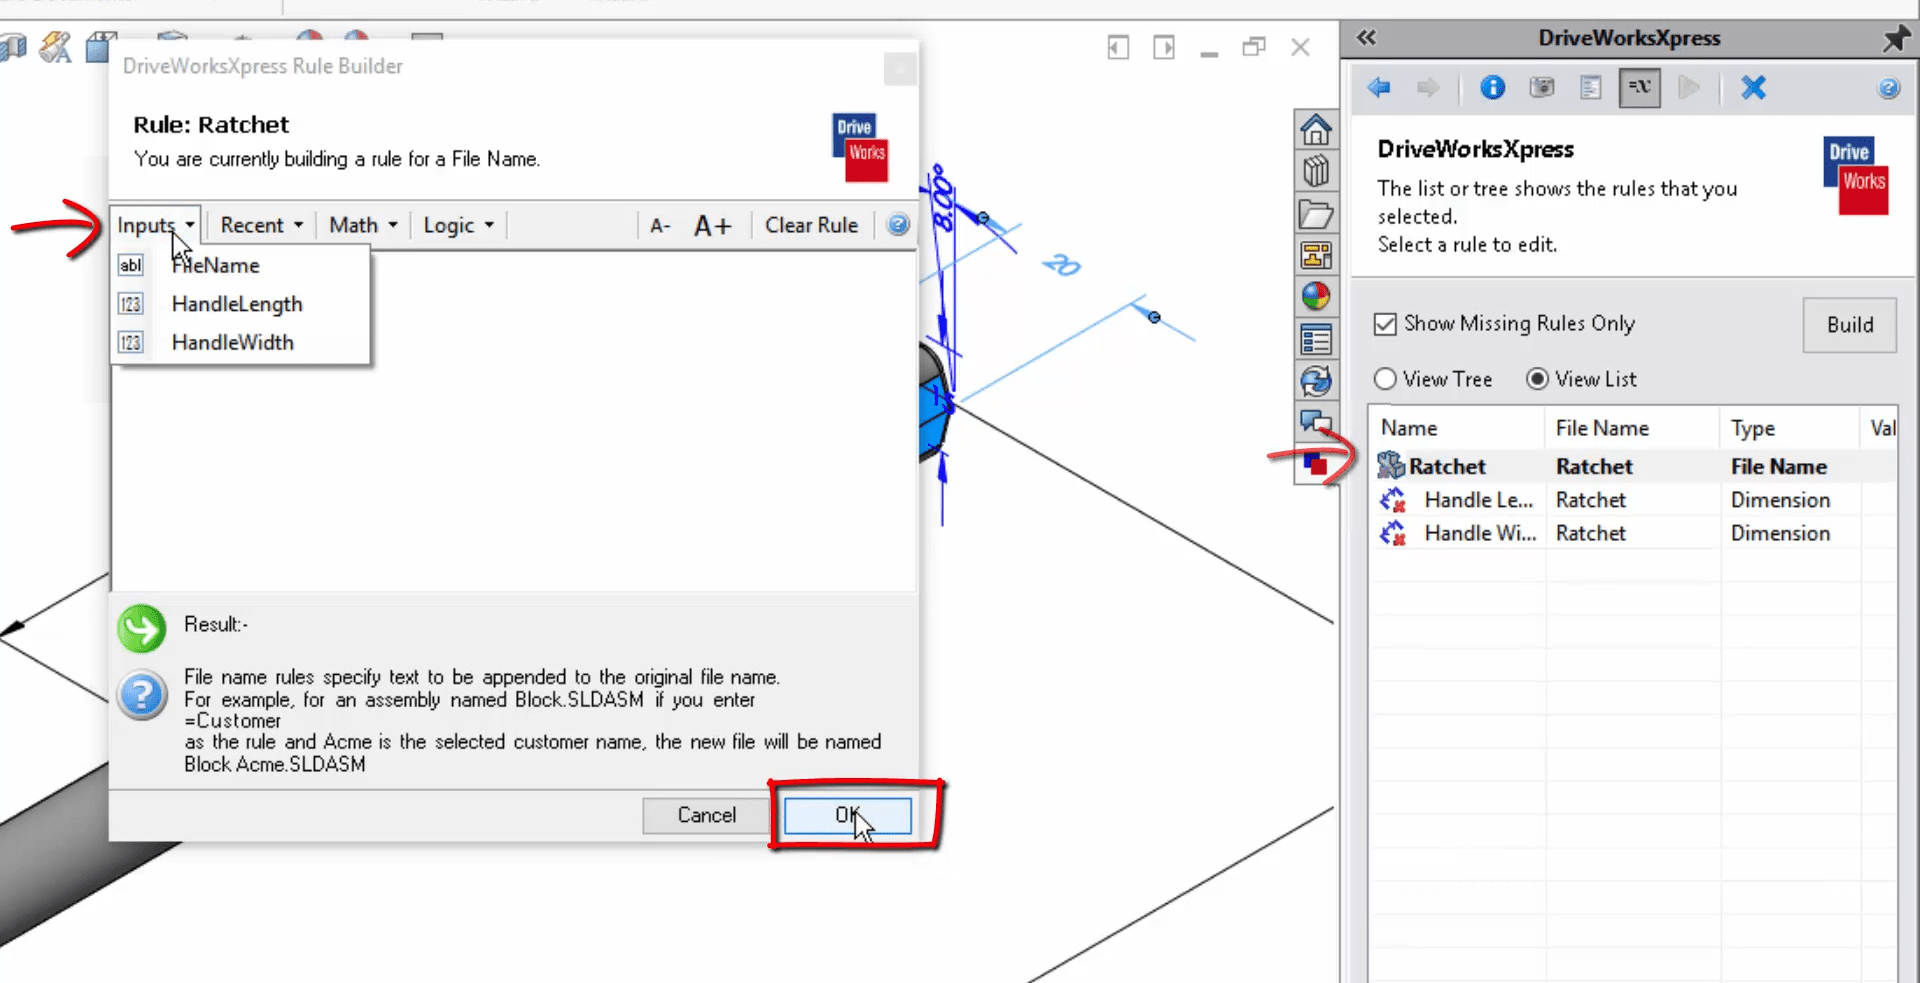
Now you’ll want to set your equations. This is how you map the inputs from your form to the model features and dimensions.
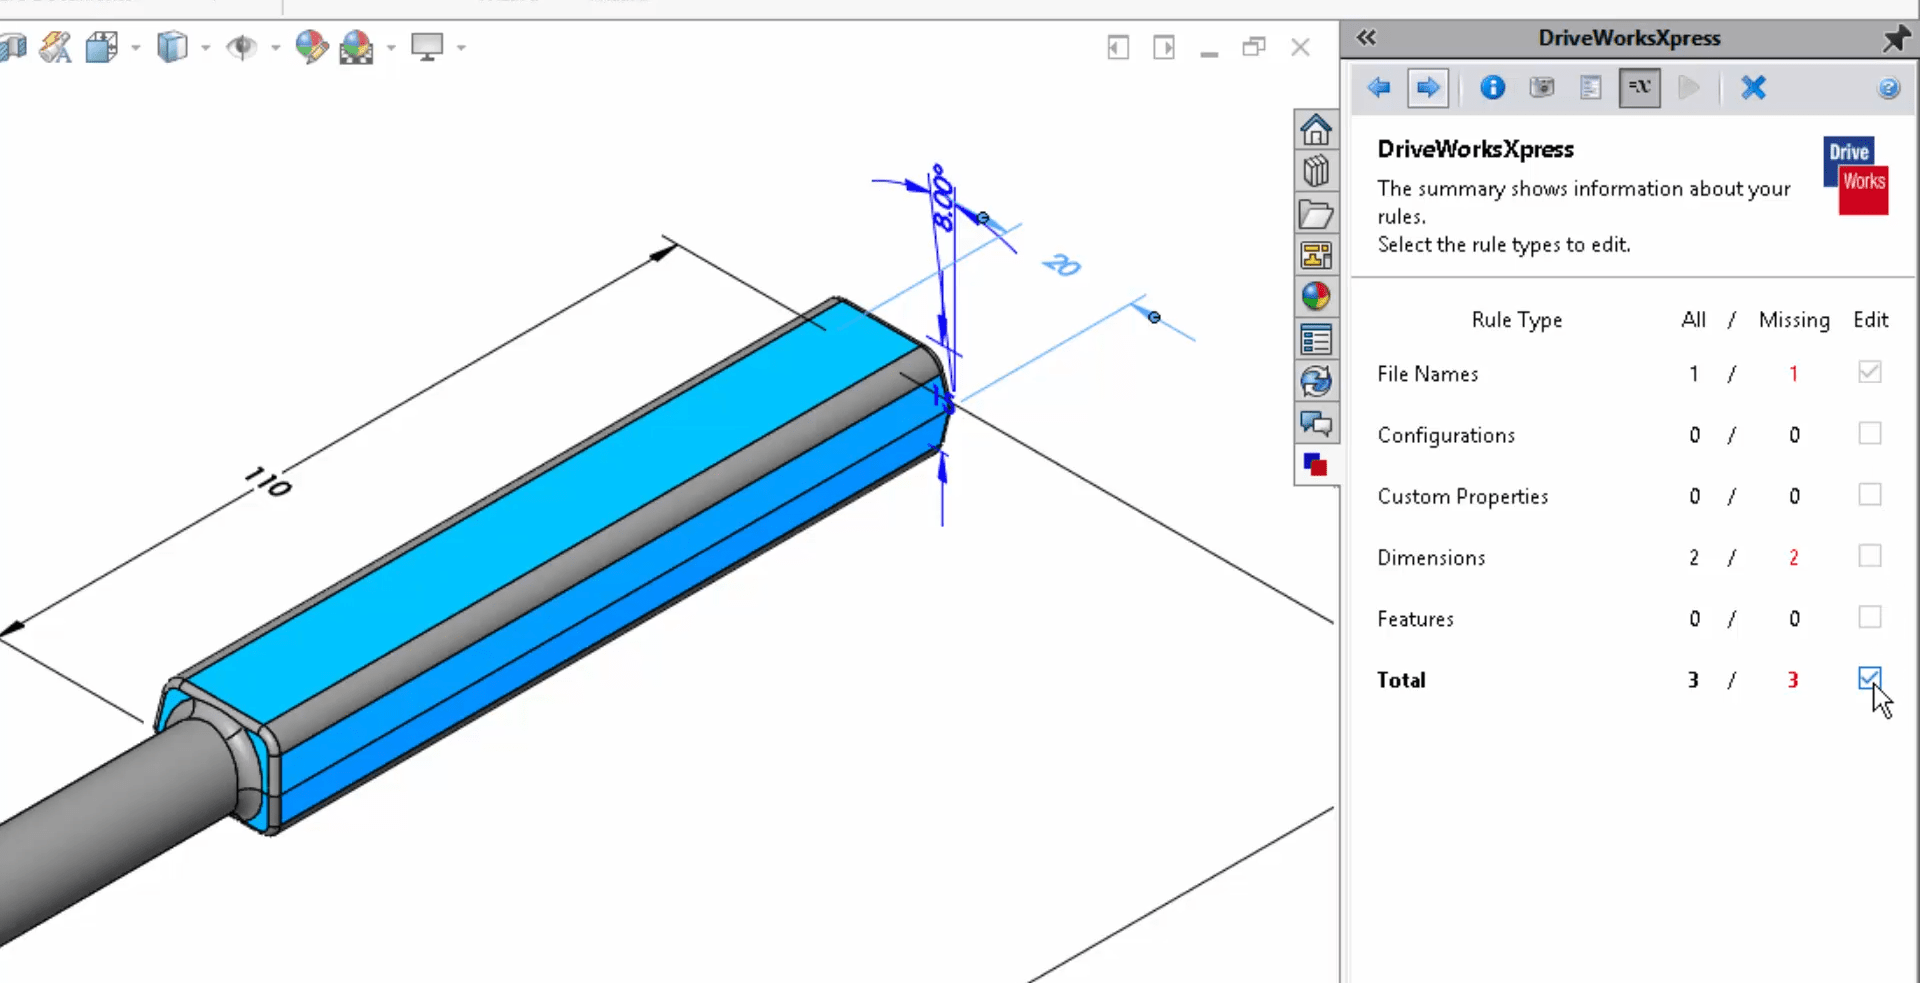
If you’re just doing a basic dimension for dimension like we are here, just select the form input and set it to the variable of the model.
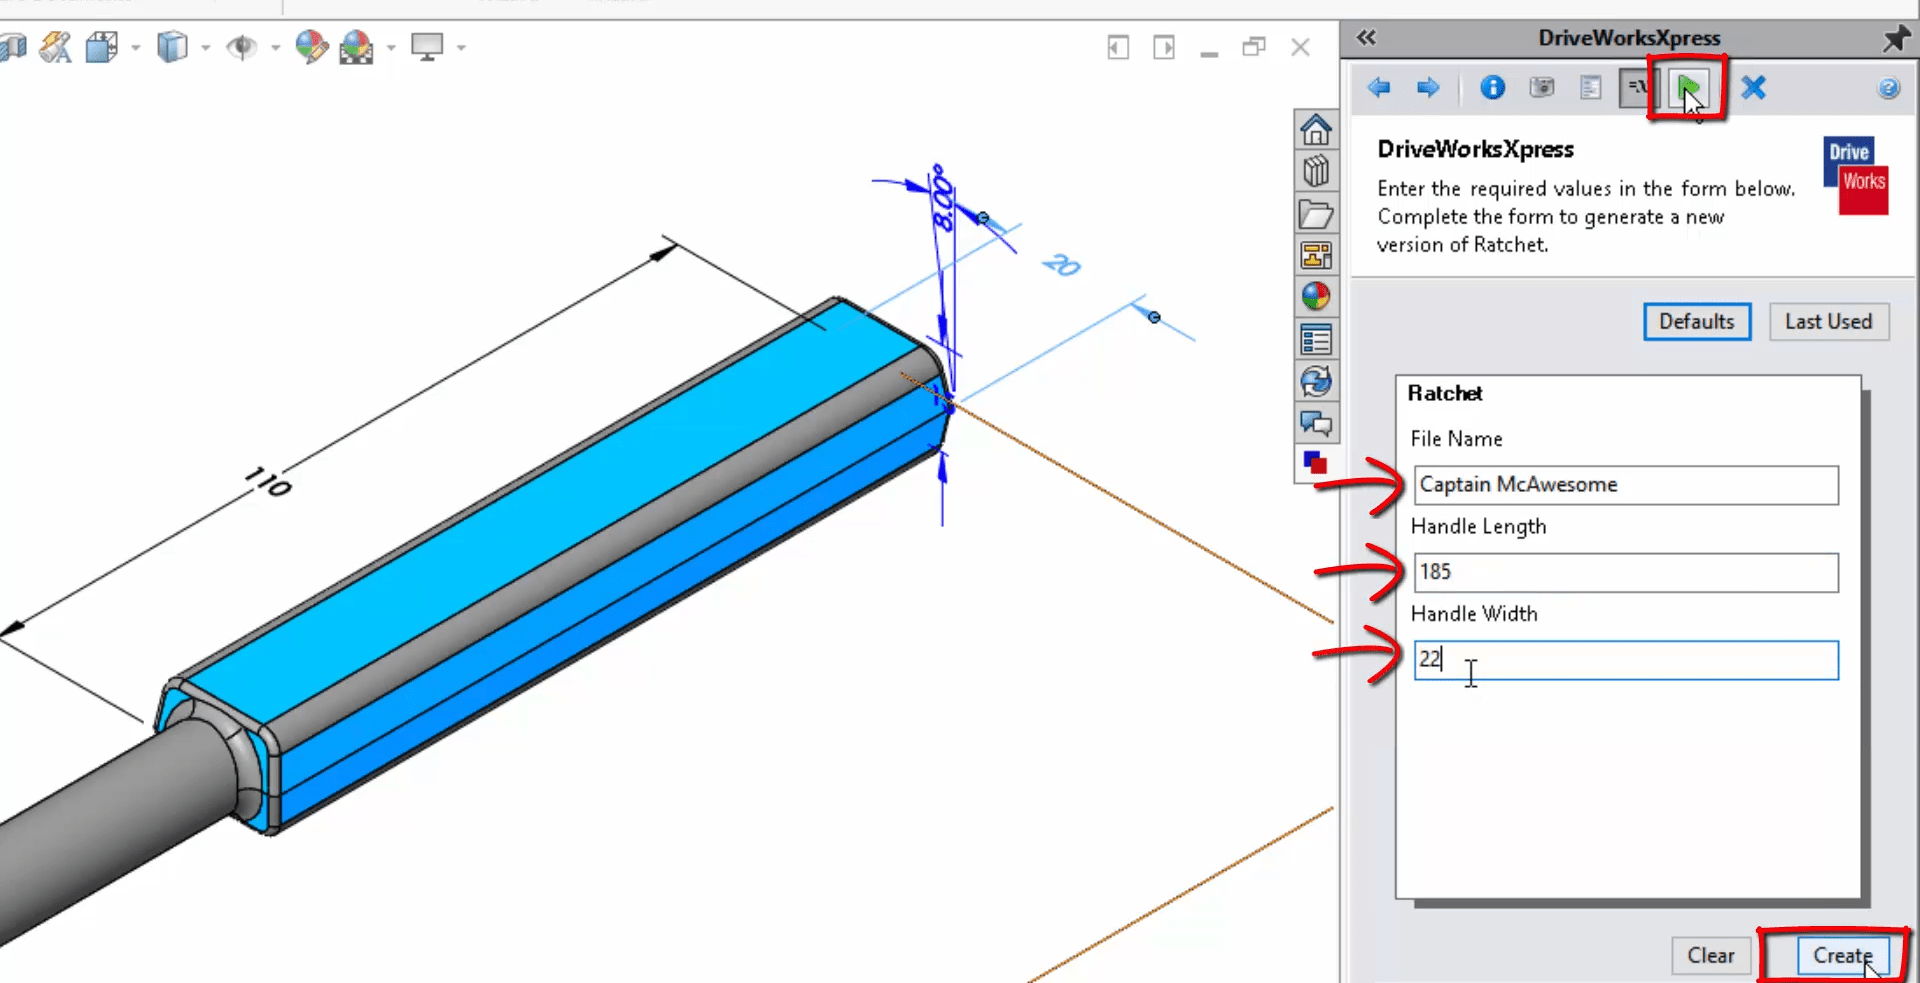
Boom! All done. Now you can create a new model just input the dimensions from the form and BAM! new model with little effort. Each time your sales person calls and needs a slightly different version, you can quickly go to your form, input the dimensions they need and output a brand spanking new model!
Brandon Nelms
Application Engineer
Computer Aided Technology, Inc