SOLIDWORKS 2017 What’s New: Controlling Decals and Scenes by Display States – #SW2017
Controlling Decals and Scenes by Display States
Among the new enhancements coming to SOLIDWORKS 2017 is the ability to now control different instances of Decals and Scenes using Display States.
You can use Display States to control the following aspects of your part:
- Hide/Show State
- Display Mode
- Appearance (Now includes Decals and Scenes!)
- Transparency
To add a new Display State, you can Right Click in any blank area in the Configuration Manager and select Add Display State.
Or you can click the Arrow to the right of the tabs in the Feature Manager to show the Display Pane.
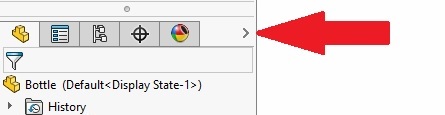
Right Click anywhere in the Display Pane, select Add Display State.
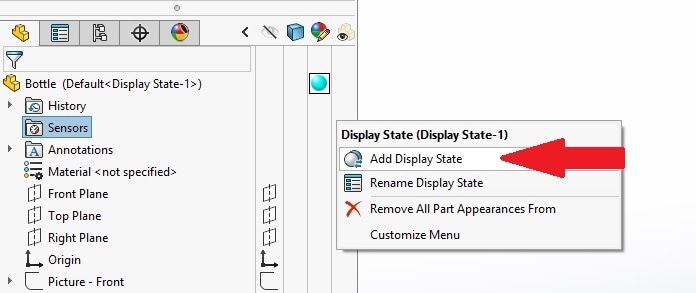
And then type in the name of the new Display State and press Enter.
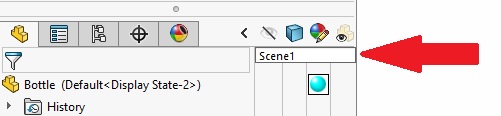
Once you’ve created the new Display State, select the Display Manager icon in the Feature Manager tabs.
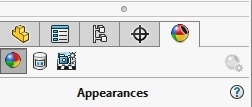
In the Display Manager, you can select from the following categories:

View Appearances
 View Decals
 View Scene, Lights and Cameras
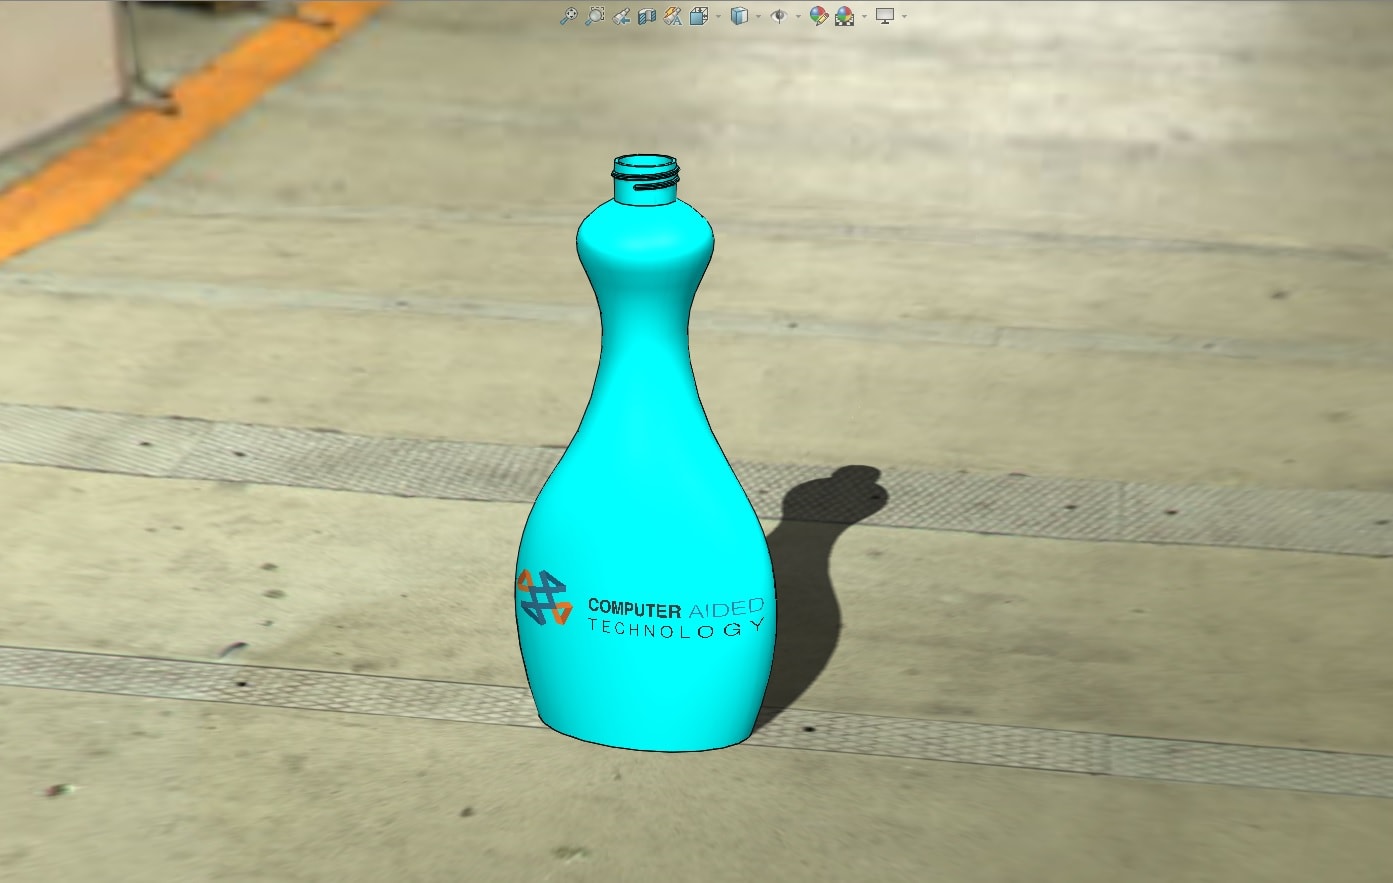
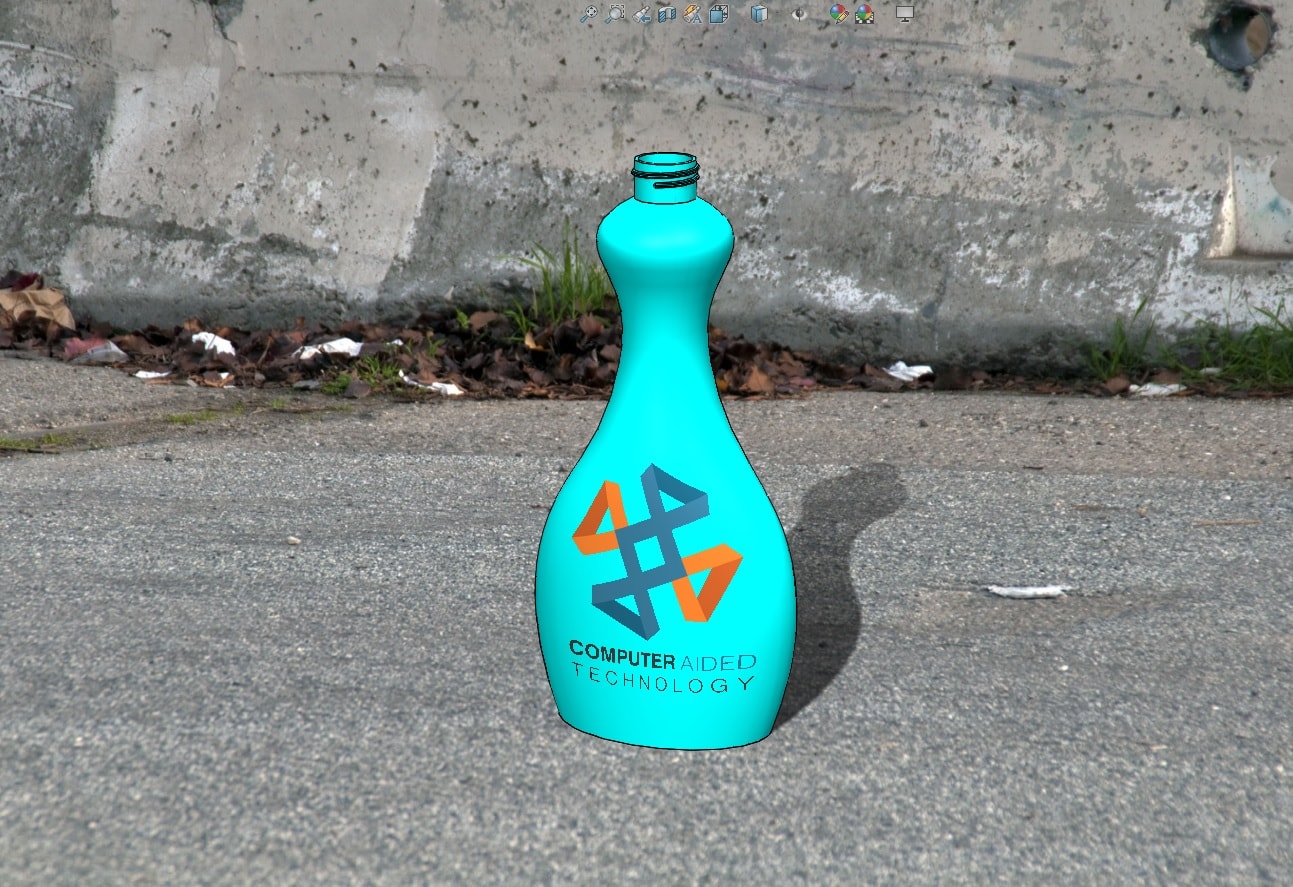
Click View Decals and then Open Decal Library. This will open your Decal Library in the Task Pane to the Right.
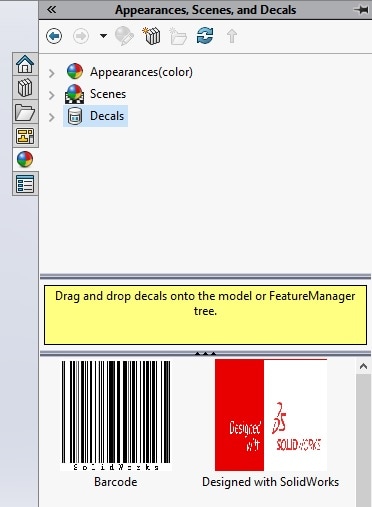
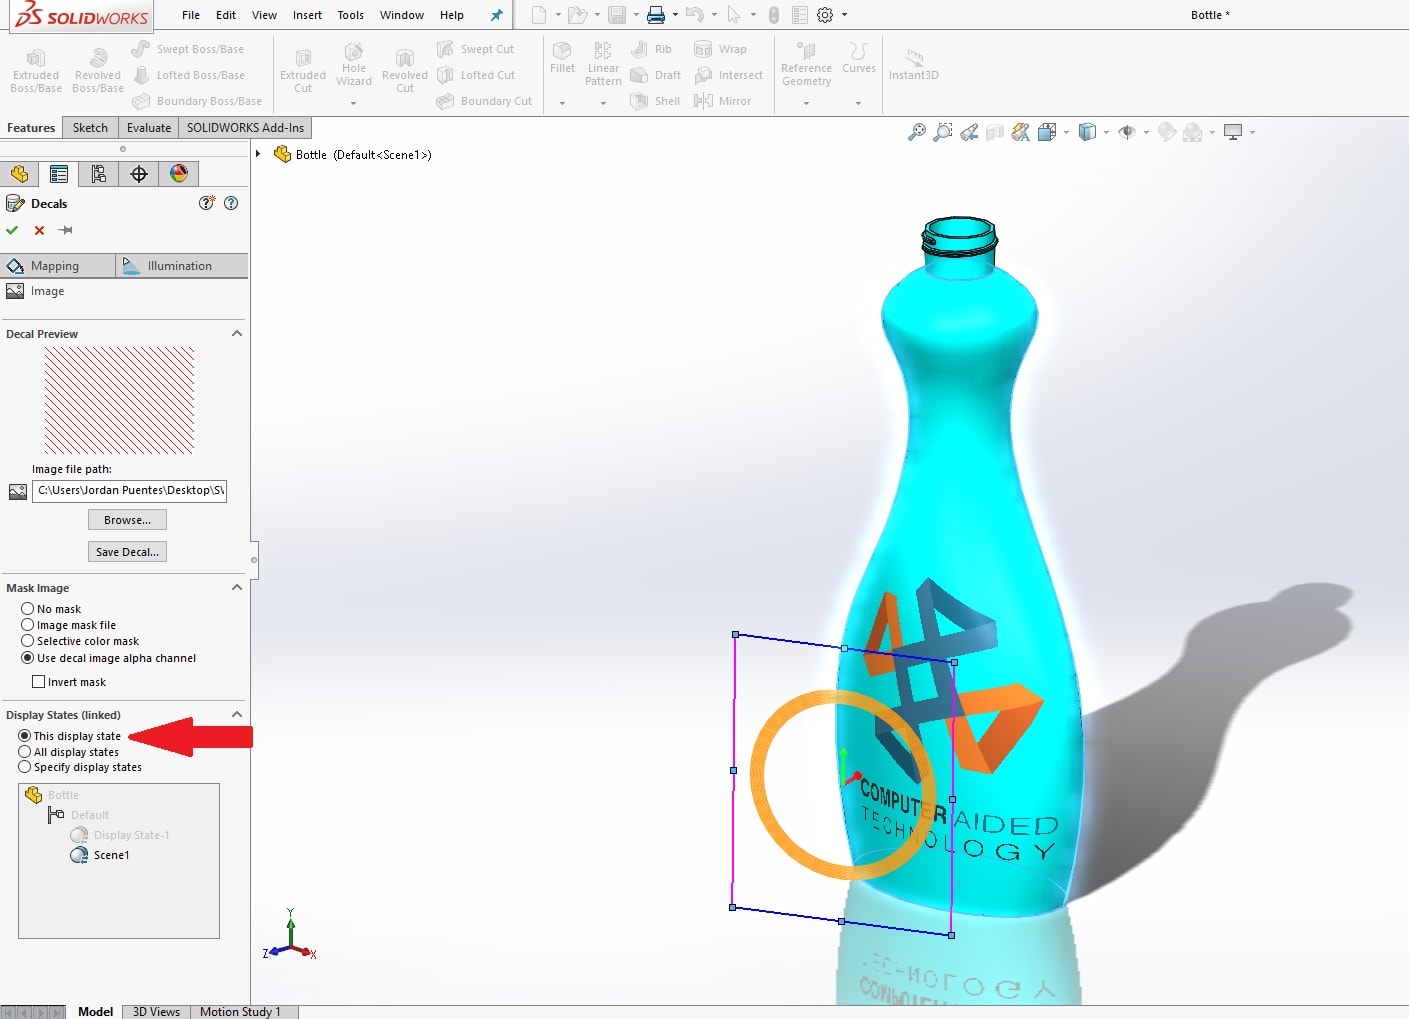
You can Drag and Drop any Decal from your Decal Library onto your part. When you do, a Manipulator appears above the decal, which lets you change the Direction, Alignment and Size of the Decal using the Manipulator.
Tech Tip: Make sure you select This display state before clicking the OK button.
To edit the Scene, you can either click View Scene, Lights and Cameras, in the Display Manager, Right-Click the Scene and select Edit Scene, or you can Right-Click anywhere in the Graphics Area and select Edit Scene.
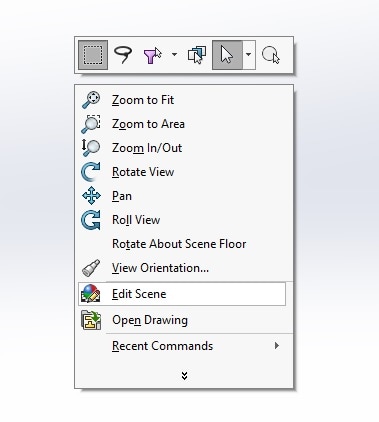
This will open the Scenes Library in the Task Pane similar to the Decal Library.
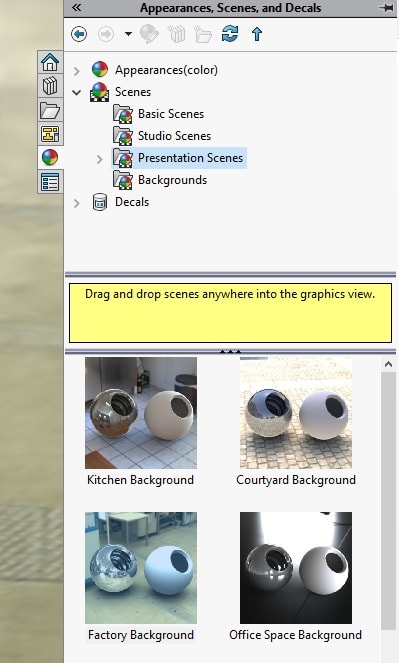
You can Drag and Drop any Scene onto the Graphics Area to apply it. Again making sure you select This display state before clicking the OK button.
You can now add multiple Display States using the previous steps while customizing the Decals and Scene in each one.
You can then toggle between the Display States in the Configuration Manager. Here is an example as I toggle between two Display States I’ve created:
I hope this part of the What’s New series gives you a better understanding of the new features and functions of SOLIDWORKS 2017. Please check back to the CATI Blog as the CATI and MCAD Support Teams will continue to break down many of the new items in SOLIDWORKS 2017. All of these articles will be stored in the category of “SOLIDWORKS What’s New.” You can also learn more about SOLIDWORKS 2017 by clicking on the image below to register for one of CATI’s or CATI’s Design Summits.
Jordan Puentes, CSWP
Application Engineer
Computer Aided Technology