Stratasys GrabCAD Print and uPrint 3D Printer Bring SOLIDWORKS Model to Life
 Welcome back to my blog series where I’m taking the concept of a fully automated drink dispenser and turning it into a real-life machine with the help of Stratasys GrabCAD Print and a Stratasys uPrint 3D Printer. In my first blog, I created a fully functional model using SOLIDWORKS. In my second blog, I created animations using motion studies SOLIDWORKS to see how the machine will move. In this blog, I demonstrate how I actually printed parts of the machine using a Stratasys 3D printer.
My original design intent was to 3D print every single component of my machine but since there are 116 components, it just didn’t make logical sense. I purchased all of the electrical components, such as the two stepper motors, Arduino, LCD screen, and coin acceptor, as well as various miscellaneous electrical components. A fair amount of the remaining components are fairly standard that I could easily find online. I also decided to purchase the nuts and bolts, the linear rails, the ball bearing bushings, the pulleys, the belt, and the drink holders.
There’s still a good amount of components left such as the entire dispense system, a pulley holder, and the body of the machine. Some of the parts were easier to cut out of wood than to use additive technologies due to their size and the simplicity of their shapes.
If I take away the wood, electronic, and metal components I am left with a bunch of custom unique parts. 3D printers are becoming prevalent in the workplace, often times, for situations just like this. The concept of creating a prototype that you can quickly and accurately create for unique components is a huge factor as to why 3D printers are so desirable.
Now that I know which parts will be to be 3D printed, let’s take a look at how this process is executed. The 3D printing process is straightforward and intuitive taking no time at all. I’m using Stratasys GrabCAD Print (an application that takes my SOLIDWORKS models and converts them into printable models). Stratasys GrabCAD Print is not only a software that prepares a print, but GrabCAD is the largest online community of professionals and engineers that share their CAD designs.
Now I will take you through the few quick steps to prepare a print. (Note: I already have Stratasys GrabCAD Print software and add-in installed and I already have my account with Fisher Unitech logged in, so the complete list of 3D printers is available every time I open the application.
The first step is to first choose an item to print. I will print the circular pusher of the dispenser that will push up against the drink holder. As soon below in the assembly highlighted in blue.
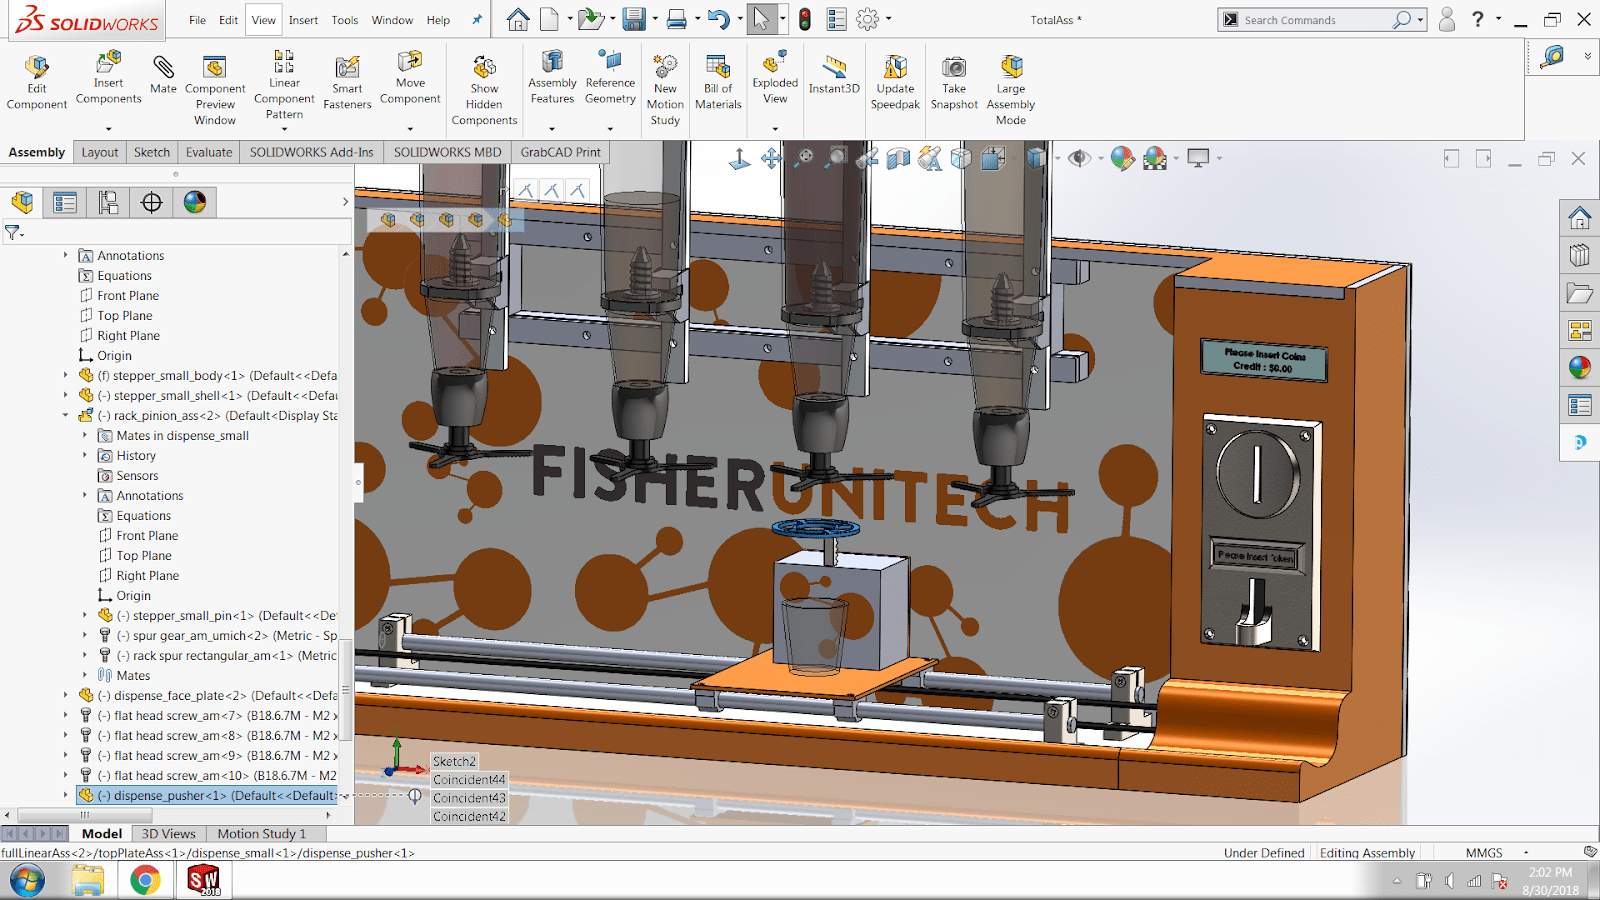
Below is the part opened in its own file.
Next, I will click on the GrabCAD Print tab in the command manager and then click print preparation. A menu will then pop up to allow the use of commands directly within SOLIDWORKS. There is even an option to print directly from here.
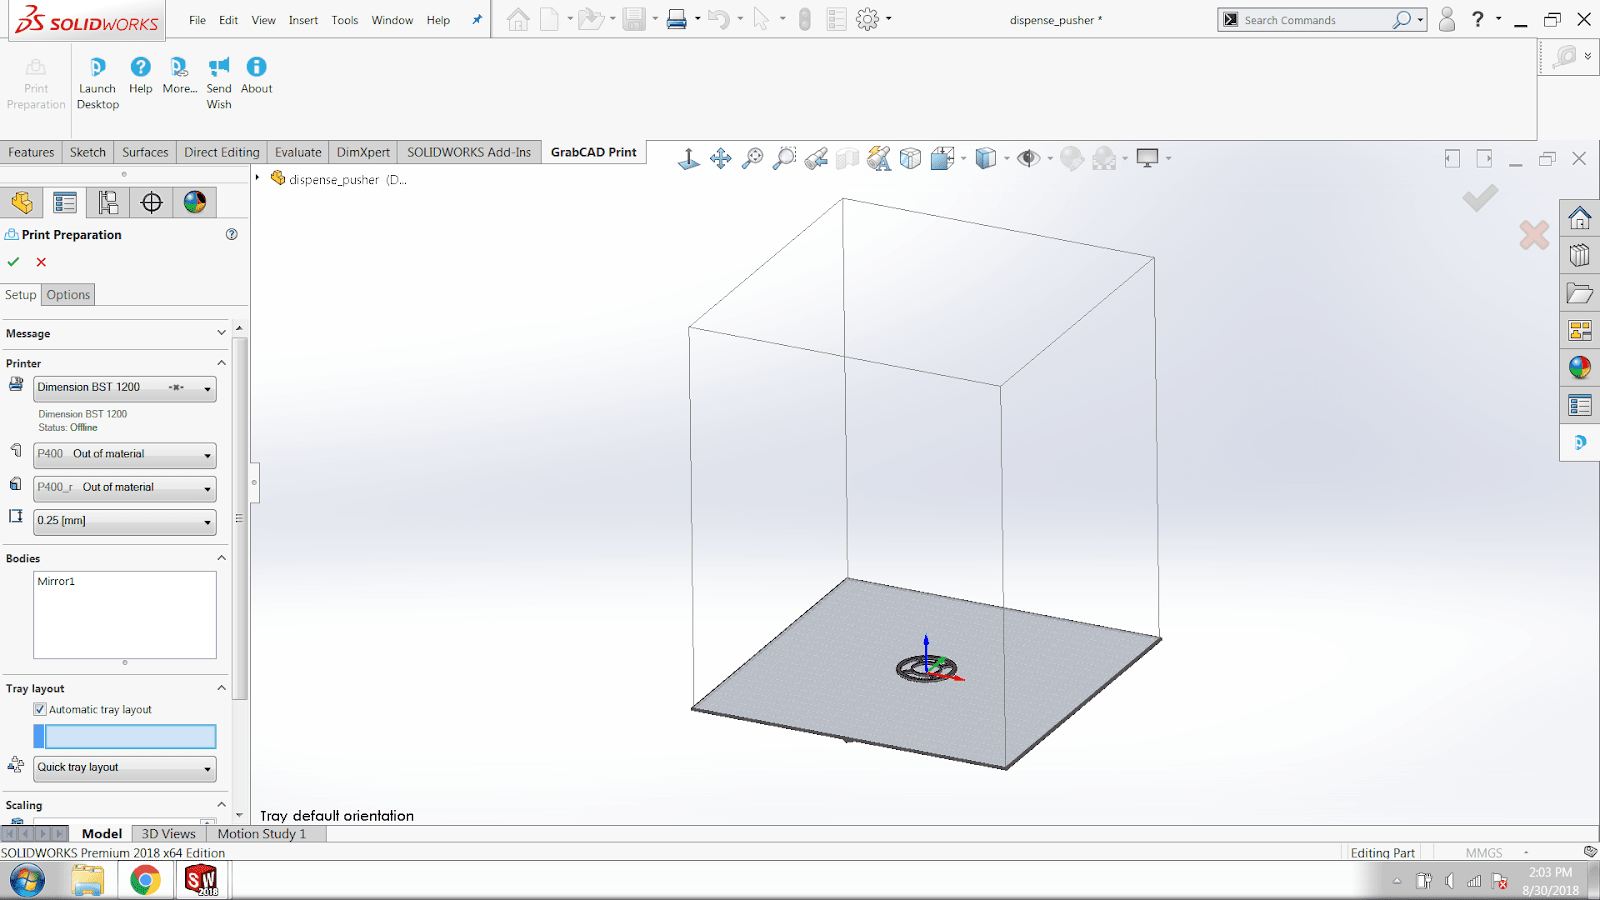
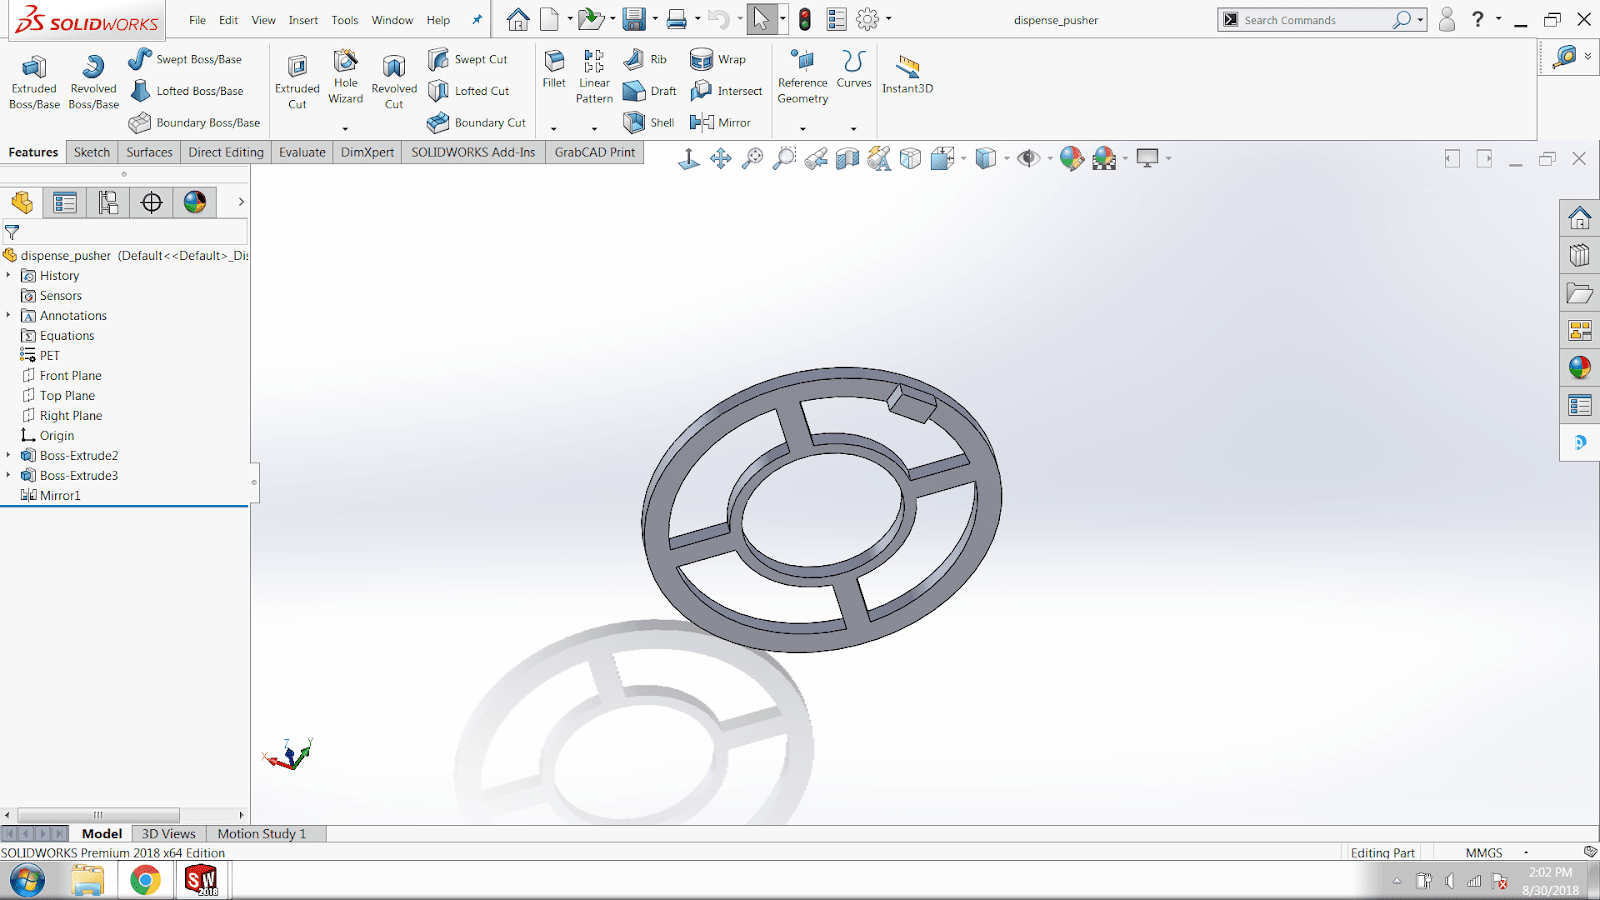
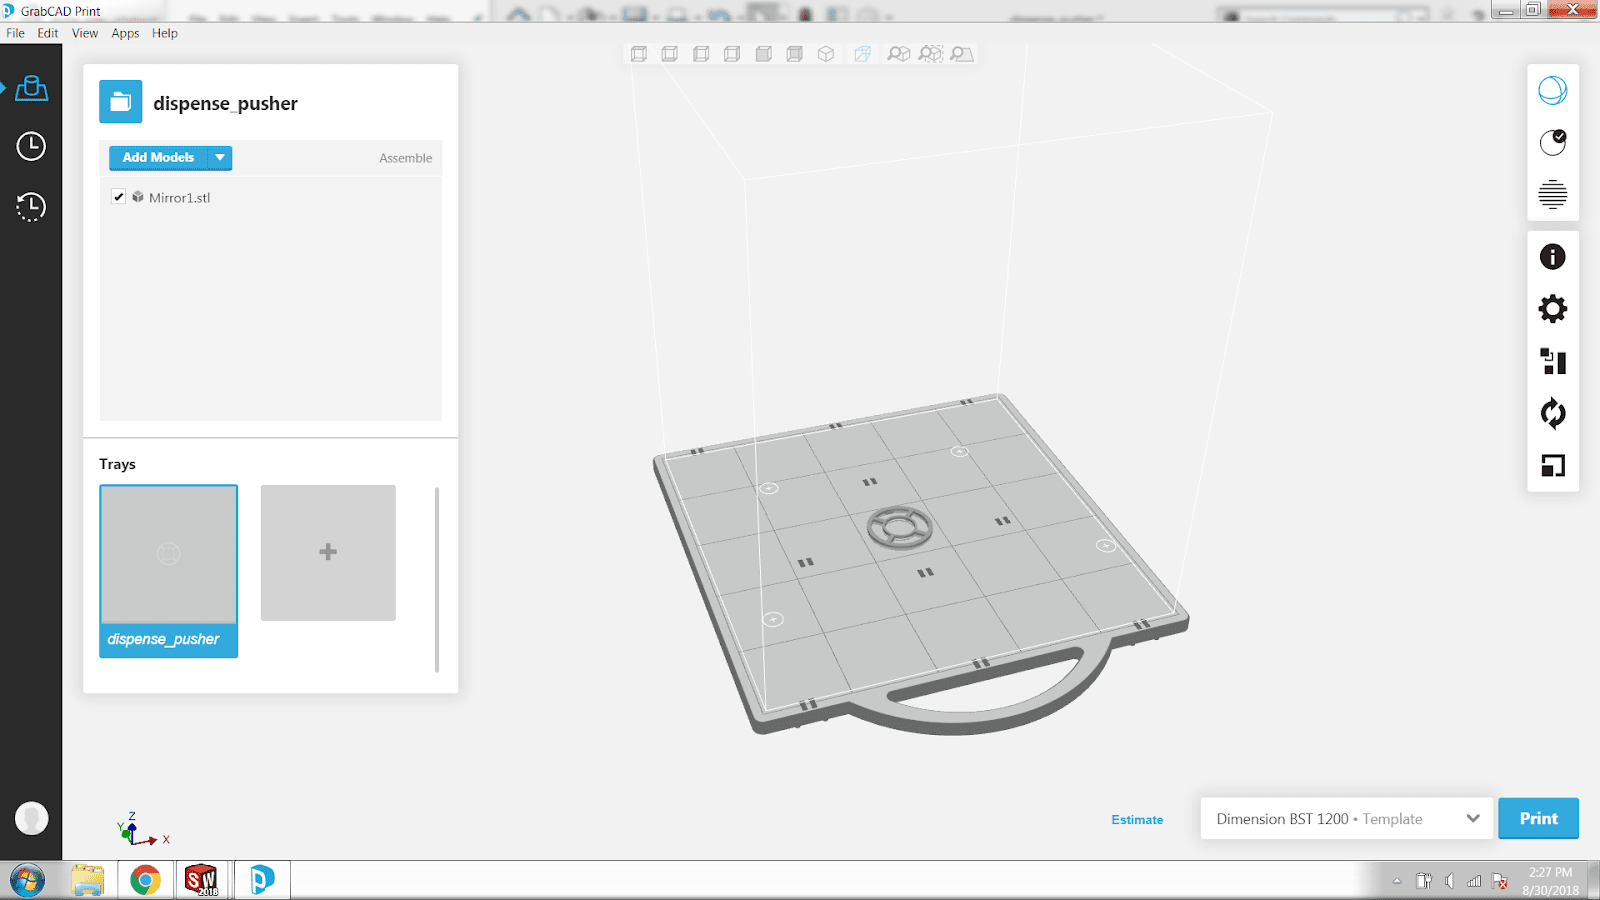
If I scroll down to the bottom of the menu, I will be asked what to do with the part. I chose to open it in GrabCAD desktop which you can see below with a representation of the tray the part will be printed on.
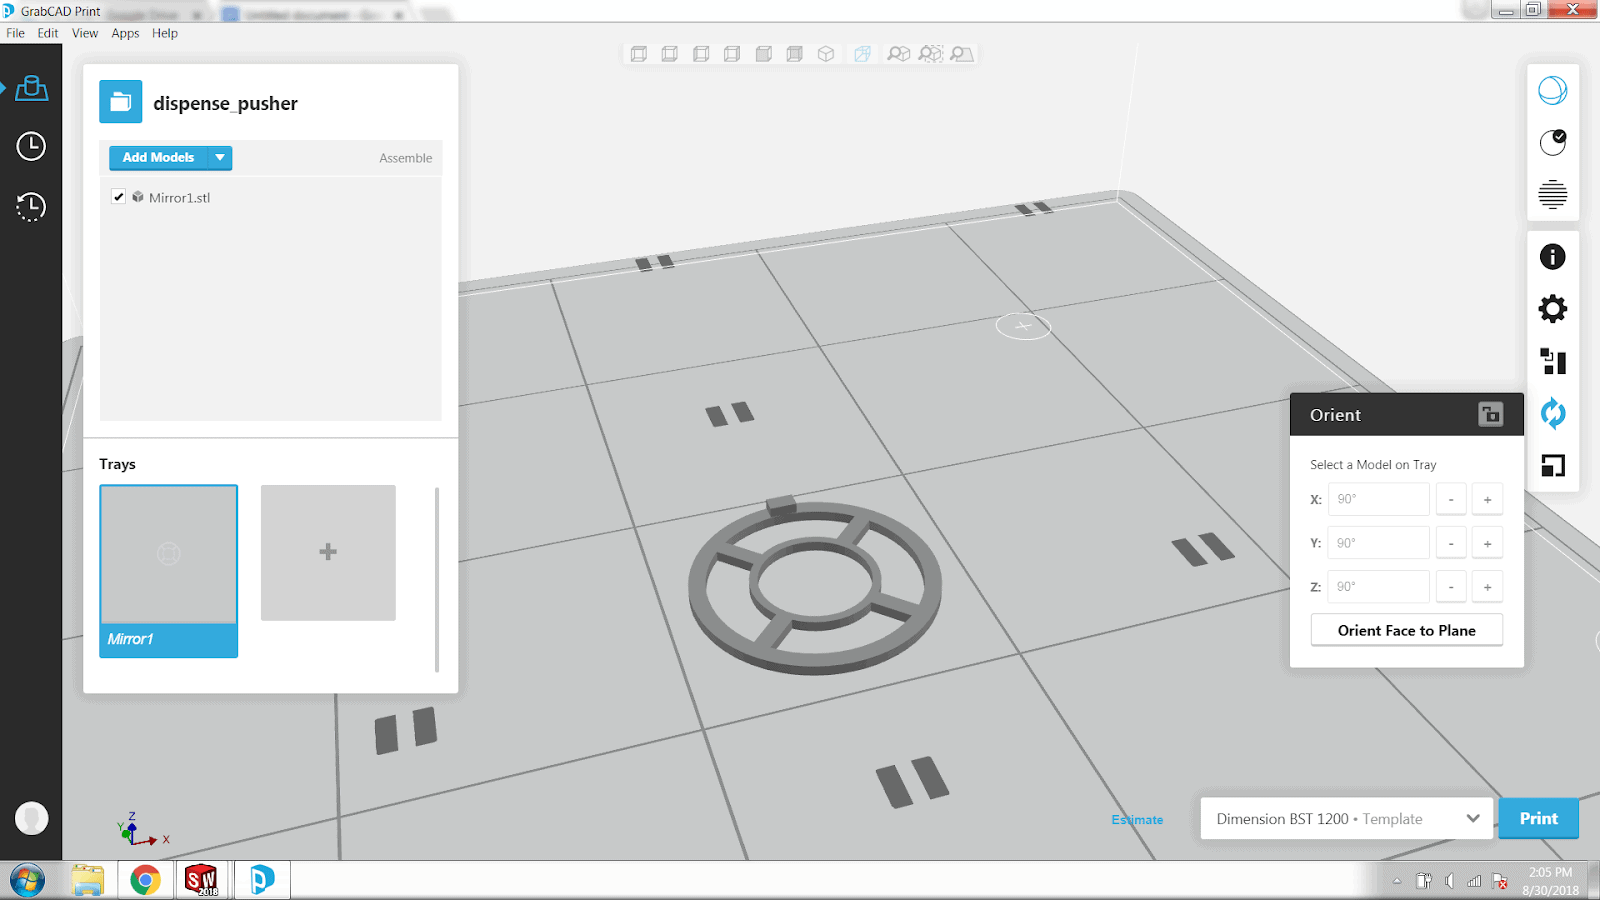
It is always smart to orientate the part to create the biggest surface on the tray. (How important is orientation to your 3D model?) It is important to minimize the number of supports needed to create the part which will help it print both faster and at a lower cost. I can click the orient tab and click the Y direction to change by 90 degrees twice and that will create the best possible way to print the part (see below).
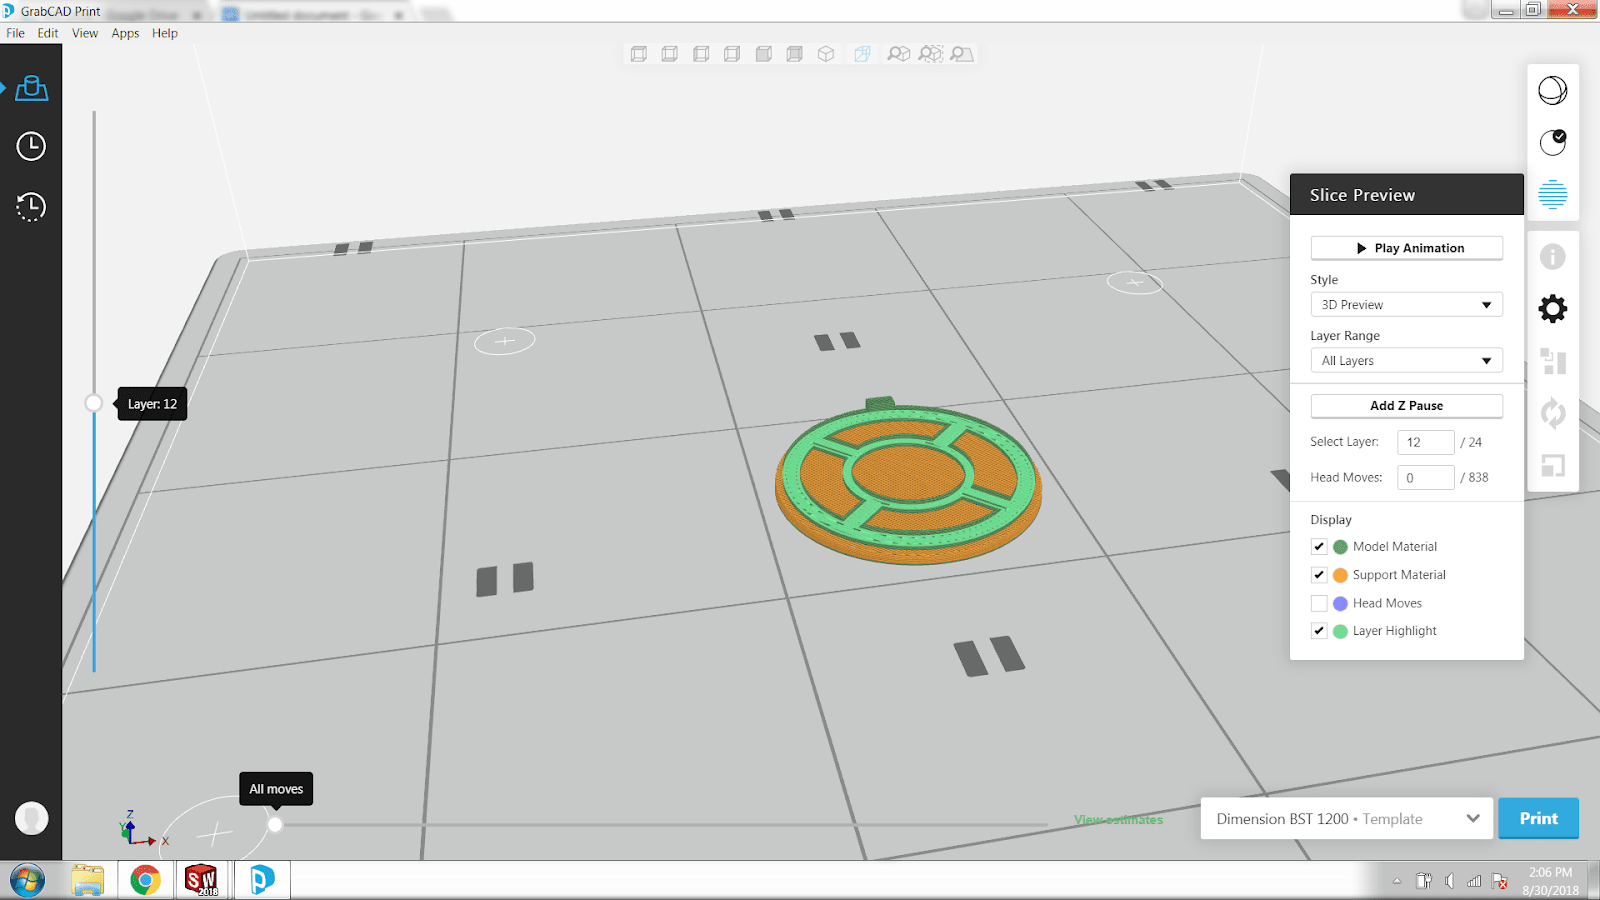
This part is ready to print but for fun, let’s take a look at the slice preview. We can watch the animation of the print, go to specific layers, or add a Z pause. Below we can see the supports are shown in orange and the model is shown in green. Looks good!
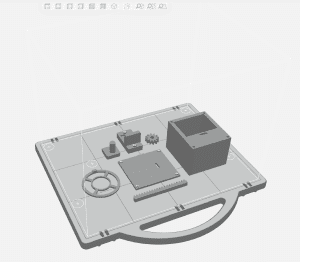
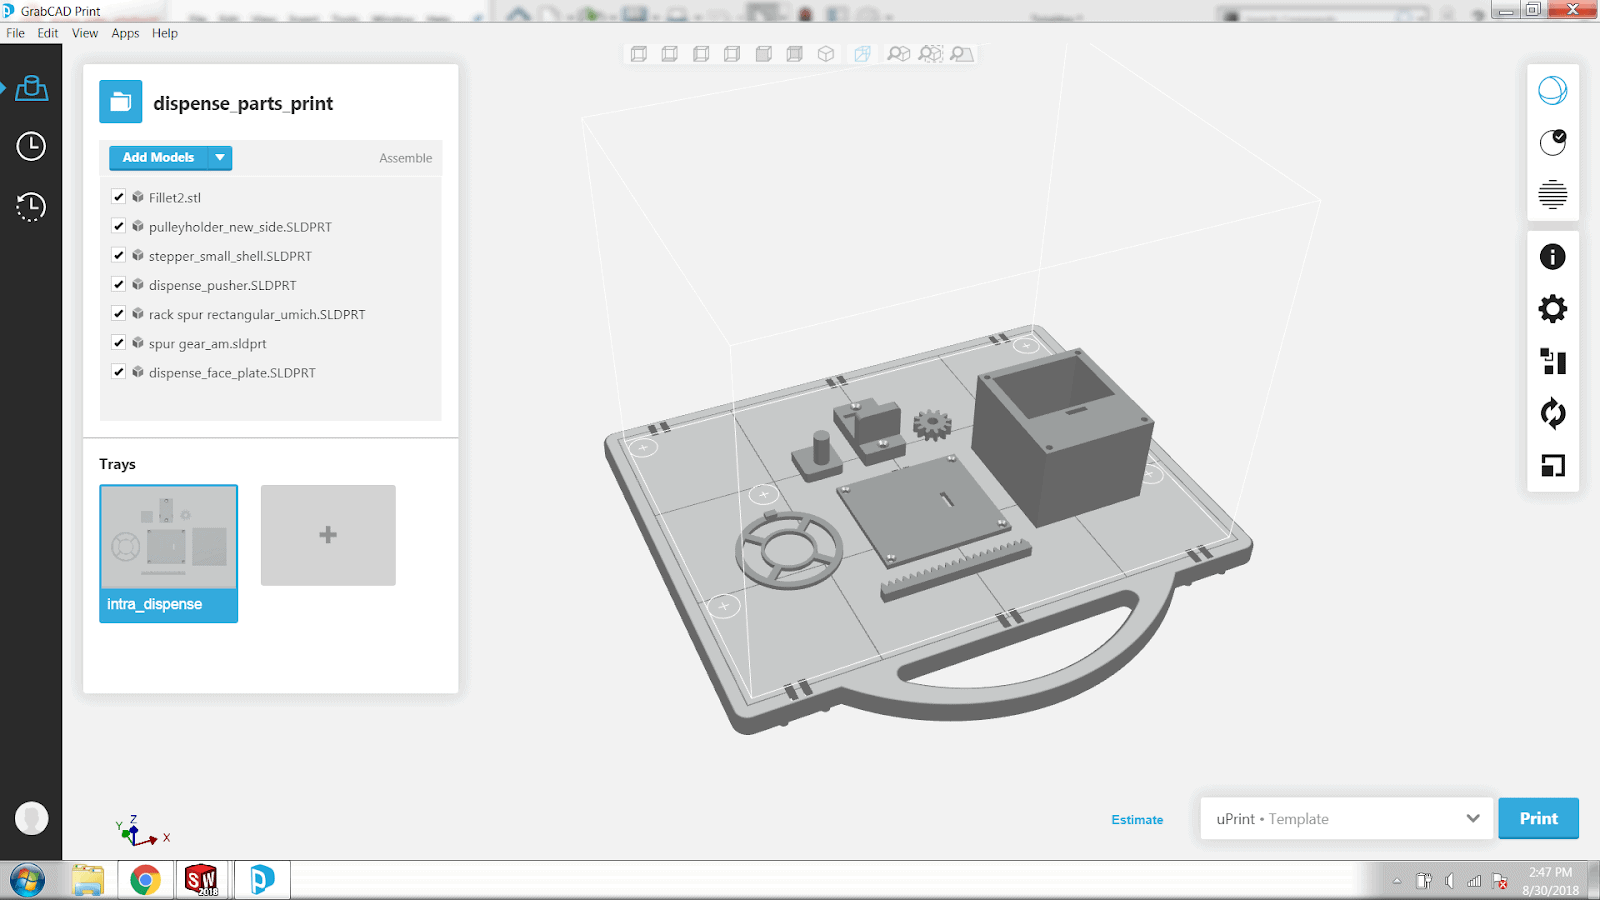
Everything is all set! It took less than ten clicks to fully set up my print for this piece. An even quicker way is to simply click “add models” in the upper left-hand corner and simply browse for a piece to print. I will use the add models button to add the rest of the parts I am printing to the tray. Below is the final tray of all the parts I am printing.
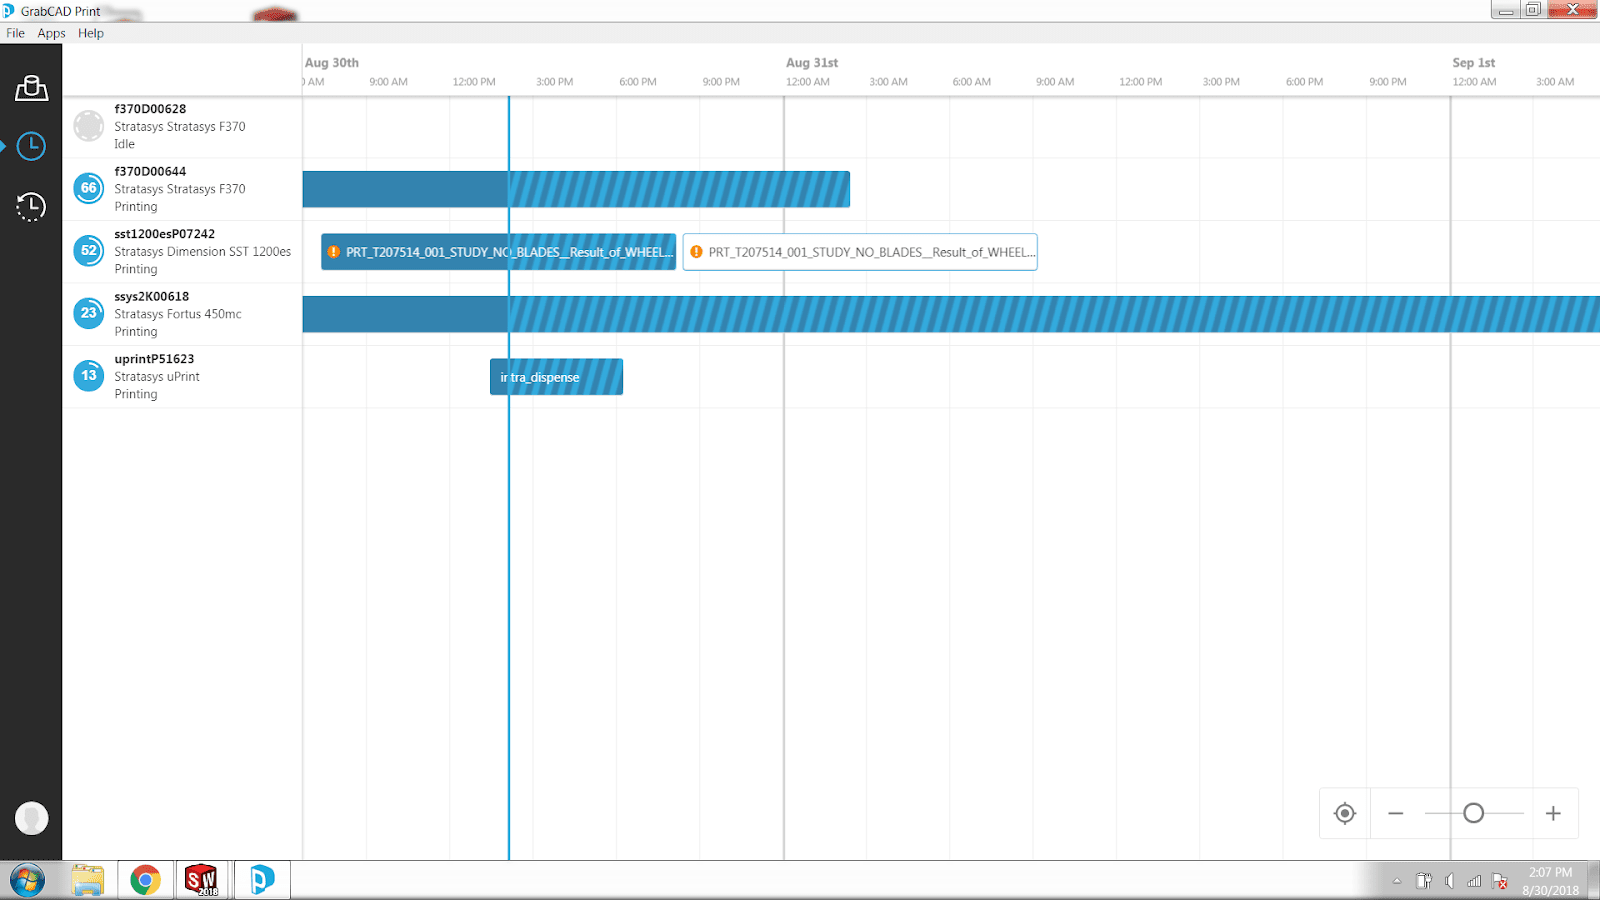
Now it’s time to send it to the 3D printer. The pieces are all relatively small so I will send my print to a Stratasys uPrint 3 printer. The time until completion is 4 hours 48 minutes. Stratasys GrabCAD Print has the functionality to show the schedule of prints in the application. My print is the last on the list and as you can see, quite shorter than other prints in the queue.
The print is now complete! Here we have the tray with all seven parts that will be assembled to create the dispensing system as well as a custom pulley holder. In the left image, we have all the pieces on the tray directly after the print. The right image shows how after we popped them off of the tray, the remaining supports. A couple of the pieces have supports that must go into a bath to dissolve them.
Here are some of the final pieces after they have been left in the bath for a few hours. All of the supports have been dissolved.
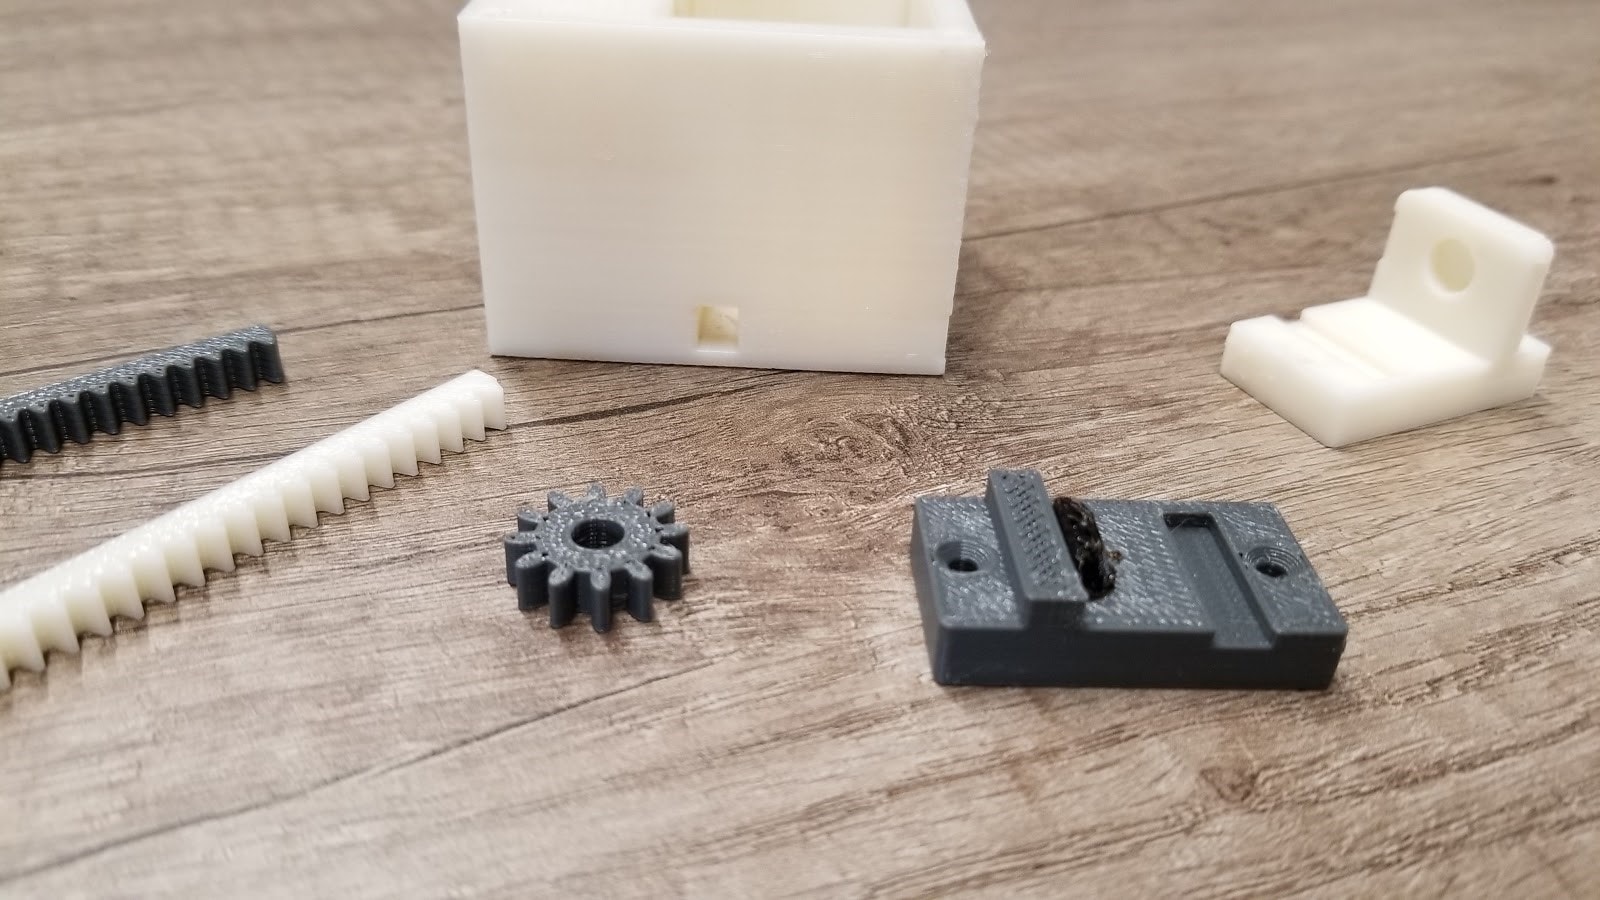
I now have all the components I need to complete the machine. The linear, dispensing mechanism, drink holder, and coin assemblies are complete. All that remains is to tie the individual assemblies together both physically and with the proper coding and wiring.
Not too long ago all I had were a few sketches. Now, thanks to SOLIDWORKS and a uPrint Stratasys 3D printer, I brought my idea to life. Now I have a 3D computer model, a simulated animation, and 3D printed parts.
This project really proves the power of computer-aided design tools and all they can create. These remarkable tools are changing the world and innovation as we know it and will not stop until they completely revolutionize the way we design.

Related Articles
SOLIDWORKS Motion Analysis vs. SOLIDWORKS Mate Controller
SOLIDWORKS Designs: Fully Functional Drink Dispenser
Design a Custom 3D Printed Nameplate using SOLIDWORKS
When uPrint You Win. How the uPrint Will Change the Way You Design
About the Author
 Madison Bryce is a sophomore at the University of Michigan. She is studying mechanical engineering with a minor in computer science. Madison has four years of CAD experience and joined the Fisher Unitech team to share and grow this knowledge. Madison is a Certified SOLIDWORKS Associate (CSWA), Certified SOLIDWORKS Professional (CSWP), and a Certified DriveWorksXpress Associate. Madison’s dream is to one day become a roller coaster engineer. She is currently in a theme park engineering group at the University of Michigan.