Tips for New SOLIDWORKS Users Part 1: Sketch Mode
Hello and welcome to the wonderful world of SOLIDWORKS. I’m excited to be your guide. I have been using SOLIDWORKS CAD software for 18 years, since my first training class back in 1998. I began teaching the software to both new and experienced students back in 2001. Throughout the years I have found that there are three great tips to help new SOLIDWORKS CAD software users get off on the right foot:
- Always start your sketches the same way – and know when you are in sketch mode
- Keep your sketches simple
- Fully define, every time
This blog is the first in a series of three that will provide details on each tip. So let’s get started!
The first tip is to “Always start your sketches the same way – and know when you are in sketch mode”. Let’s tackle this tip in reverse order, since the latter subject is much easier to judge.
Know when you are in sketch mode
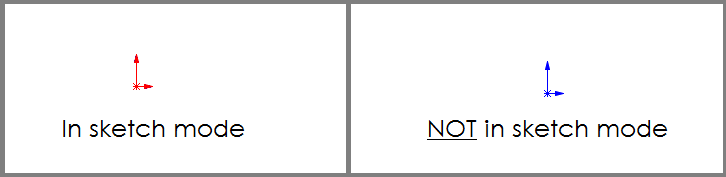
One of the first lessons we teach to new users is how to work in 2D sketch mode. Since we spend so much time in 2D sketch mode, it’s important to know when you are, or when you are not, working in this mode. Putting it simply: If you have a red sketch origin it means that you are in sketch mode.
But why does this matter? And what does this even mean? To answer these questions let’s talk about the four modes available when working in SOLIDWORKS. The first three are fairly obvious and intuitive, since they are matched to the three file types in SOLIDWORKS: Parts, Assemblies and Drawings.
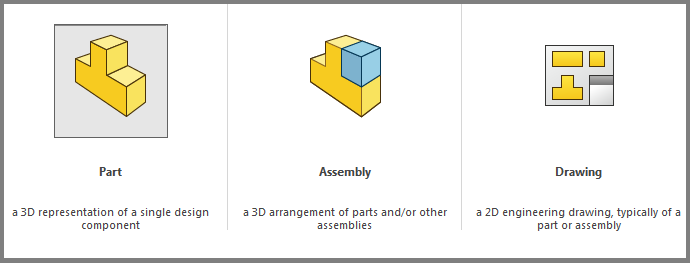
Each of these three modes has specific qualities and each has its own set of tools that users will take advantage of. When working in part mode users can create sweep and loft features, but users cannot do this in assembly or drawing mode. When in assembly mode users can add MATES between components, but you cannot add MATES when working in drawings mode. When working in drawings mode users can create detail or cropped views, but users cannot do this when working in PART mode.
The examples go on and on, but the lesson here is that depending on which mode you are working in you will have certain tools that are available, and certain tools that are not.
There is a fourth mode available in the SOLIDWORKS software, known as sketch mode. One of the more frustrating situations I see my students run into (when getting started in the SOLIDWORKS software) is understanding when they are in sketch mode, and when they are not.
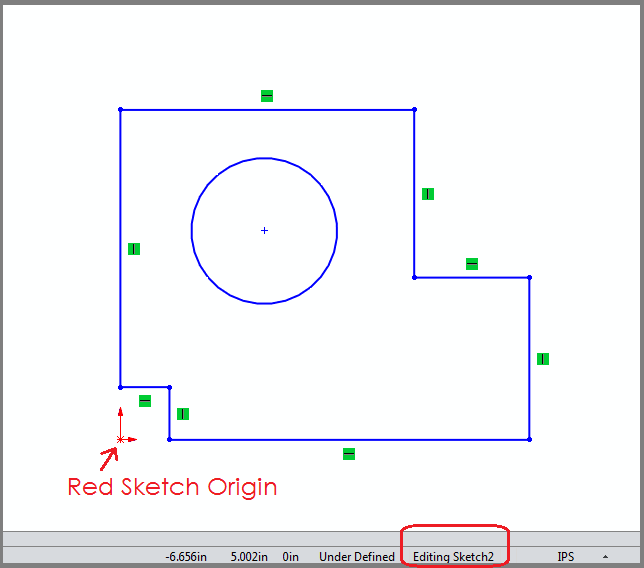
There are several indicators that you are working in sketch mode: The origin will be red; Your sketch geometry will be blue or black; There will an indication in the status bar that you are “Editing Sketch”; and several other indicators.
The important thing to remember is this basic concept: Depending on which mode you are working in, certain tools will or will not be available within the software. In the case of sketch mode you will only be able to add dimensions or create new sketch lines and circles when you are IN sketch mode. Otherwise these commands will not function as expected.
And of course, remember that a Red Origin means that you are in sketch mode, and a blue origin means that you are not.
Always start your sketches the same way
Now that we have the basics out of the way, let’s get to the heart of the issue: How to begin a new sketch in SOLIDWORKS. Although there are many ways to begin a new sketch, the following three step process has always worked for me, and I teach it to all of my SOLIDWORKS students:
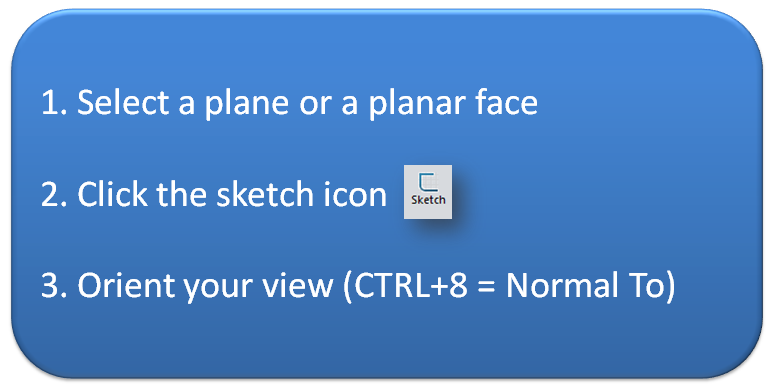
The three step process shown above should become a mantra to any new user of the SOLIDWORKS software. I encourage you to write it down and keep it next to your monitor, so that you can develop a consistent workflow. With so many options (for advanced users) to begin a sketch, the best way to get started can be a bit confusing. But don’t worry, there is no need to get frustrated. Simply remember these three steps:
- Select a plane or a planar Face – This can be done with a simple LEFT CLICK on your mouse. You can either select a plane from the feature tree (such as the FRONT, TOP or RIGHT planes), or you can left click on a plane or planar face from your model, out in the graphics area.
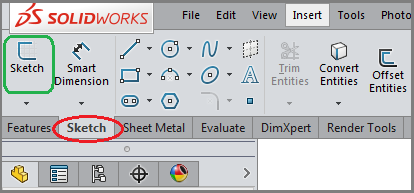
- Click the sketch icon – The sketch icon is located on the sketch toolbar. Keep in mind that the SOLIDWORKS command manager (the toolbar at the top of the screen) contains both a tab and a button with the label “Sketch”. To begin a new sketch, you must select the button (or “icon”).
Once the sketch icon is selected, you will be placed in 2D sketch mode on the selected plane or planar face (from step 1).
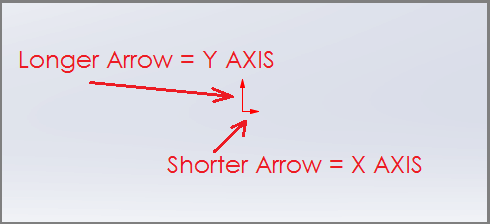
- Orient your view – The final step in the three step process is to change your viewport so that you are looking at the sketch plane from the desired perspective. Most of the time you want to be looking dead on at the sketch, with the Y axis of the sketch pointing up and the X axis of the sketch pointing to the right. This is what is known as a “Normal To” view, and it can be initiated by click the shortcut “CTRL+8”.
Once this three step process (Select a plane, Click the sketch icon, Orient your view) is complete, you should see the red sketch icon with the longer arrow pointing up and the shorter arrow pointing to the right.
Practice, practice and more practice
As I mentioned earlier, I try to get my students to practice this process until the three steps become a mantra. I still find myself, even after 18 years, mumbling this three step process to myself anytime I begin a new sketch.
One of the first tips I teach to newer users of the software is to always begin your sketches the same way, and to know when you are in (or not in) sketch mode. By following these steps and looking for indicators that you are working in sketch mode, you will become very comfortable knowing when you are in or out of sketch mode. This will make the process of getting started in the SOLIDWORKS software a much smoother one, and in no time you will transition from beginner to advanced!
Be sure to come back for our next post where Toby will review another tip for users who are just getting started in the SOLIDWORKS software.
Related Articles: