Bringing Flat Files into SOLIDWORKS to Create Models (Part 2): Pictures
This is the second part to a blog I wrote on how to bring flat files into SOLIDWORKS. In my first blog, I showed how to bring in drawings and DXF files. In this blog, I am going to show you how to bring in pictures.
If you’re a conceptual designer, just mocking drawings up on a whiteboard or napkin sketch, you may be wondering if it is possible to bring those 2D sketches or pictures into SOLIDWORKS. With the ability to directly import and size a picture, we are able to bring in our sketch-up and move through the process of part creation. Let’s get started.
Step 1: Open up a new sketch on a plane.
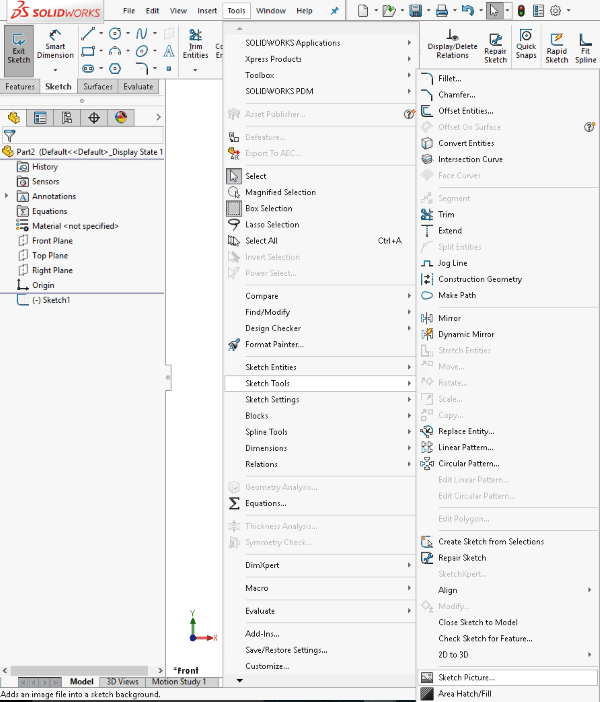
Step 2: Go to Tools >> Sketch Tools >> Sketch Picture.
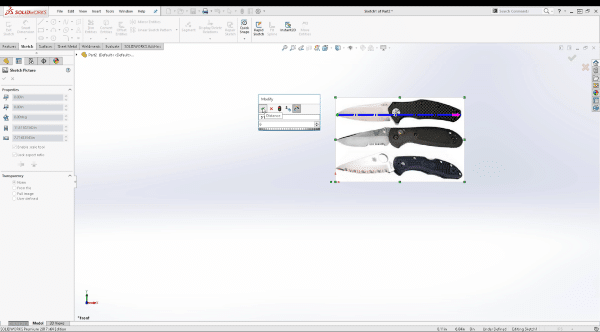
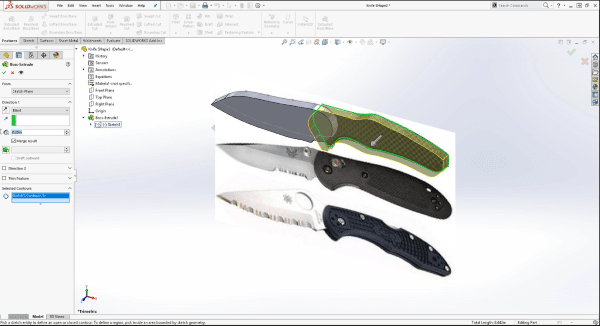
Step 3: Select picture and import in.
Step 4: Using the scale tool, line up an aspect of your picture you know a dimension for or roughly know the size you would like it to be.
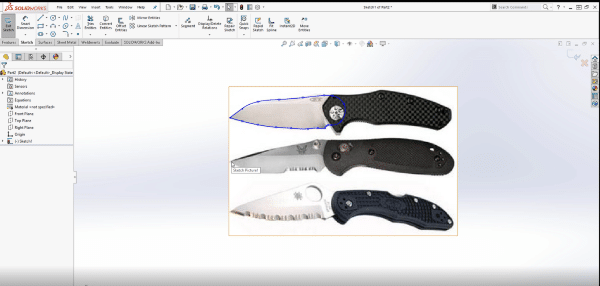
Step 5: Begin to sketch over the aspect of your picture you would like to create, using lines, splines, or other sketch entities to help get your part outline.
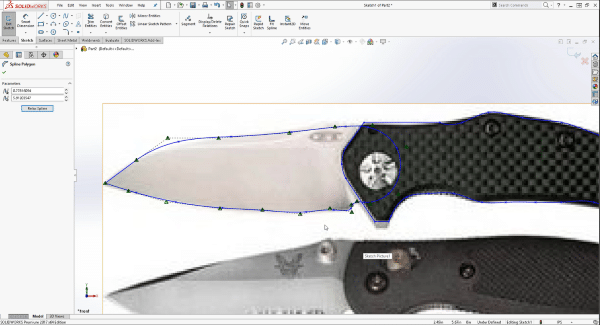
Step 6: If you have two or more separate extrudes, you can continue to sketch and trace the outlines. Again, with splines we can accurately trace edges and use the spline handles to contour tightly to anything we need.
Step 7: One by one you are now able to extrude the individual pieces you need allowing you to also save them off as individual parts to later be brought into an assembly for mating.
This is just one way this process can be accomplished using SOLIDWORKS. I hope you found this tip helpful. You can find more tips & tricks listed below. You can also view a video demonstration of this process here.
Learn More
Have more questions? Join us for “Straight from Support” where our experts answer the most frequently asked questions in real-time along with any other questions you may have during the Q&A session. Register here.
More tips & tricks
Using a CAD Data Card for State Changes in SOLIDWORKS PDM
The Power and Value of the SOLIDWORKS Hole Wizard
Removing Padlocks in the SOLIDWORKS Customer Portal
Don’t forget to subscribe

About the Author
 David Janicki is an Application Engineer based out of office in Grand Rapids, MI. He is a proud graduate of Western Michigan University, where he received his Bachelors in Engineering Management. Prior to joining Fisher Unitech in November 2015, David worked in various industries from Automotive and Sheet Metal to Electronic RFID’s. A large portion of his background is in the Continuous Improvement industry and still continues to be his passion, helping customers use the software more effectively both on a user and company level.