How to Change Material in SOLIDWORKS: Customized and Standard
 Welcome back to my how-to blog series, where I’ve been discussing common questions from new SOLIDWORKS users. In my first blog, I showed how to make a screw in SOLIDWORKS, in my second blog we took that same model and I demonstrated some tips and tricks while making a helix, and in my third blog, I showed how to make basic and custom threads in SOLIDWORKS. Today we’re going to talk about how to change material in SOLIDWORKS and I have some useful hacks on how to make them customizable to your specifications. Let’s get started.
Changing Material in SOLIDWORKS: Standard
The creation of material in SOLIDWORKS is something I’ve talked about in a previous tech tip, and and I’ll include that video below. For today’s example, I just want to show how to change material in SOLIDWORKS using the hex cap screw that we’ve been modeling in previous blogs.
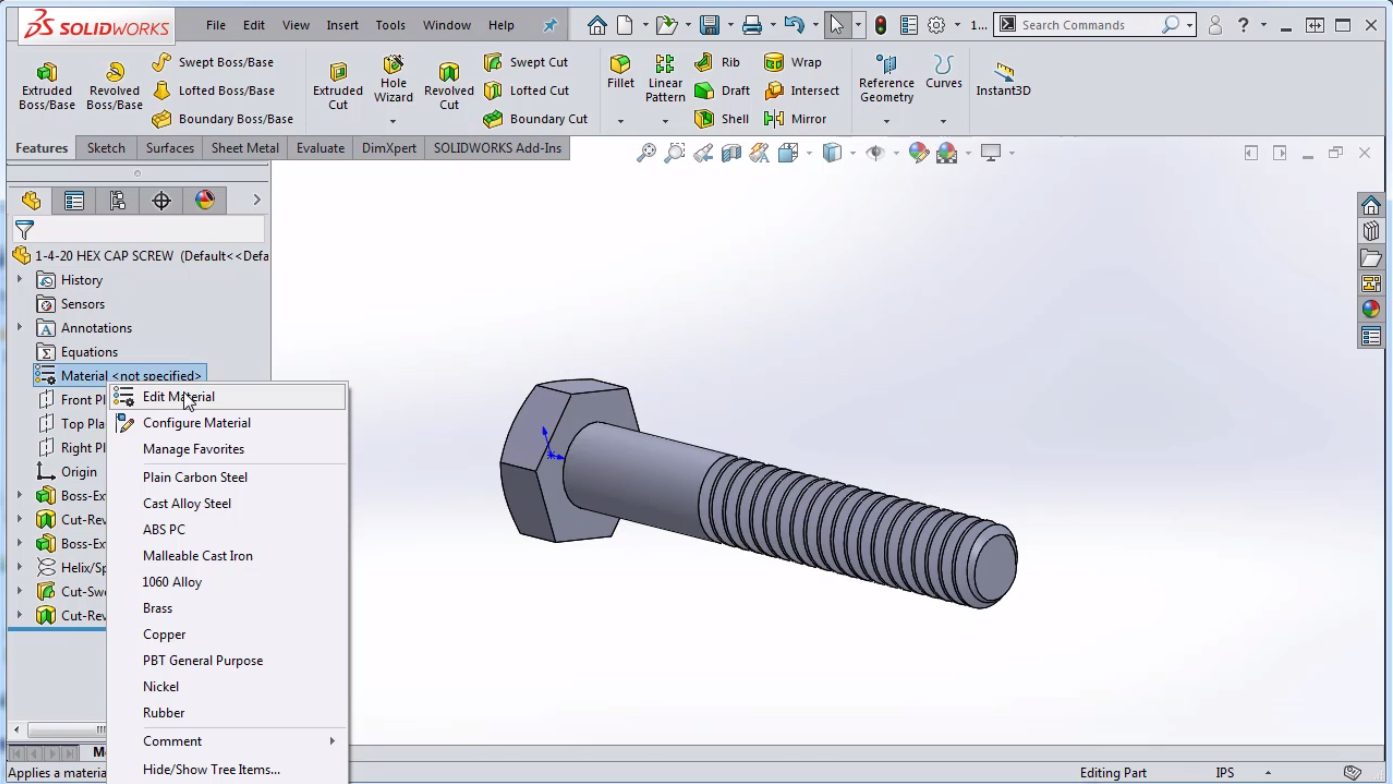
Changing material in SOLIDWORKS is easy – all you need to do is go to Features > Material <not specified> right click, and select Edit Material.
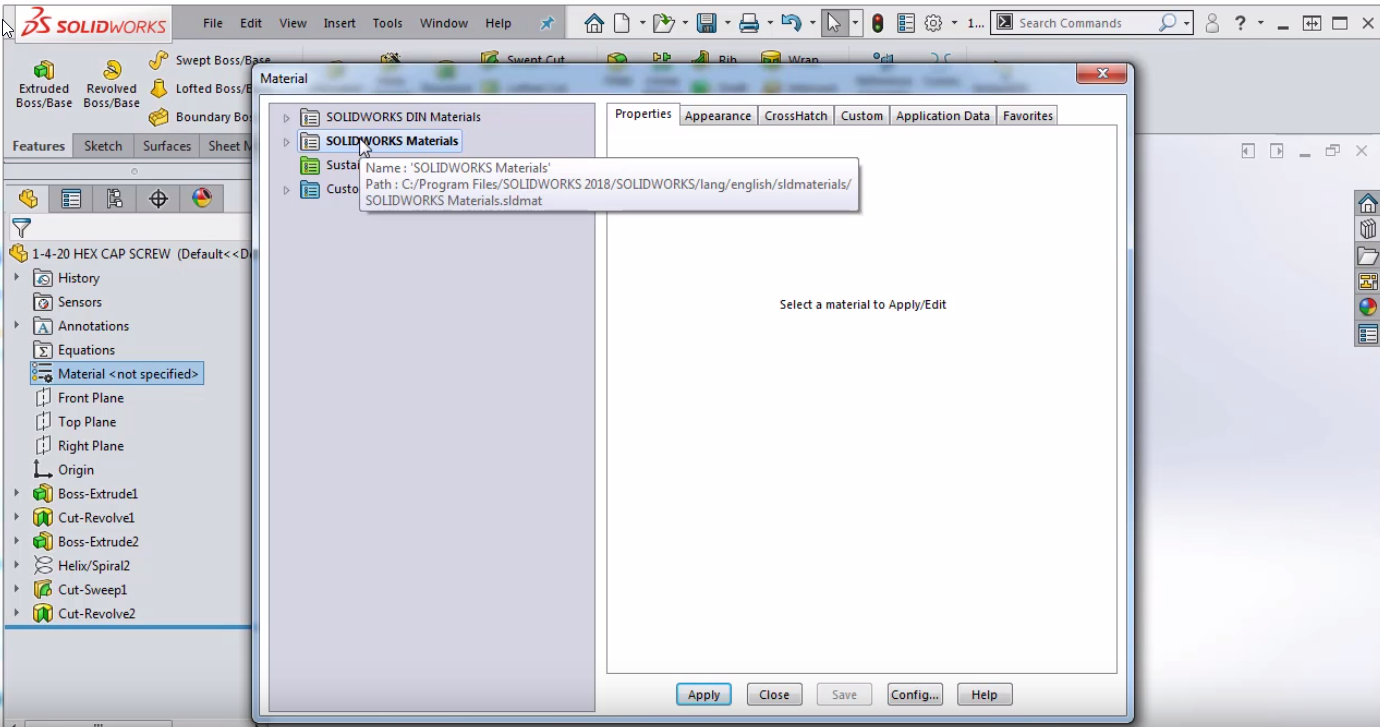
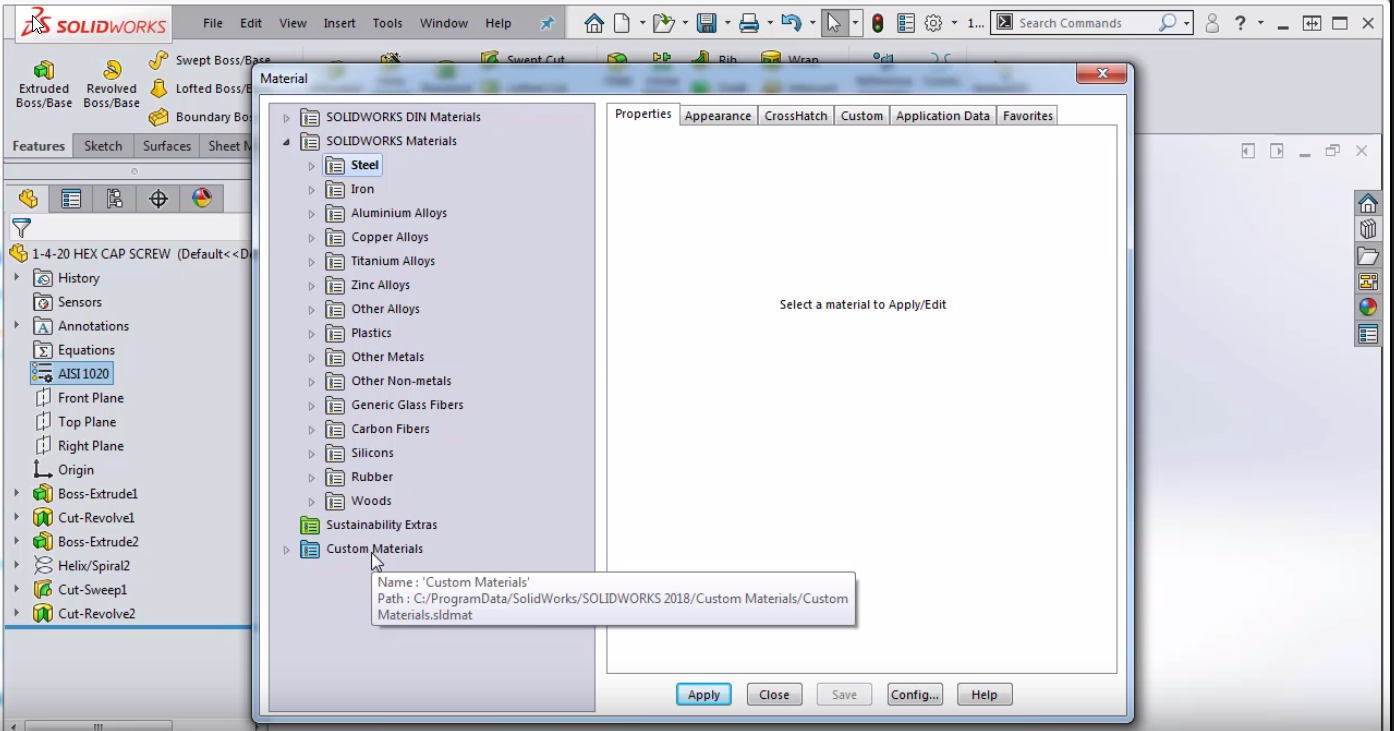
The material database provided by SOLIDWORKS will then pop up. If you hold your mouse over those materials, a box appears that tells you where that database is located.
For example, I can go in and say I want my model to be made out of steel and made out of AISI 1020 and hit apply. SOLIDWORKS will then take on all the material attributes of that material.
A common question I get is if there is a way to change the material attributes to make them customized or to make them per your own specifications.
Changing Material in SOLIDWORKS: Customized
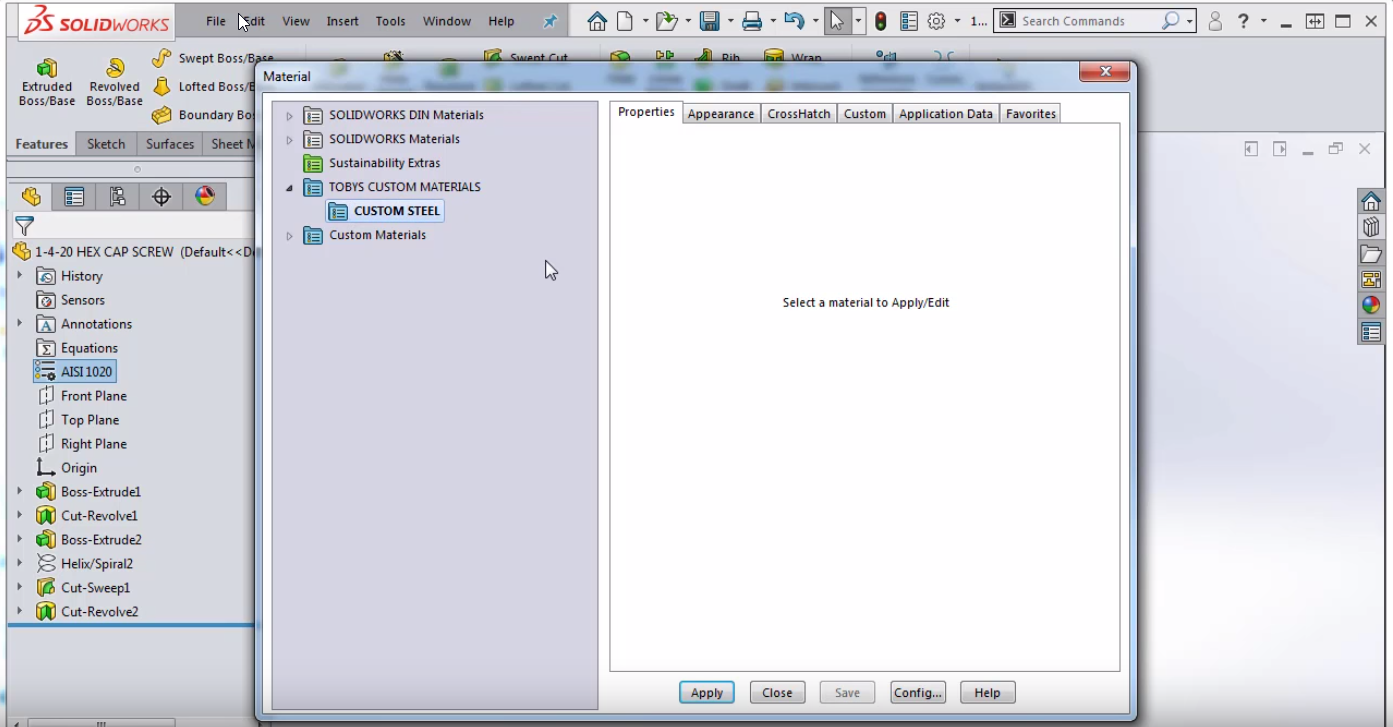
One way I can accomplish this I can right mouse button over my AISI 1020 and choose edit material. Down at the bottom, there is an option called Custom Materials which is in its own database in a different location.
We can also create our own new custom material database by creating a new library (right-clicking in the grey area). I can then go to my Local Disk (C:) drive, create a New Folder, and give it a unique name. Once I go into that folder, I’m going to give the material database a unique name as well and save.
So now you can see that in the SOLIDWORKS interface there is your new directory. You can then right-click on your new directory and click New Category. In my example, I’ll call the new category Custom Steel.
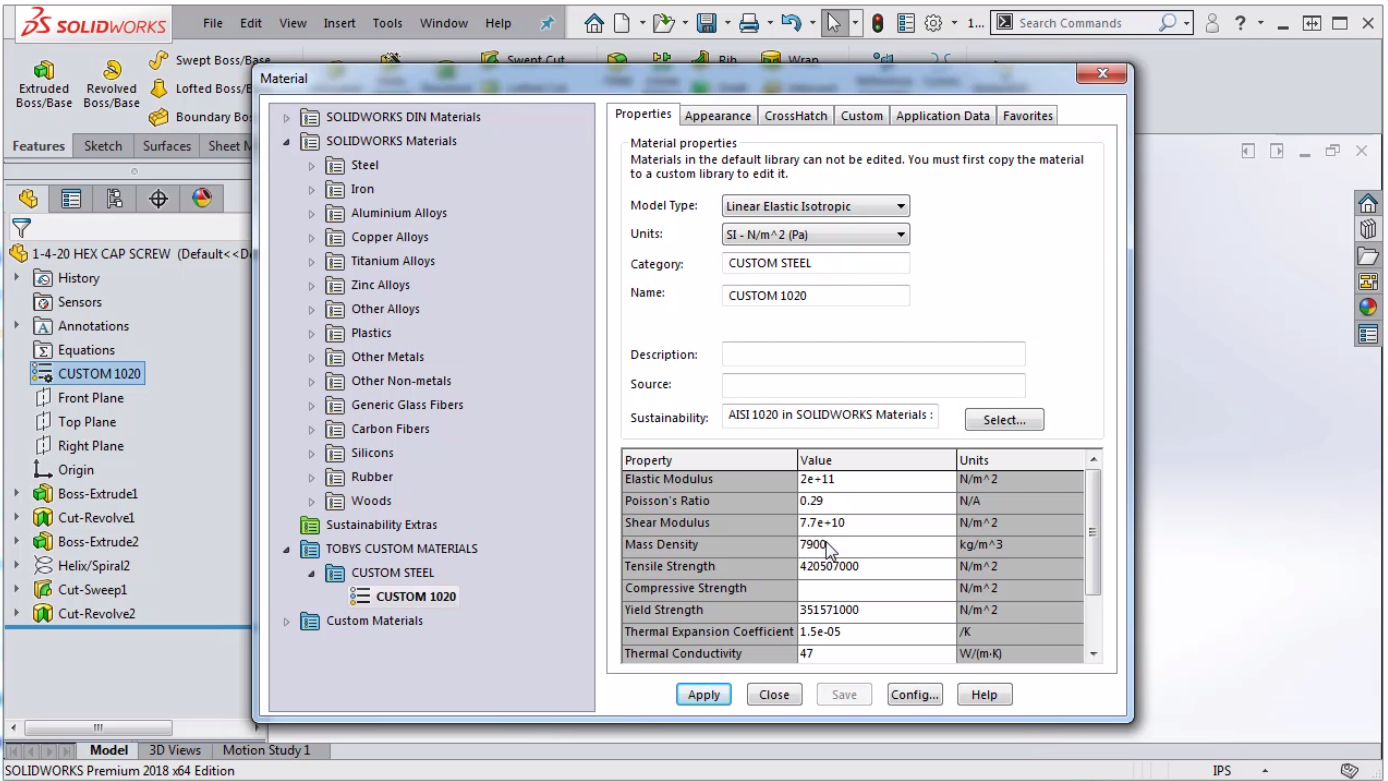
I can then go into the SOLIDWORKS materials and look at the AISI 1020. The fields here can’t be edited because they are all greyed out so I’m going to right mouse button on AISI 1020 > Copy and right mouse button over my Custom Steel folder and hit Paste. Now I have a new custom material that I can rename Custom 1020 an I can say Apply. In my tree, it will now say Custom 1020 and I can now adjust the material properties.
I hope this answered your question on how to apply a new material in SOLIDWORKS OR how to change the material.
Related Articles
How to Make a Screw in SOLIDWORKS
How to Make a Helix in SOLIDWORKS
How to Make Threads in SOLIDWORKS
About the Author
 Toby Schnaars began using the SOLIDWORKS Software on the ’98 plus release, in October of 1998. Toby is currently a Technical Sales Manager at Dassault Systèmes SOLIDWORKS. He has fielded over 10,000 tech support cases and been the head instructor for over 200 SOLIDWORKS training classes. Toby is a regular presenter at users groups, technical summits, and SOLIDWORKS world. In 2003, in Orlando, FL, Toby won first place in SOLIDWORKS MODEL MANIA a modeling contest based on speed and accuracy.