SOLIDWORKS 2021 Install Guide - Part 2 Installing or Upgrading the SolidNetwork License Manager (SNL)
If you are running the network version of SOLIDWORKS, every new version requires the license manager to be upgraded. The newest version that the clients are using will be the version that the SNL manger will need to be upgraded to. The license manager is backwards compatible with all older version of SOLIDWORKS along with PDM licenses.
The update is straight forward and takes little time to accomplish. There are a few things to watch out for.
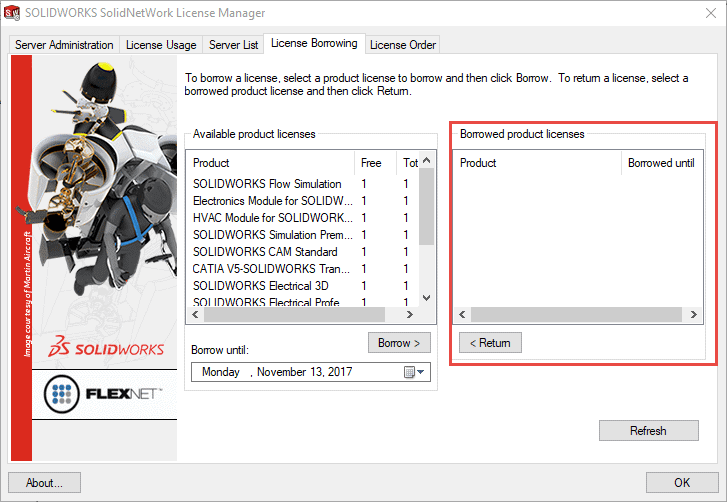
The first step you want to do, is to make sure that there are no borrowed licenses out. If the server is upgraded when a borrowed license is pulled, the client will run into errors when trying to return the license with the new license manager.
Now with all borrowed licenses returned, the next step is to de-activate the license. If this is not done, you may have problems re-activating the license even though it is on the same computer.
Select the “Server Administration” tab, then select the “Modify” button.
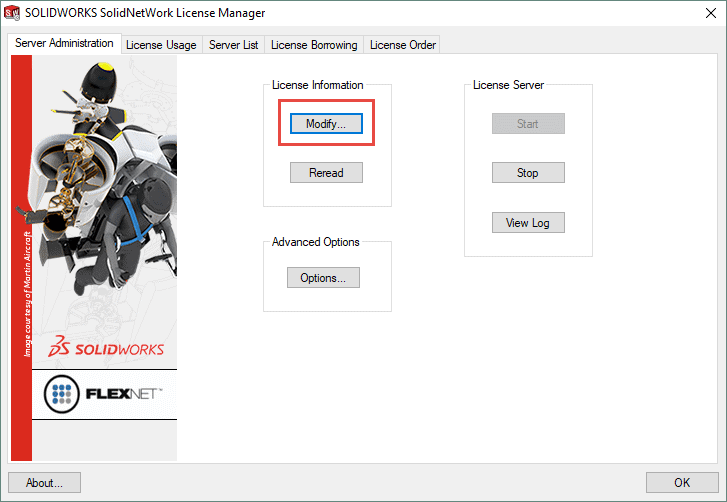
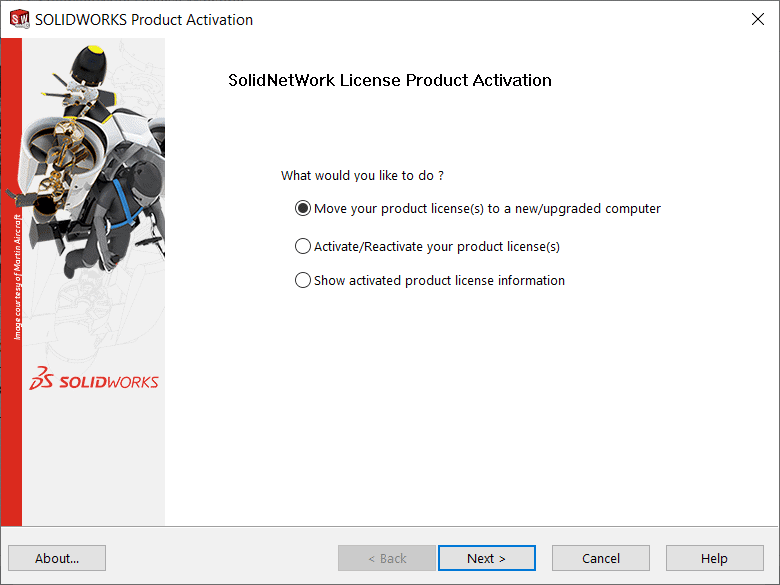
Once selected, check the option to “Move your product licenses to a new/upgrade computer”.
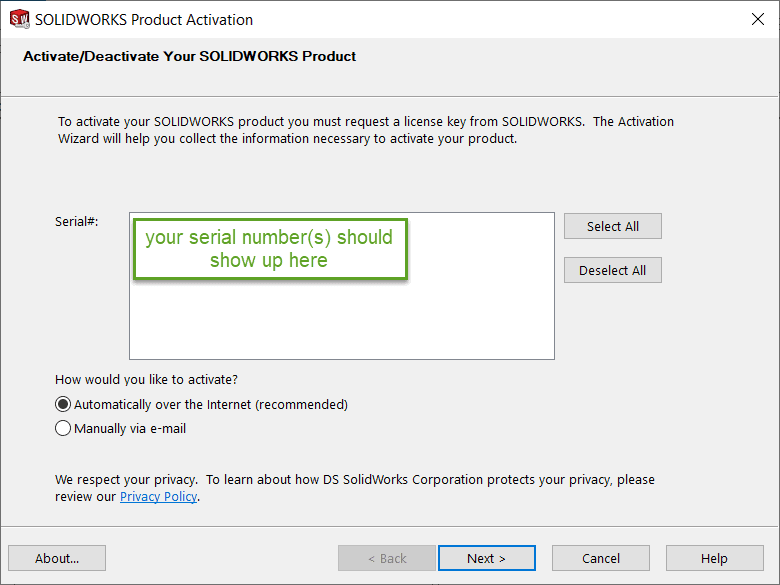
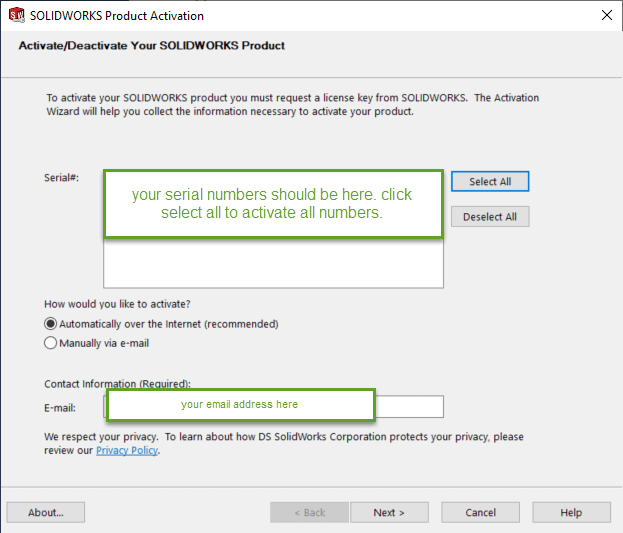
If you have more than 1 serial number, select the “Select All” option.
Once the license has been de-activated, you can then procced to the upgrade.
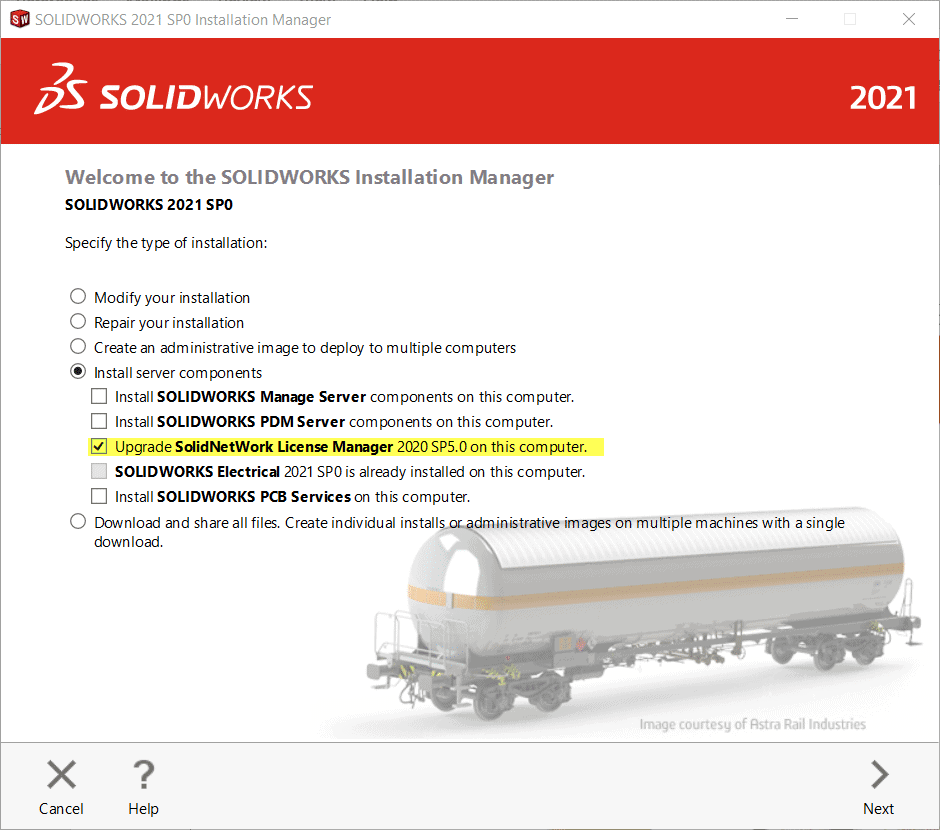
You can use the same media/download as you would use for the clients, however you will want to select “Server Products” from the menu. With the license manager being previously installed. It should default to this option. You will get a notice about a pending reboot, but you will see this always by default even if you have rebooted. It is recommended to reboot before the install, but it is not required.
For a NEW install of the SNL manager follow these instructions

Fill in your serial number and click next. Check the terms acceptance box and then download and install.

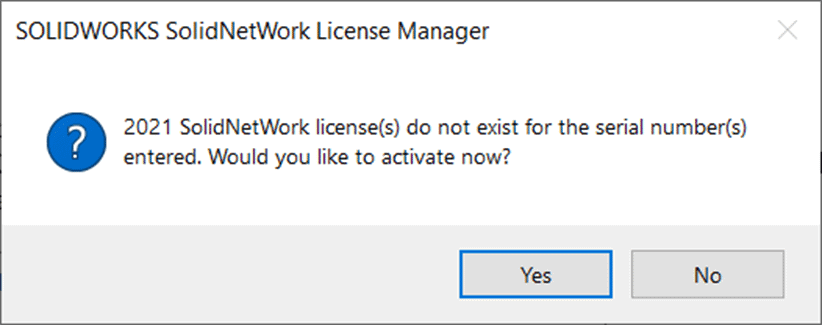
Launch the SNL manager from the Windows Start menu, it will be located under SOLIDWORKS 2021 Tools, SolidNetwork License Manager Server. Then you will see this message. Go ahead and click yes.

Verify the information on the next screen and click next.

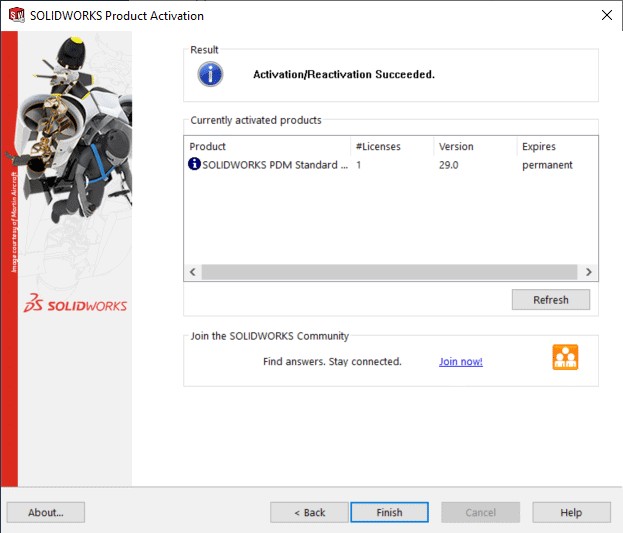
Select your serial number(s), verify the information on this last page, click next and you’re done!
For UPDATING a SNL manager follow these instructions:
Be sure to return all borrowed licenses as described at the beginning of this blog. Start installation manager and select the option to upgrade the license server.
You should not be required to re-enter your serial number since this stored in the registry and does not get removed by default.
Once the installation has been completed, there is still one major step to finish. You are still required to re-activate.
Launch the license manager once. It will prompt you to re-activate.
Run through the process of re-activating. Once this is complete, you are good to go!


We hope this series has given you an insight on how to successfully install SOLIDWORKS 2021. Please check back to the CATI Blog as the Technical Team will continue posting new series of articles every month that go further into the details of many of the SOLIDWORKS tools.
- SOLIDWORKS 2021 Installation Guide Part 1 – Individual Installation (Neil Bucalo)
- SOLIDWORKS 2021 Installation Guide Part 2 – SOLIDWORKS SolidNetwork License Installation (John Van Engen)
- SOLIDWORKS 2021 Installation Guide Part 3 – SOLIDWORKS Electrical Installation (Jason Chon)
- SOLIDWORKS 2021 Installation Guide Part 4 – SOLIDWORKS Composer, SOLIDWORKS Simulation – Motion, Flow, SOLIDWORKS Plastics, and SOLIDWORKS MBD (Bryan Pawlak)
- SOLIDWORKS 2021 Installation Guide Part 5 – DraftSight and eDrawings (Cami Florence)
- SOLIDWORKS 2021 Installation Guide Part 6 – SOLIDWORKS PCB (Fred Zobel)
- SOLIDWORKS 2021 Installation Guide Part 7 – SOLIDWORKS Visualize (James Carlin)
- SOLIDWORKS 2021 Installation Guide – Part 8 SOLIDWORKS CAM (Ronnie Flaugh)
John Van Engen
Support Manager
www.cati.com