How to Link Variables in SOLIDWORKS PDM to a Newly Created Drawing
Often times, linking the variables in SOLIDWORKS PDM (Product Data Management) to newly created drawings can seem like a puzzle with a piece or two missing. Fortunately, this can be mitigated by arming yourself with a step-by-step system that I’ve found to be very useful.
In this blog, I’ll take you through the steps to easily link variables in SOLIDWORKS PDM to newly created files. Let’s get started.
Developing data cards and creating variables
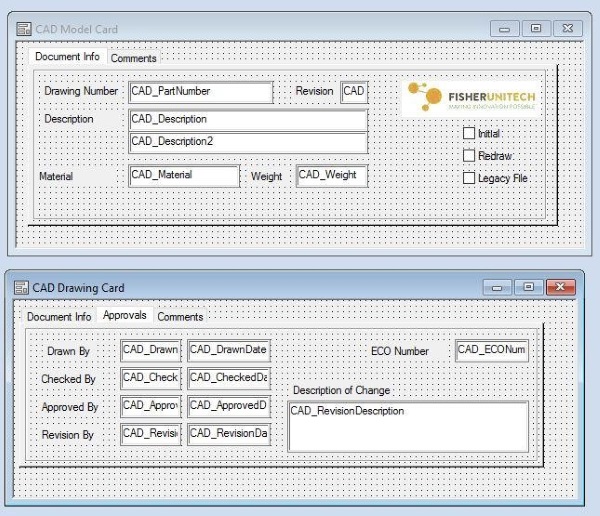
Designing data cards isn’t just about making them look nice, but making them functional. Ask yourself what properties (variables) on your data card do you want/need to see and want driven to your model/drawing?
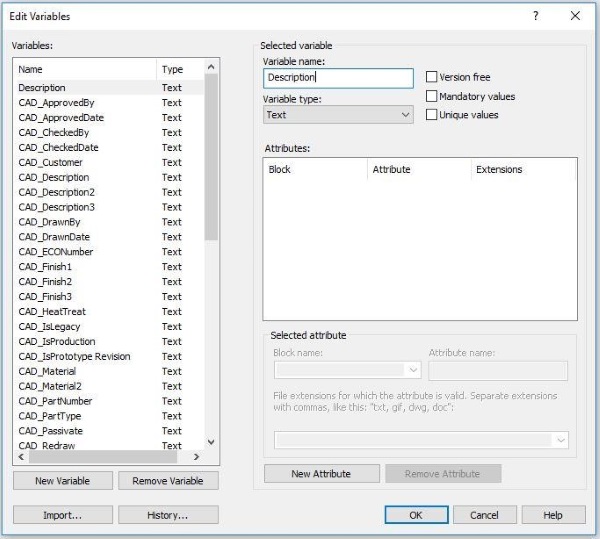
In this example, I have decided on the variables I want in my data cards, but now need to figure out how to attach them to the control on the card. First, variables can be there before being attached to a control, or they can be made after the control is added to the card. If you make them before attaching to a data card control, right click on variables in the vault tree > open > type the variable name, then hit OK.
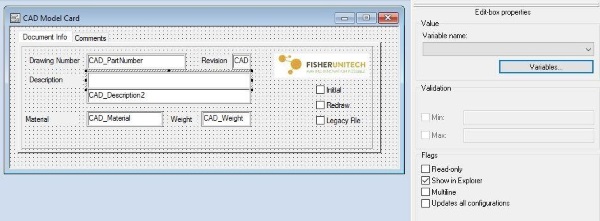
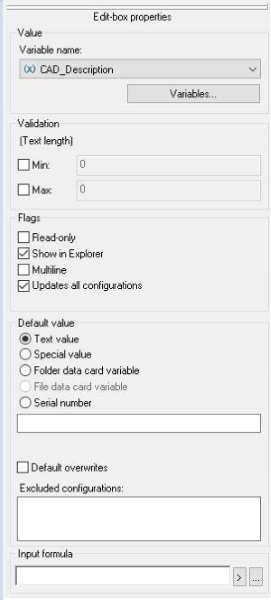
After the variable has been created, open your data card and add a control to the card (ex: text box). Highlight the control and in the right window pane, select variables, and select the variable from the drop-down list. Another way would be to make the variable while you are working in the card editor by adding a control (textbox, checkbox, etc.) to your data card and creating the variable on the spot. Highlight the edit box, select variables in the right window pane, and it will open the edit variables dialogue box where you can create your new variable.
Mapping variables inside SOLIDWORKS PDM
When you created your variables, you could have already mapped them by adding the Block, Attribute, and Extensions. If you created the variable and left those fields blank, then you’ll want to make sure you create the mapping. This can be done by clicking on the variables themselves to open the variable editor or highlighting the variable in the card editor and selecting variables to open the variable editor. This is a demonstration from the card editor:
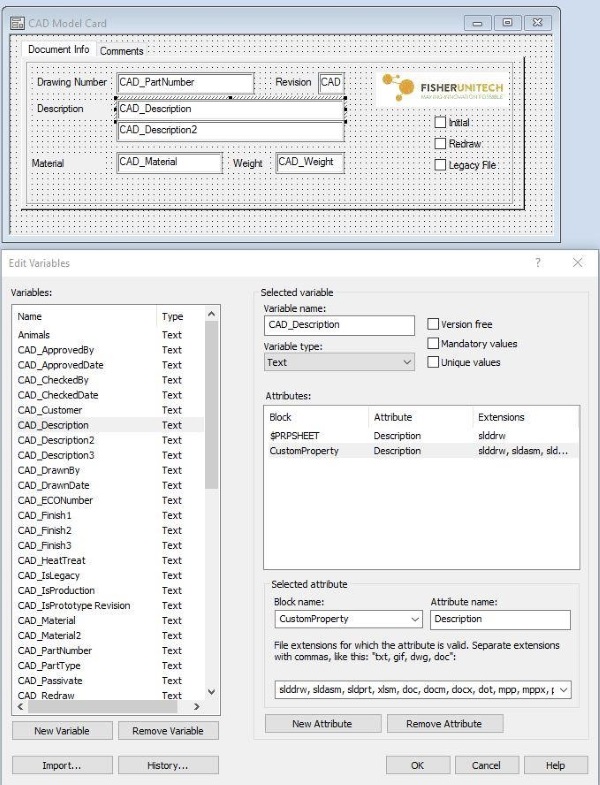
Once the variable editor is open, fill in the Block name, Attribute name, and File extensions. Looking at this dialogue, you see two blocks $PRPSHEET and CustomProperty. $PRPSHEET is going to push and pull data from the model. The attribute is Description for both which is the variable the data will populate. If you look at the Extensions, slddrw is the only one listed for $PRPSHEET. This means that the slddrw will get its description populated with the description that was entered from the model. The list of extensions for CustomProperty is much longer and has a lot of Microsoft Office Extensions. This means if you fill the data in on the file card or if you fill the data in in Microsoft office (and it’s linked back to a custom property) it will populate either way.
This is all pretty standard stuff out of the SOLIDWORKS PDM Admin Training Manual. There is one more area of mapping variables that will change the expected outcome with these options selected or unselected. For more details, check out the Administration Guide in the admin tool.
Hints:
- – Read-Only, under flags, makes it so fields cannot be edited on the data card
- – Updates all configurations, under flags, should be unchecked if you want to change the input per configuration
- – Special value, under Default value, will update all your configurations if you select an option in this field (file name, date, etc.)
Customizing and mapping the variables inside the drawing template
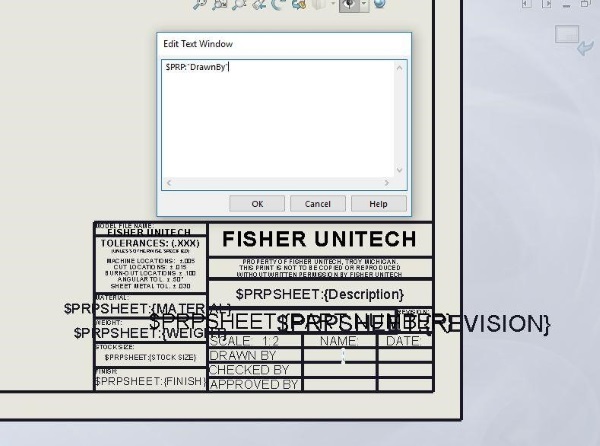
Mapping the variables to the drawing is the fun part. Decide if you want the variables to be populated from the custom properties of the model or the drawing. If you want to pull the property from the model use $PRPSHEET: ”Description.” If you want it to pull the property from the drawing use $PRP: ”DrawnBy.” Once you have the template mapped properly you will want to save the sheet format by selecting File > Save Sheet Format. Then you will save the Drawing Template by selecting File > Save As (make sure the Save As type is *.drwdot).
Caution: Two custom properties will not map with our current setup with the data cards and the template. Can you find the two variables on the template and understand why they will not populate?
Answer: The properties are STOCK SIZE AND FINISH. They will not map because they are not on the file card and certain variables have not been made/mapped for them.
If you want it automated: Adding the action in the workflow transition to drive a value into the property
So far you can fill in the fields in the data card, and it will populate the fields in your drawing. Taking it that extra step, you can automate it to fill in the variables as it transitions through the workflow by adding an action.
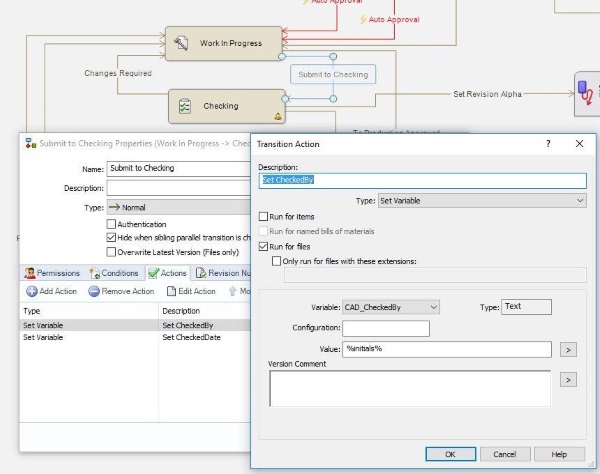
Left click on the transition and select the Actions tab. Click on the Add Action icon and the Transition dialogue will come up. For Type, select Set Variable and for Description try to be descriptive on what variable you are setting. The next thing to worry about is the variable. Make sure you select the correct variable out of the drop-down. I’ve seen this cause problems multiple times by being overlooked. The last thing would be to fill in the value, and we will use the user’s initials. Select OK for these menus, and you can repeat on whichever transition and automatic variable you would like the workflow to control.
Hint: If the variable is updating automatically through the workflow, the variables should be set to read only.
I’ve given you the tools to setup the variables in the data card, map them in PDM, map them on a drawing template, and add an action to the workflow to make the variable populate automatically. Some of the errors I’ve seen that cause variable mapping issues are so slight they are easily overlooked. My suggestion is to look back through step-by-step and make sure you haven’t missed any steps or clues shared. Follow these instructions, and your puzzle will be completed: A nice filled out data card and fully mapped file.
I hope you found this tip helpful. You can find more tips & tricks listed below.
Learn More
Want to learn more about SOLIDWORKS PDM? Visit our Resource Center.
Have more questions? Join us for “Straight from Support” where our experts answer the most frequently asked questions in real-time along with any other questions you may have during the Q&A session. Register here.
More Tips
SOLIDWORKS Network Licensing: Installing/Upgrading the SOLIDWORKS SolidNetWork License
How to Create a Custom OCR Dictionary in SOLIDWORKS Inspection
A Quick Lesson on SOLIDWORKS Treehouse
Related Articles
Don’t Let Mismanaged Product Data Hold You Back
Quick Lesson on the Value of Product Data Management
Exploring SOLIDWORKS PDM Processional
Like what you see?

About the Author
 Jodi Degenaer has been in the Engineering field for 19 years. She joined Fisher Unitech in November of 2015 and is a PDM Senior Support Engineer. She has multiple certifications including her CSWE.Her expertise lies in Product Data Management and Design Automation. She worked in the fire truck industry for 8 years and began using SOLIDWORKS in 2004 and Enterprise PDM in 2010. In 2012 she became a PDM Applications Engineer where her primary focus was implementations and instructing the PDM class. Jodi is also DriveWorks certified and has participated in supporting and implementing DriveWorks.