Bringing flat files into SOLIDWORKS to create Models: Drawings and DXF Files
In the current state of CAD affairs, everyone is either using or has heard of 3D CAD. But for users who have been using a 2D system for many years and have an exorbitant amount of data, making the switch isn’t always as easy as deciding to.
Inside of SOLIDWORKS, there are a multitude of tools to help you take and convert your old 2D drawings, and begin to create 3D parametric models with them. In this blog, I’m going to take you through those steps to ensure none of your data gets left behind in this smooth and easy process.
Step 1: Pre-select a Plane or Face to import your DXF or DWG onto.
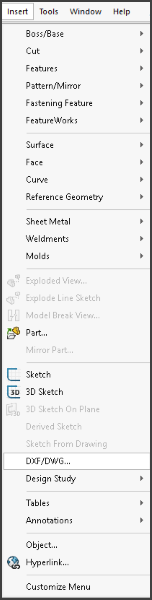
Step 2: Under “Import” on your toolbar, select DXF / DWG and choose the file you want to import.
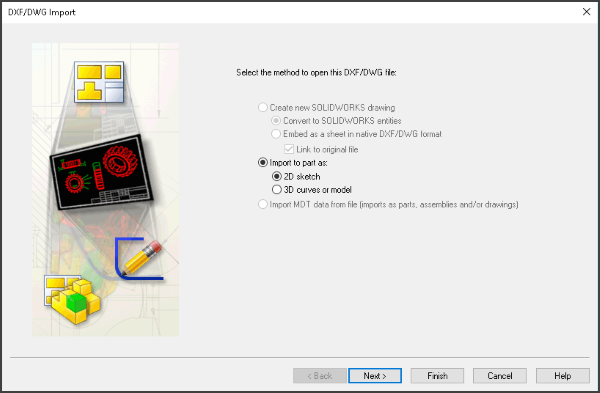
Step 3: Ensure “2D sketch” is selected, and click “next.”
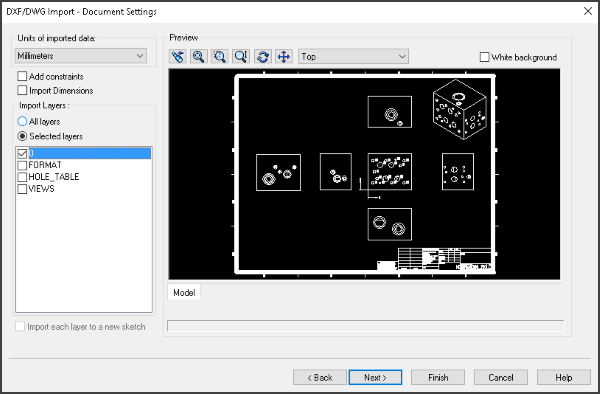
Step 4: Toggle off layers that are not required and to save yourself time down the road. Select “Add constraints” and if available “Import Dimensions.”
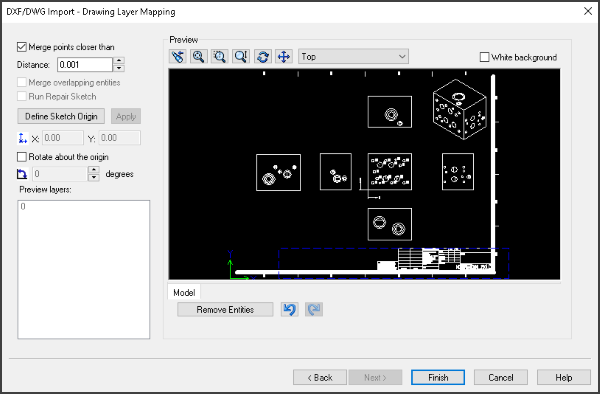
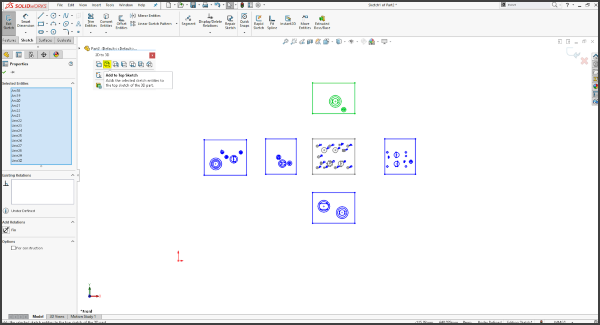
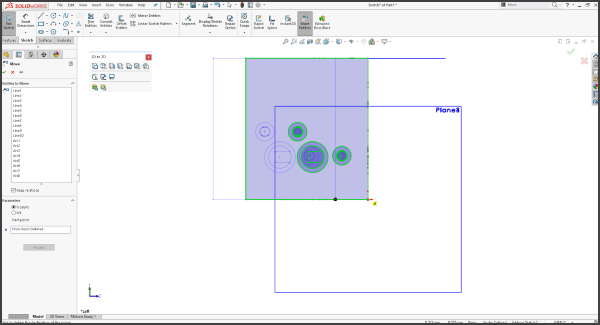
Step 5: Select and remove sketch entities you don’t want included, and click “Finish.” (You can also remove them later once imported into SOLIDWORKS)
Step 6: Do any additional clean up, and begin by selecting sketch entities and assigning them to the various views they will reside.
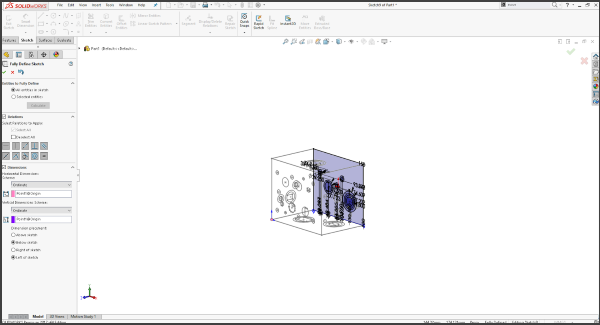
Step 7: To ensure that everything is placed where it needs to go, some reference planes will need to be created. The best way to create the reference planes, will be setting up one view first and then creating point and line reference planes off of it.
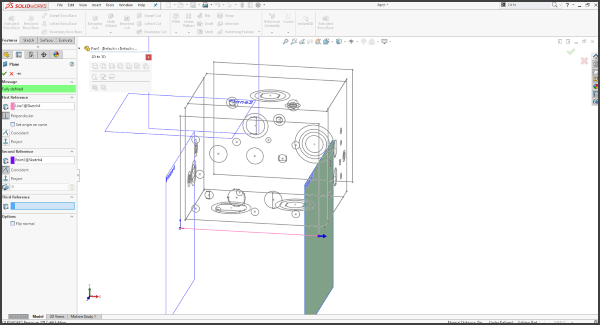
And for each sketch/view that is in the model, you will want to use the “Edit Sketch Plane” and update it to the new one.
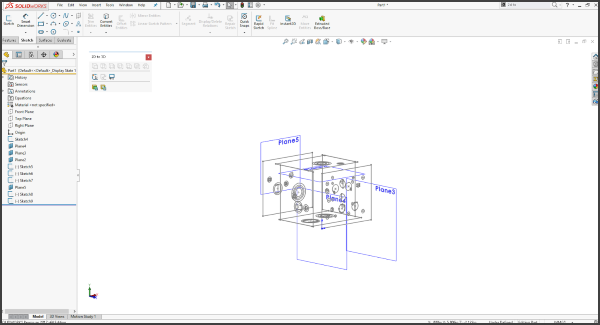
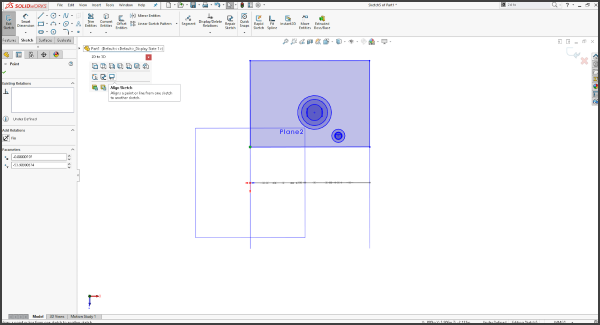
Step 8: Now that all the sketches reside on the planes they require, we can begin to align them with one another using either “Align sketch” or “Move sketch.”
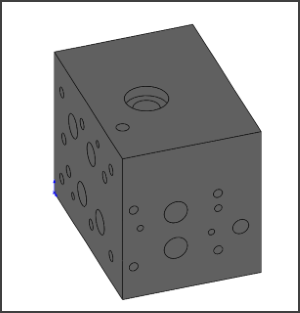
Step 9: Once everything is fully lined up, you can begin to go into sketches and dimension items or use the “Define Sketch” command to quickly get items ready for extrusion.
After you are done creating these new models, saving your old DXF / DWG’s in your vault is a good way to ensure that your legacy data will still be protected in case of any longstanding customers looking for an older version.
I hope you found this tip helpful. You can find more tips & tricks listed below.
Learn More
More Tips & Tricks
Removing Padlocks in the Customer Portal Area
How to Create a Custom OCR Dictionary in SOLIDWORKS Inspection
Related Articles
Design to Manufacturing: Find an Event Near You
Optimize Your Plastic Parts and Injection Molds with SOLIDWORKS Plastics
SOLIDWORKS Drawing Tip: Convert View to Sketch
Don’t Let Mismanaged Product Data Hold You Back
Like what you see?
About the Author
 David Janicki is an Application Engineer based out of office in Grand Rapids, MI. He is a proud graduate of Western Michigan University, where he received his Bachelors in Engineering Management. Prior to joining Fisher Unitech in November 2015, David worked in various industries from Automotive and Sheet Metal to Electronic RFID’s. A large portion of his background is in the Continuous Improvement industry and still continues to be his passion, helping customers use the software more effectively both on a user and company level.